Any suggestion is welcomed! Feel free to join my Facebook group to let me know what you want: https://www.facebook.com/groups/1115757609295068
Custom display base are also available from $5! Contact me to discuss what you want!
If you like my work, consider support me through Patreon: https://www.patreon.com/gigapenguin3dprints/posts
Supporting me on Patreon with the lowest tier of $3 will give you access to ALL my paid Cults design too!
Description
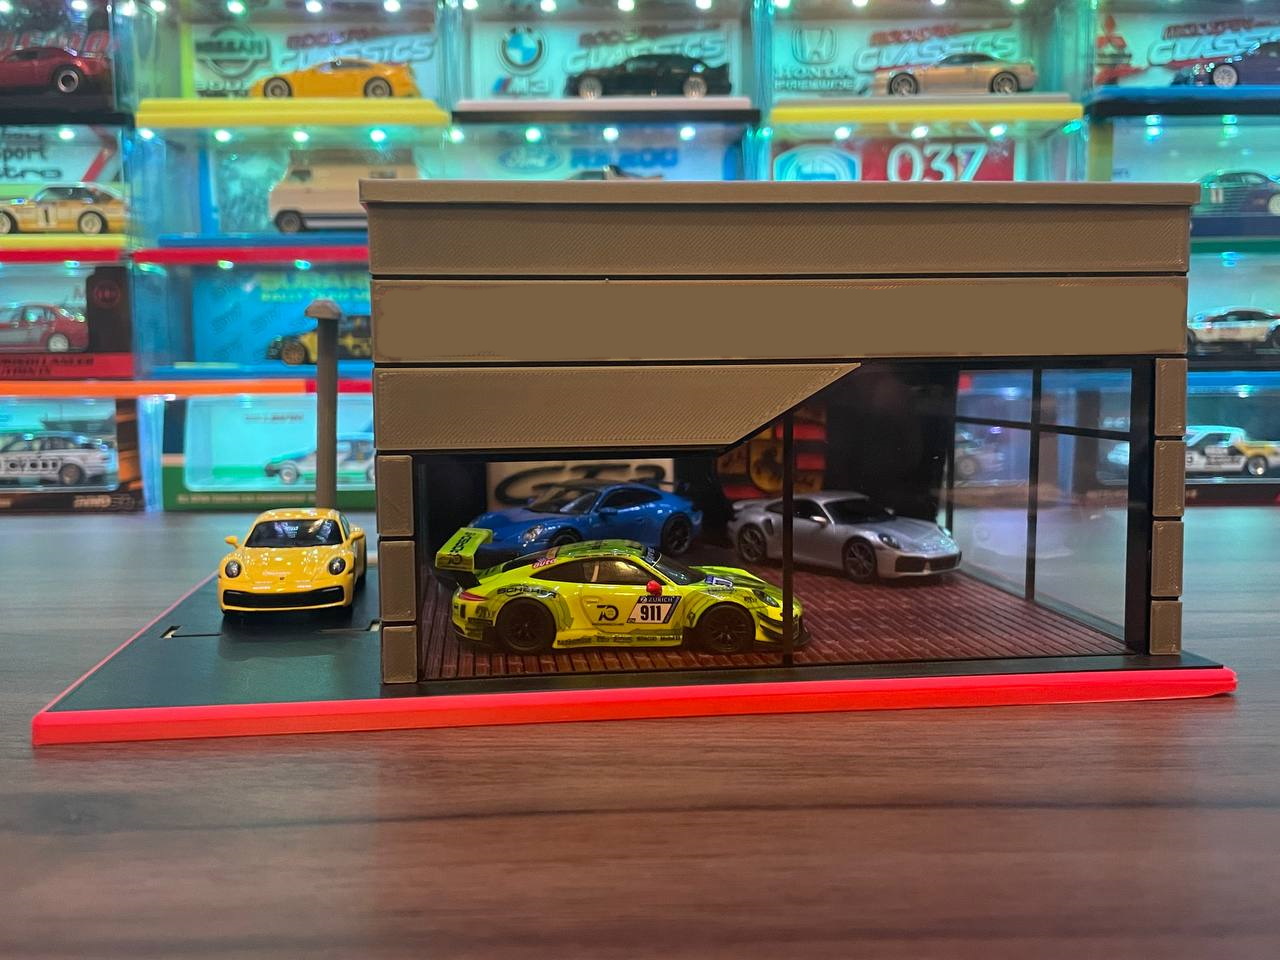
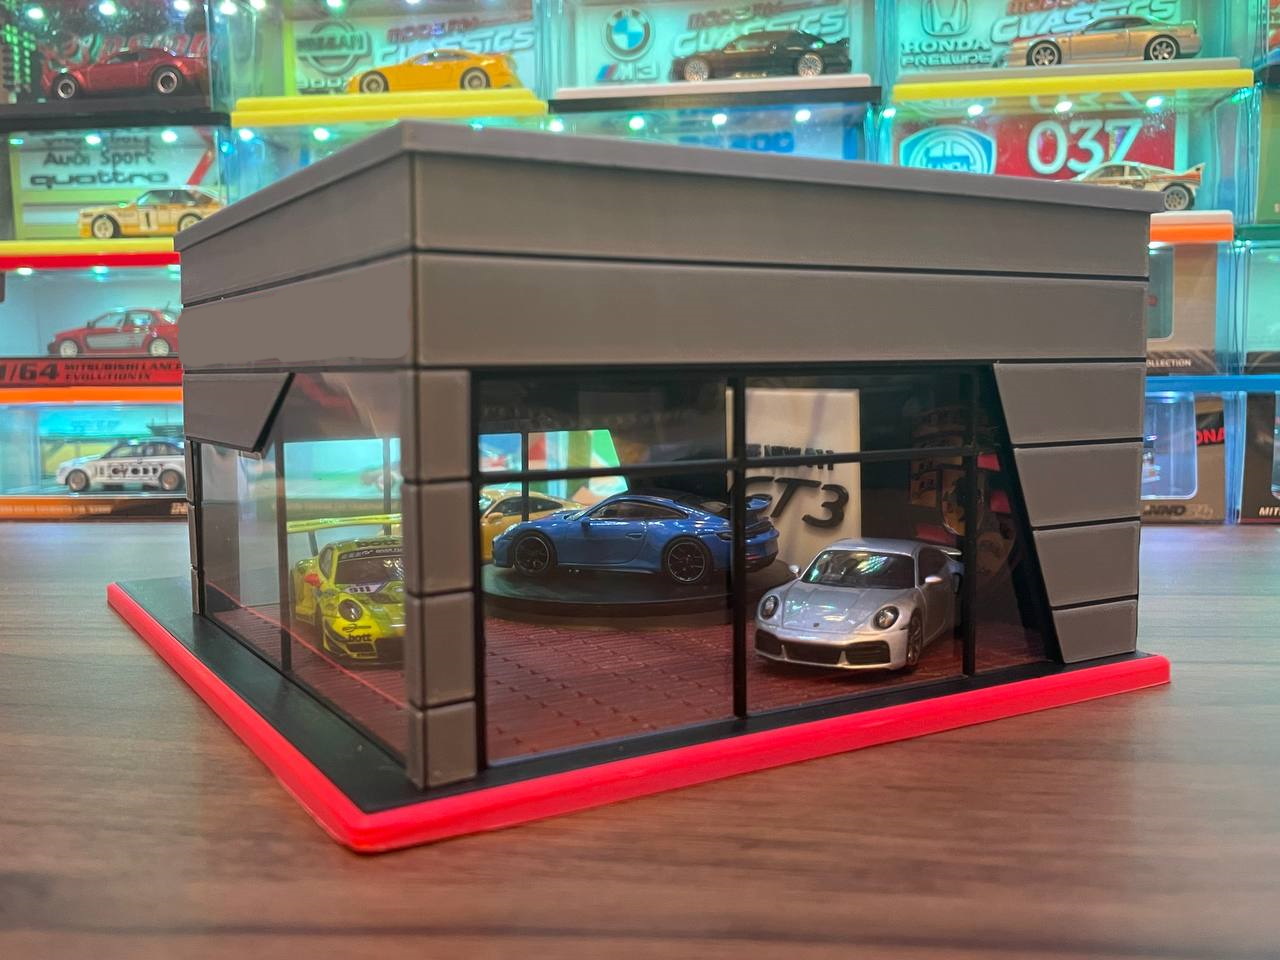
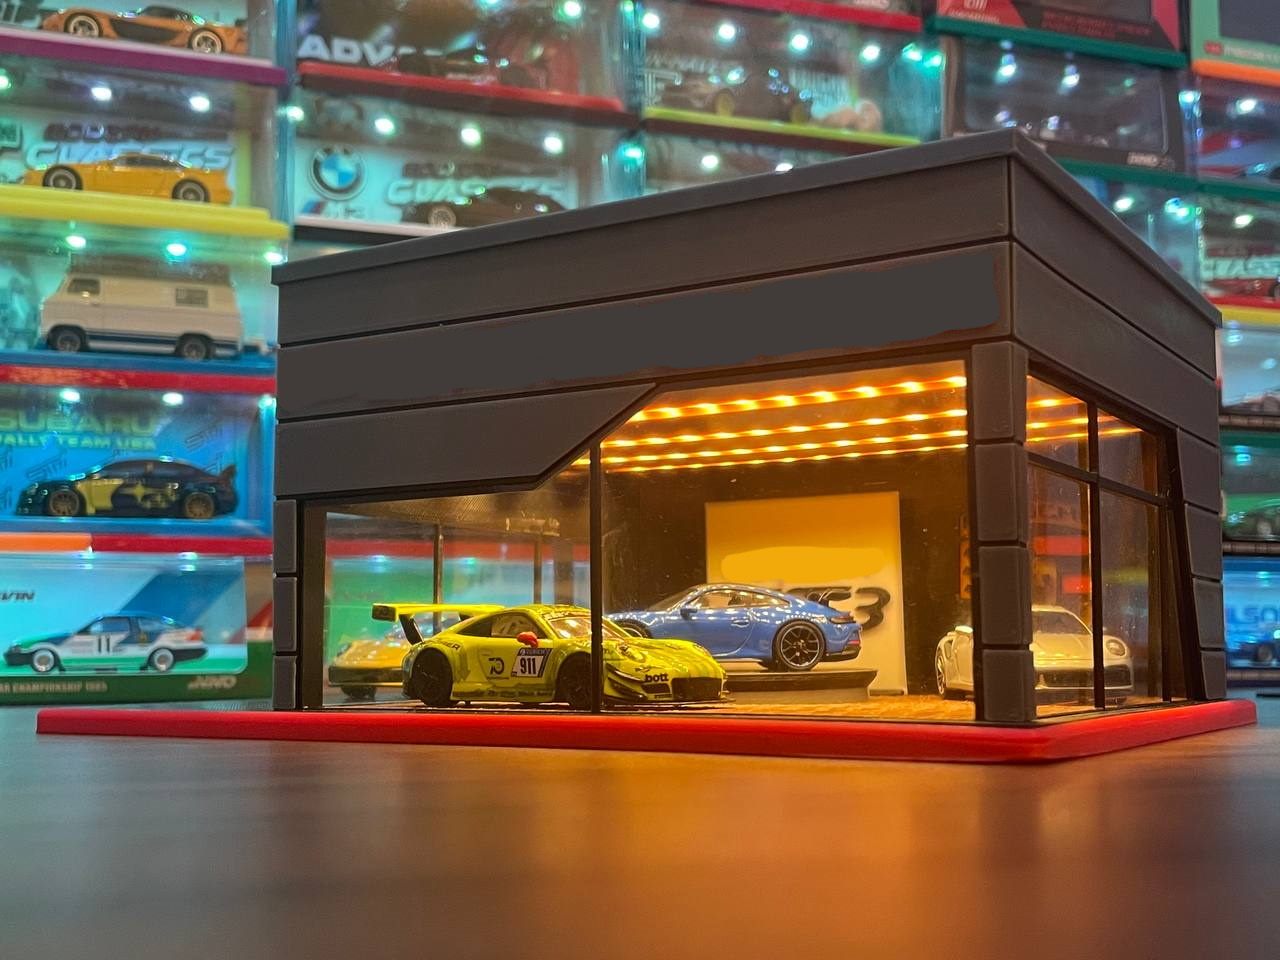
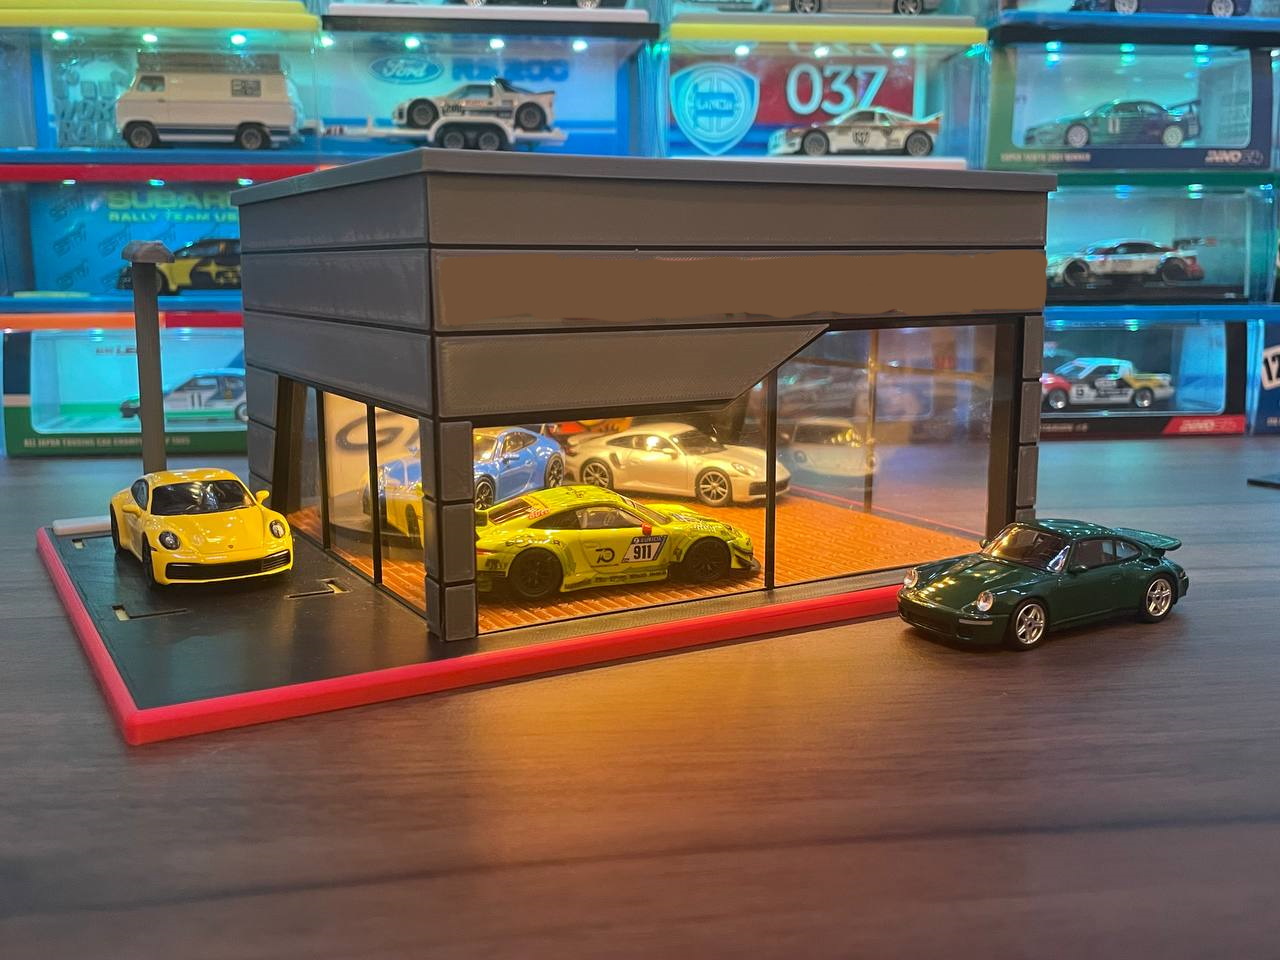
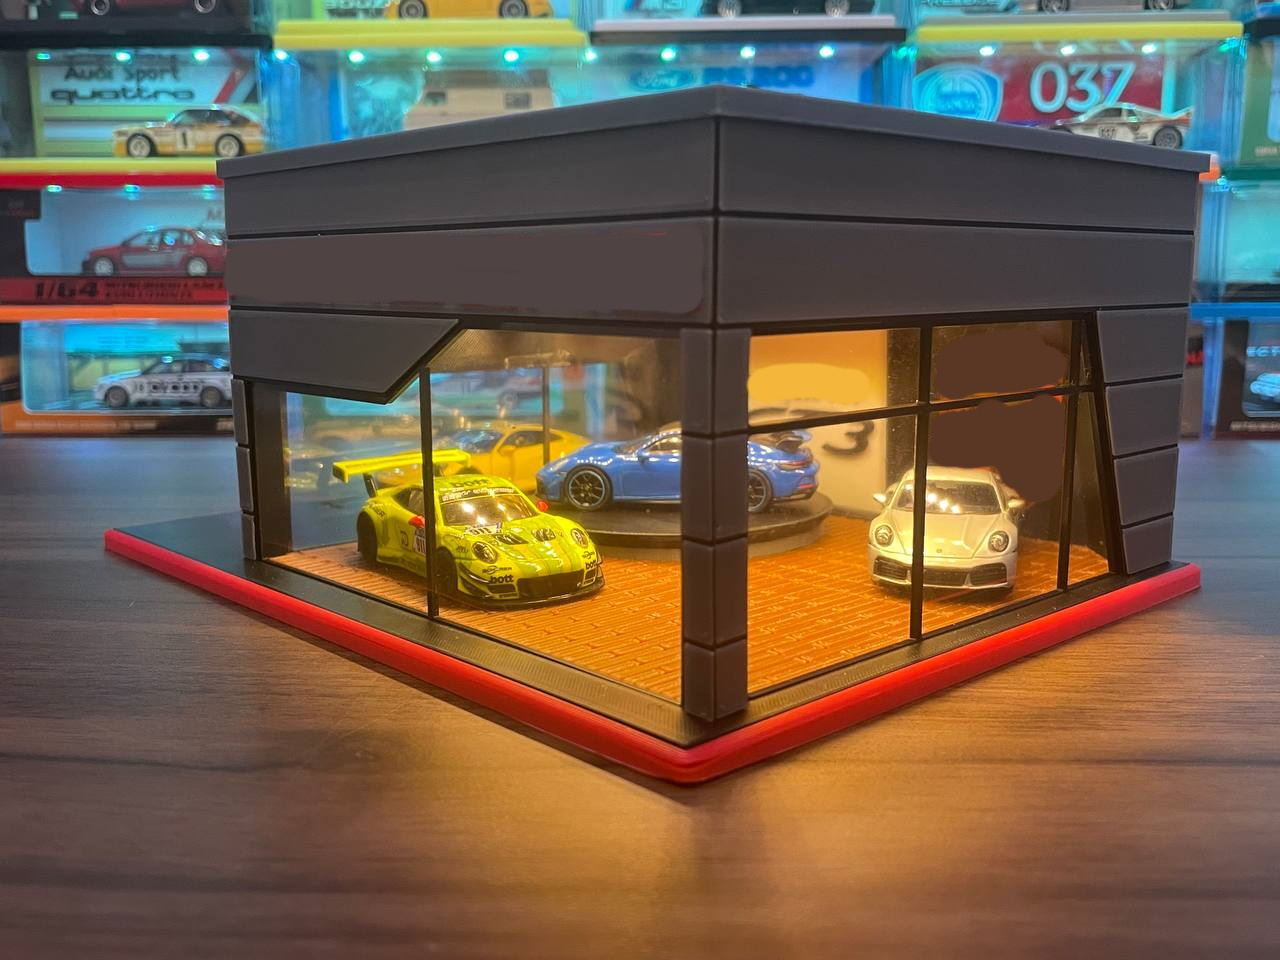
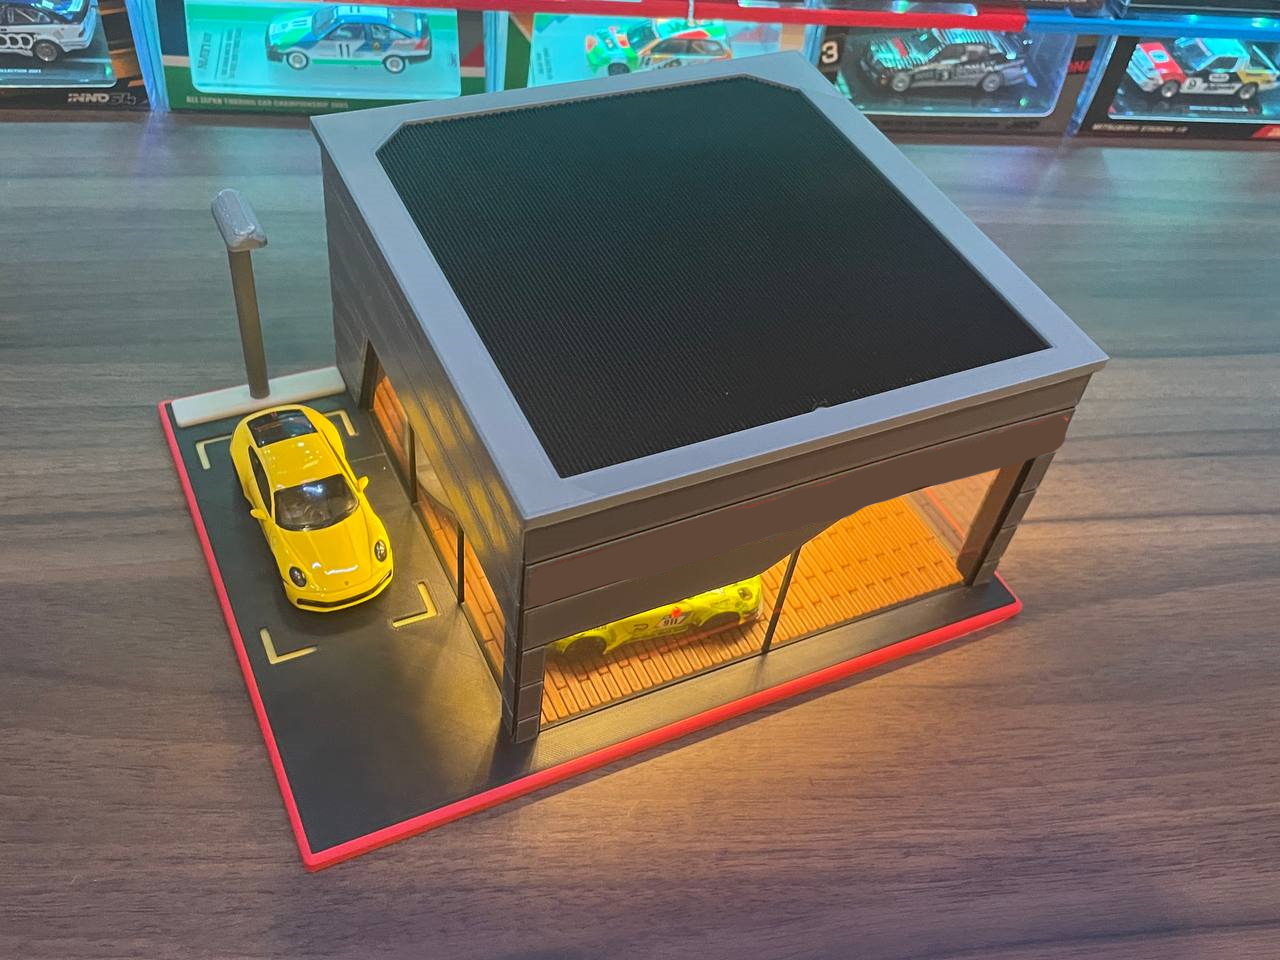
A small showroom that fits up to 4 1/64 scale cars. The first 9 photos is the LED variant build and the remaining are the no LED build photos.
Only PLAIN version included!
For manufacturer theme decoration walls, can be downloaded here: https://cults3d.com/en/3d-model/various/1-64-generic-showroom-brand-names-decoration-671173b607c311f0239c
The cars I used in the photos are:
- Porsche 911 (992) Carrera S (Mini GT)
- Porsche 911 (992) Turbo (Mini GT)
- Porsche 911 (992) GT3 (Mini GT)
- Porsche 911 (991) GT3R (Spark)
If you wish to have a display base tweaked to fit to a different car from a different brand, please send me these dimension for the display base holes: https://imgur.com/5T6mb2L
The display base is separated into many parts for easy printing, build and colour swap. The base parts are:
Floor & Base parts:
1) Base (Base - Giant.STL)
2) Flat Base (FlatBase.STL & FlatBase - Center.STL)
3) Center Stage (CenterStage.STL)
Street Light Parts:
1) Lamp Piece (Lamp.STL)
2) Lamp Pillar (LampPillar.STL)
3) Lamp Holder (LampHolder.STL)
Main Building parts:
1) Building Walls (BackWall.STL, FrontWall.STL, SideWall.STL, SideWall2.STL)
**2) Building Decoration (FrontDeco.STL, SideWallDeco.STL, SideWall2Deco.STL)
3) Roof (Roof4.STL)
4) Roof Cover (RoofCover - Clear.STL, RoofCover - LED.STL)
*5) Ceiling (Ceiling4.STL)
*6) Ceiling Stiffeners (Ceiling - Stiffeners.STL)
**Front wall decoration has 4 variant, plain, Porsche, Ford and TRD.
*Ceiling is for LED variant only, the front wall and back wall has a LED variant to place the ceiling.
Print Settings
Nozzle size = 0.3 mm (Should be printable with 0.4)
Layer height = 0.2 mm
Filament change layer for colours on "FlatBase.STL":
1) Start (Parking lines colour, mine is in yellow)
2) Layer 4 (Overall base colour, mine is in black)
Filament change layer for colours on "FlatBase - Center2.STL":
1) Start (Gaps colours, mine is in black)
2) Layer 4 (Floor panels colour, mine is in Brown)
Filament change layer for colours on "CenterStage.STL":
1) Start (Stage base colour, mine is in silver)
2) Layer 18 (Stage face colour, mine is in black)
Filament change layer for colours on "SideWallDeco.STL" & "SideWall2Deco.STL":
1) Start (Thin lines, mine is in black)
2) Layer 4 (Overall wall piece colour, mine is in silver)
Filament change layer for colours on "FrontDeco - Plain.STL":
1) Start (Thin lines, mine is in black)
2) Layer 4 (Overall wall piece colour, mine is in silver)
Filament change layer for colours on "Ceiling4.STL":
1) Start (Gaps colour, mine is black)
2) Layer 9 (Panels colour, mine is in brown)
Assembly
Flat Base and Base
The car is tied by wires through the hole in the flat base and center flat base, the 4th car is tied to the center stage and it is glue or tape on to the center flat base.
Flat base should fit nicely into the base, the flat base should be glued or tape to the base. Center flat base will need the back wall fitted for accurate alignment.
Building
Print the building walls first, back wall should be aligned on the base first then both side wall will slide nicely into the gaps provided. Front wall has a gap for the side wall to slide in between.
Print the LED variant if you plan to use LED strip for lighting up the display, the front and back wall piece has extra wall for placing the ceiling. No LED variant has no ceiling.
The "glass" seen in my photos are made with PVC sheet, I double side tape mine on to the walls.
Ceiling (LED Variant Only)
The ceiling fits nicely on the support piece from the front and back wall. "Ceiling - Stiffeners.STL" is meant to glue on the side of the ceiling piece for extra stiffness for it carry more weight. See photo below for better clarification.
Building Decoration
All the decoration piece will need to be glue or tap on to the outisde of the wall, I recommend taping the side walls decoration first becarse the front wall decoration is wider to cover the extra thickness from the side walls decorations.
The Roof is designed to fit nicely over the whole area of the building. Use the LED variant roof cover to hide the LED strips on the ceiling. If no LED variant printed, use the clear roof cover which is just a massive window for light to shine into the showroom.
Street Light
Put the lamp pillar into the lamp golder and the lamp should fit nicely onto the pillar.
If you are unsure on how to assemble them, please send me a message or leave a comment.
Others
Feel free to send me any feedback on how to improve the design. Suggestion on display base designs are welcomed too.
I can be contacted through Instagram or Twitter too:
Twitter: https://twitter.com/Giga_Penguin
Instagram: https://www.instagram.com/GigaPenguin3DPrinting/
Facebook: https://www.facebook.com/groups/1115757609295068/