Skip to content

Master replicas Yoda Proffieboard Conversion Chassis v3.0

Advertising
Advertising
?
Creation quality: 5.0/5 (1 vote)
Evaluation of members on the printability, utility, level of detail, etc.

  • 1.8k views
  • 1 like
  • 21 downloads

License
3D design format
Folder details Close
  • YodaMRChassisV3.stl
  • yoda_switch_plunger_v3_Bar_Magnet.stl
  • yoda_switch_plunger_v3_Disc_Magnets.stl

Learn more about the formats

Publication date 2022-12-12 at 14:04
?
Published to Thingiverse on: 2021-06-26 at 18:03
Design number 959495

3D printer file info

3D model description

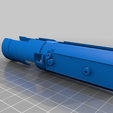
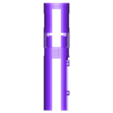
This is a Chassis for the 2007 Master Replicas Yoda Force FX lightsaber, to convert it to use a Proffieboard V2, and Hold an 18650 Battery.

The Chassis is designed to fit into the hilt, and be held in place by Screws using the existing threaded holes that hold on the Switch section of the Lightsaber.

Speaker is Centrally mounted, and you have Recharge Port and access to the Proffieboard USB and SD cards just by removing the pommel.

Existing switch can be used, I recommend mounting magnets to the existing switch, and to the switches you mount on the chassis.

Update: I realized my screw holes were in the wrong position. They made the switch section angled, and inaccessible. I've moved the holes, and I've also added a switch plunger. I modified my plastic switch section to be longer on mine, so YMMV.

Unfortunately, the print is fragile, so every time I have printed it with supports, it breaks while trying to remove them, So I would not recommend using supports, and just clean the print up with an Xacto afterwards.

The Screws in the Sqitch/Clamp section are threaded for 3-56. I used the following Screws
https://www.mcmaster.com/91253A099/

I have uploaded two versions of the Switch plunger. these are both my Longer version that required me to modify the plastic "cover plate" to fit properly.

On version uses a single 1/2" x 1/4" x 1/32" bar magnet, linked here
https://www.kjmagnetics.com/proddetail.asp?prod=B8401

the other uses 4mm x1mm disc magnets, and has three places to put them, or just put in three. I only had disc magnets on-hand at the time. The disc magnets are linked here.

https://www.amazon.com/Multi-use-Refrigerator-Magnets-Science-Projects/dp/B07BVTW5NQ/ref=sr_1_8?dchild=1&keywords=Neodymium+Magnets+4mm+X+1mm+x+12mm&qid=1623952401&s=industrial&sr=1-8

this SHOULD be my final revision, however i am considering making a Standard size switch plunger as well.

3D printing settings

-

Advertising


Issue with this design? Report a problem.

Would you like to support Cults?

You like Cults and you want to help us continue the adventure independently? Please note that we are a small team of 3 people, therefore it is very simple to support us to maintain the activity and create future developments. Here are 4 solutions accessible to all:

  • ADVERTISING: Disable your banner blocker (AdBlock, …) and click on our banner ads.

  • AFFILIATION: Make your purchases online by clicking on our affiliate links here Amazon.

  • DONATE: If you want, you can make a donation via Ko-Fi 💜.

  • WORD OF MOUTH: Invite your friends to come, discover the platform and the magnificent 3D files shared by the community!


Sharing and downloading on Cults3D guarantees that designs remain in makers community hands! And not in the hands of the 3D printing or software giants who own the competing platforms and exploit the designs for their own commercial interests.

Cults3D is an independent, self-financed site that is not accountable to any investor or brand. Almost all of the site's revenues are paid back to the platform's makers. The content published on the site serves only the interests of its authors and not those of 3D printer brands who also wish to control the 3D modeling market.

100% secure payment by credit card, PayPal, Apple Pay, Google Pay, etc.
View all payment options.