ENCLOSURE PER FILAMENTI
Questa non è una vera e propria guida ma un riferimento, ci sono diverse varianti quindi va adattata ai propri scopi in base alla manualità della persona e ai materiali reperibili o che si riciclano. a partire dalla scatola, all’essiccatore ecc. Pertanto prendete queste pagina come spunto per cimentarvi nella costruzione di un enclosure per filamento personalizzato e adattato alle vostre esigenze.
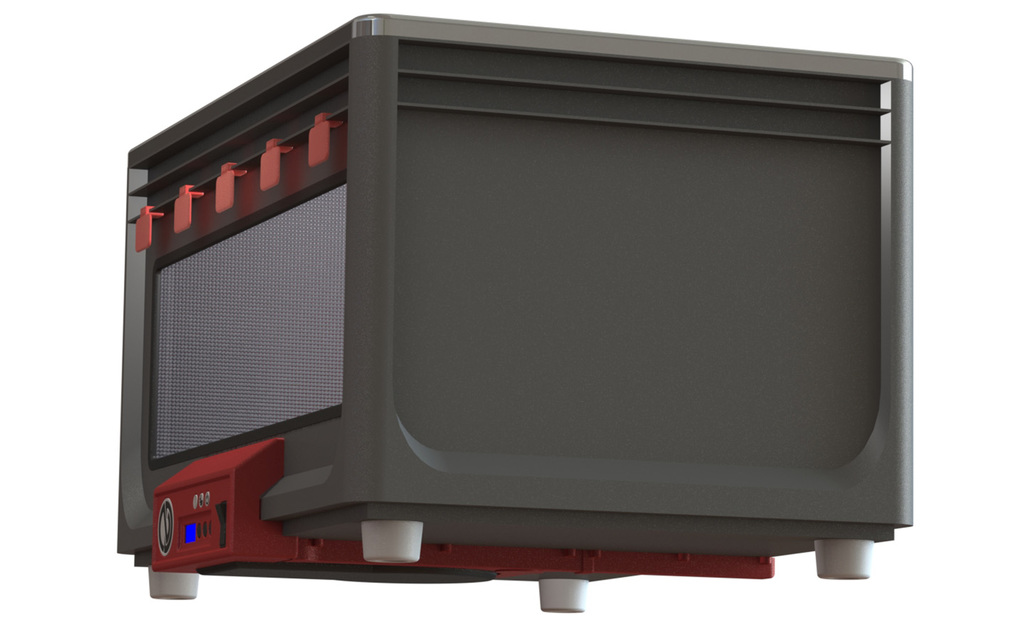
Ho cercato in fase di progettazione, di rendere questa enclosure quanto più funzionale possibile, cercando di non tralasciare un po' il lato estetico che a me non dispiace curare sinceramente.
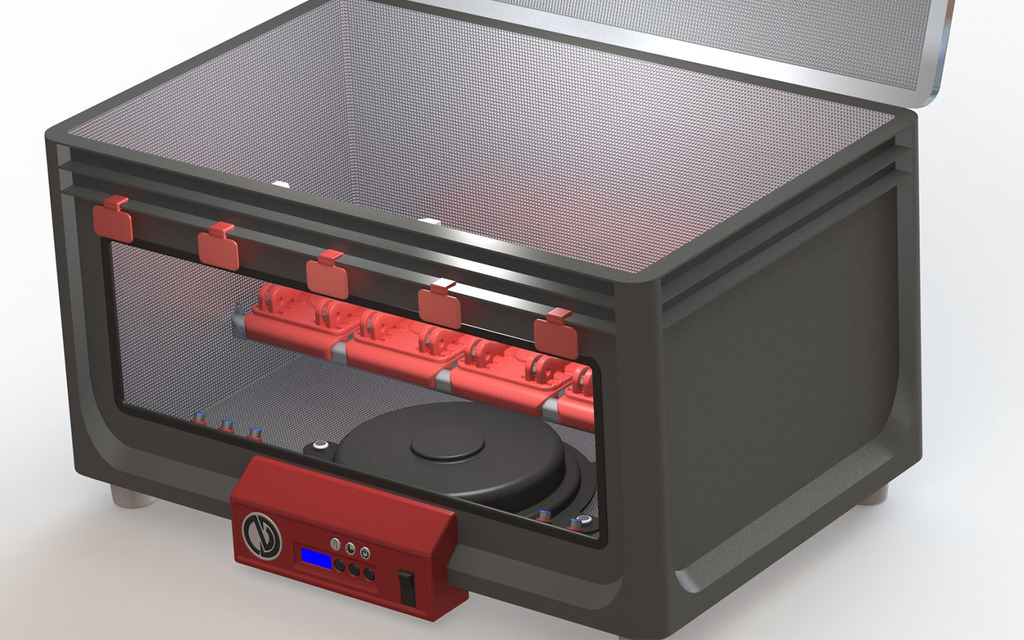
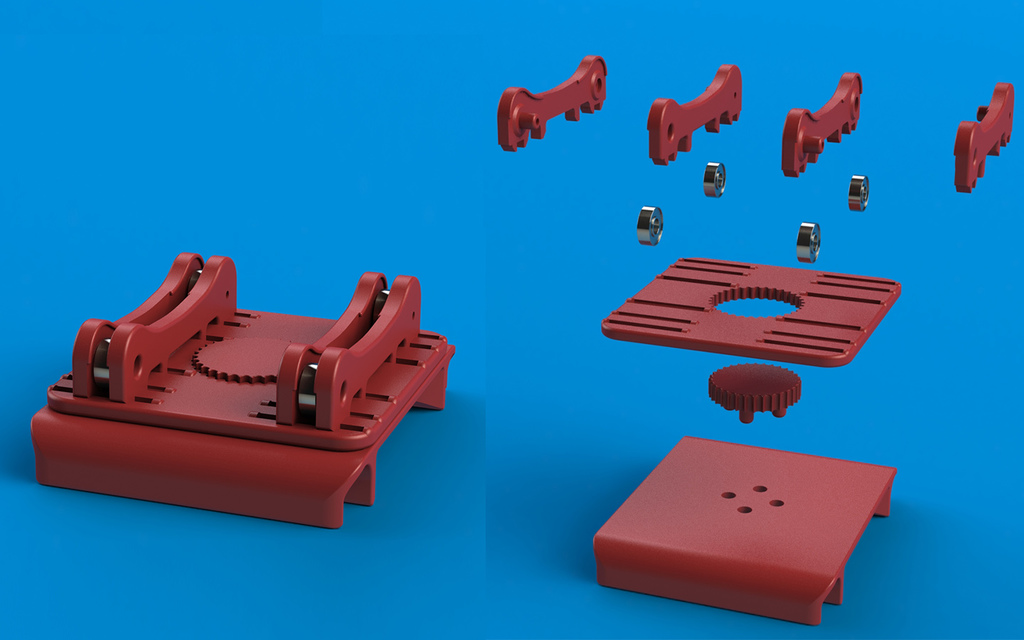
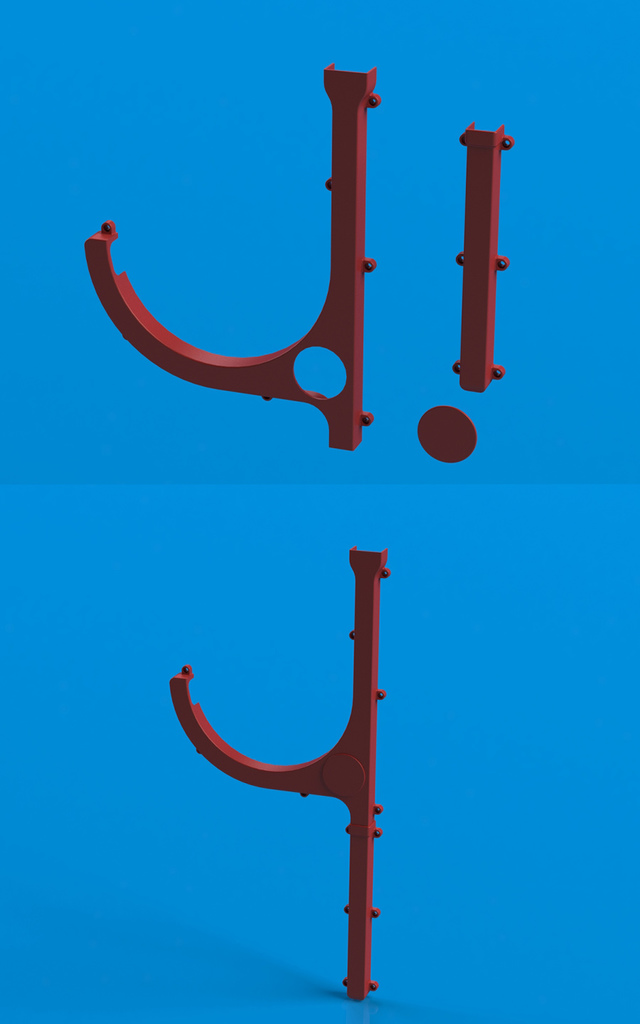
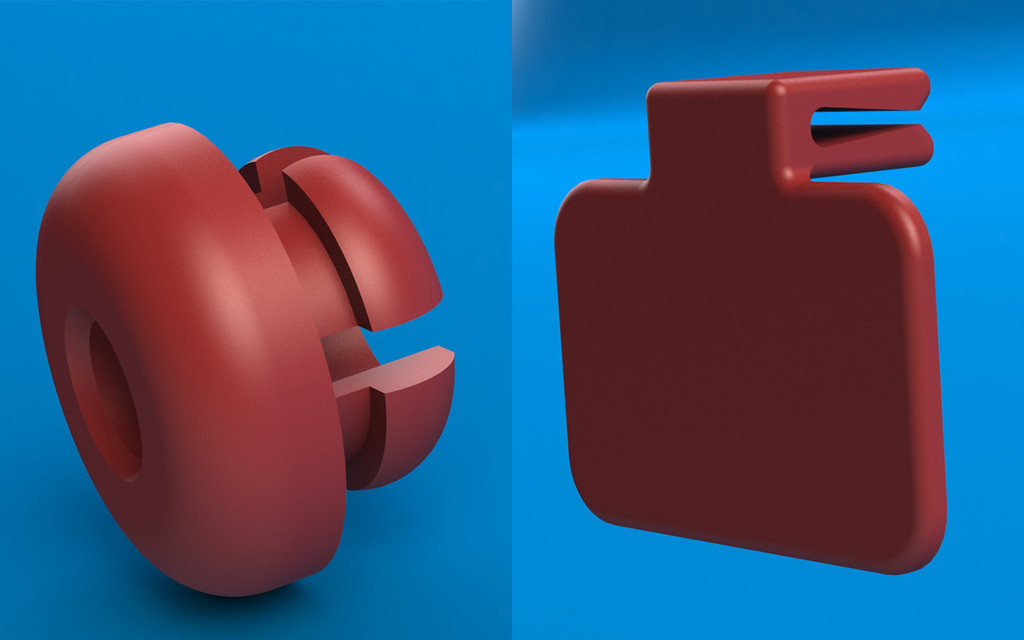
L’altezza dalle slitte al coperchio (che ho dovuto alzare di 1cm adattandolo) da modo di contenere bobine da 1 kg, e le slitte sono adattabili in larghezza in base alla dimensione che può avere una bobina (ho cercato di documentarmi sul massimo di larghezza e altezza di bobine per uso hobbistico quindi intorno al kg) sono direzionabili in modo da non creare angoli che diano fastidio o forzature al filamento nel suo percorso. Le bocche a fondo scatola (in totale 6) con attaccati dei raccordi M6 hanno una forma diciamo ergonomica e sono liberi di girare seguendo il filamento, in esse sono inseriti dei classici tubi in ptfe per facilitare lo scorrimento del filo e tenerlo protetto da polvere durante il passaggio dalla scatola al mobile della stampante. Le aperture di uscita nel mio caso sono in basso perché la cassa è appoggiata sul mobile stampante, ma possono variare in base alle esigenze personali. L’interno è rivestito da materiale termoriflettente per evitare dispersione di calore e anche da amplificare un po' l’illuminazione interna data da una semplice lampada a led con interruttore esterno.
Il filamento usato è tutto PETG red scuro marca eSUN, stampato a 245° con bed 80°, infill 100% per evitare eventuali deformazioni al caldo.
La descrizione non è dettagliata semplicemente perché non è complicato come progetto, di certo un po di manualità ci vuole, ma non servono attrezzi particolari per il lavoro, giusto un cutter, un trapano, forbici, matita, righello, ed eventuale seghetto anche a mano perché si lavora su plastica.
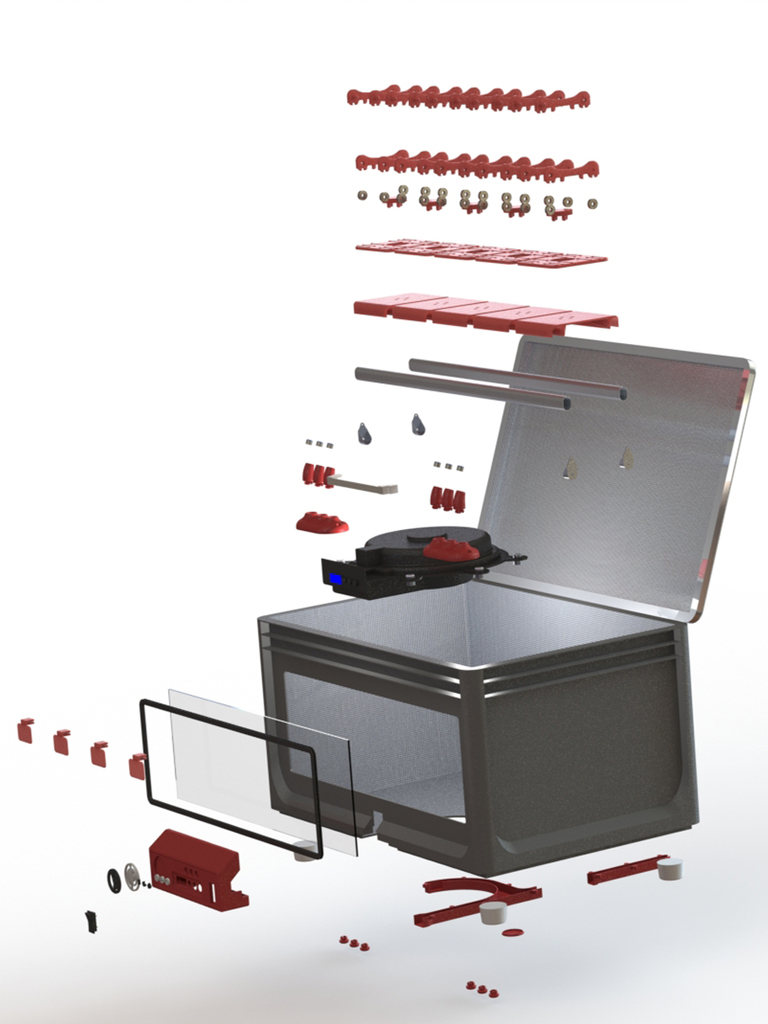
All’interno della pubblicazione ci sono tutte le foto con sequenza e spiegazioni, file .stl e file .parts per solidworks che potete usare modificare e adattare. E’ compresa una lista materiali con link per avere dei punti di riferimento
Per favore se esponete il lavoro altrove chiedo solo di essere citato (come regola giusta tra i makers). Se avete bisogno contattatemi, buon lavoro da “NanoDesigner” e grazie.
NB. Nel post pubblico di thingiverse ci sono solo 2 stl allegati per apparenza, questo perchè thingiverse richiede obbligo di allegare almeno 1 file stl. Tranquilli erano molti, ma ho messo tutti i file nell'archivio.rar quindi prendete quello.
ENGLISH (GOOGLE TRANSLATION)
ENCLOSURE FOR FILAMENTS
This is not a real guide but a reference, there are different variants so it must be adapted to your purposes based on the manual skills of the person and the materials available or that are recycled. starting from the box, to the dryer etc. So take this page as a starting point to try your hand at building a custom filament enclosure tailored to your needs.
I tried in the design phase to make this enclosure as functional as possible, trying not to neglect a bit the aesthetic side that I don't mind looking after sincerely.
The height from the slides to the lid (which I had to raise by 1cm by adapting it) to contain 1 kg reels, and the slides are adaptable in width according to the size that a reel can have (I tried to find out about the maximum width and reel height for hobby use therefore around 1 kg) can be directed so as not to create angles that bother or force the filament in its path. The mouths at the bottom of the box (in total 6) with M6 fittings attached have an ergonomic shape and are free to rotate following the filament, they are inserted in the classic PTFE tubes to facilitate the sliding of the wire and keep it protected from dust during the transition from the box to the printer cabinet. The outlet openings in my case are at the bottom because the cash desk is placed on the printer cabinet, but they can vary according to personal needs. The interior is covered with heat-reflecting material to avoid heat loss and also to slightly amplify the internal lighting given by a simple LED lamp with an external switch.
The filament used is all dark red PETG eSUN brand, printed at 245 ° with bed 80 °, 100% infill to avoid any deformation in the heat.
The description is not detailed simply because it is not complicated as a project, certainly a bit of manual skill is needed, but no special tools are needed for the job, just a cutter, a drill, scissors, pencil, ruler, and any hacksaw even by hand. because we work on plastic.
Inside the publication there are all the photos with sequence and explanations, .stl files and .parts files for solidworks that you can use to modify and adapt. A material list is included with links for reference points
Please if you exhibit the work elsewhere I only ask to be cited (as a right rule among makers). If you need to contact me, good job from “NanoDesigner” and thanks.
NB. In the thingiverse public post there are only 2 stl attached by appearance, this is because thingiverse requires you to attach at least 1 stl file. Quiet there were many, but I put all the files in the archive.rar so take that.
:format(webp)/https://fbi.cults3d.com/uploaders/26105973/illustration-file/3ba0e223-1e6b-4fbf-8931-c9a3884c831c/1.jpg)


/https://preview3d-images.cults3d.com/6qgykw0lc1p4lv8xf1v9vzsxd9tq)
/https://preview3d-images.cults3d.com/olp9f9y5dl5vnf1y25dj2ubjo063)


