Skip to content

Toyota 22RE (6/8) / Starter and Command Box add-on

Advertising
Advertising
?
Creation quality: 5.0/5 (1 vote)
Evaluation of members on the printability, utility, level of detail, etc.

  • 1.2k views
  • 1 like
  • 29 downloads
  • 1 collection

License
3D design format
STL Folder details Close
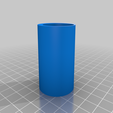
  • StarterBody1.stl
  • StarterBody2.stl
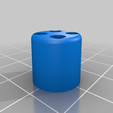
  • StarterBody3.stl
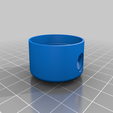
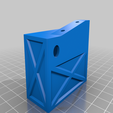
  • StarterCommandBody.stl
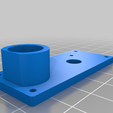
  • StarterCommandDoor.stl
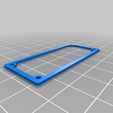
  • StarterCommandGasket.stl
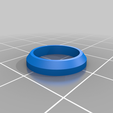
  • StarterCommandHubcap.stl
  • StarterConnector.stl
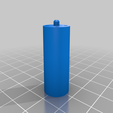
  • StarterSolenoid1.stl
  • StarterSolenoid2.stl

Learn more about the formats

Publication date 2022-12-21 at 11:48
?
Published to Thingiverse on: 2019-09-09 at 17:57
Design number 972200

3D printer file info

3D model description

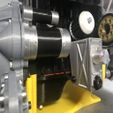
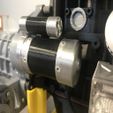
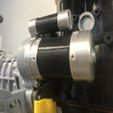
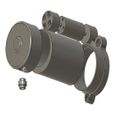
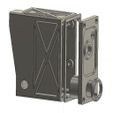
This is a Starter and his Command Box add-on for the 22RE Toyota Engine (https://www.thingiverse.com/thing:644933)

The video of the final project : https://www.youtube.com/watch?v=Oly5FVFVWa0

Print Settings

1 x StarterBody1 : Layer:0.15mm Raft:no Support:no Infill:100%
1 x StarterBody2 : Layer:0.15mm Raft:no Support:no Infill:100%
1 x StarterBody3 : Layer:0.15mm Raft:no Support:no Infill:100%

1 x StarterSolenoid1 : Layer:0.15mm Raft:no Support:no Infill:100%
1 x StarterSolenoid2 : Layer:0.15mm Raft:no Support:no Infill:100%
2 x StarterConnector : Layer:0.15mm Raft:no Support:no Infill:100%

1 x StarterCommandBody : Layer:0.15mm Raft:no Support:yes Infill:100%

1 x StarterCommandDoor : Layer:0.15mm Raft:no Support:yes Infill:100%

1 x StarterCommandGasket : Layer:0.15mm Raft:no Support:no Infill:100%

1 x StarterCommandHubcap : Layer:0.15mm Raft:no Support:no Infill:100%

Accessories

2 x m3x5mm SHCS
4 x m2x10mm SHCS
8 x m2x5mm SHCS
4 x m2 jam nut
1 x Electric Motor : https://www.amazon.fr/gp/product/B07RRPS7CC/ref=ppx_yo_dt_b_asin_title_o09_s00?ie=UTF8&psc=1
1 x Speed Controller : https://www.amazon.fr/gp/product/B07K2S9VRY/ref=ppx_yo_dt_b_asin_image_o05_s00?ie=UTF8&psc=1
1 x Braided Sheath : https://www.amazon.fr/gp/product/B07F8YRY3T/ref=ppx_yo_dt_b_asin_title_o03_s00?ie=UTF8&psc=1
1 x Female Jack : https://www.amazon.fr/gp/product/B07TNDKY7V/ref=ppx_yo_dt_b_asin_image_o02_s00?ie=UTF8&psc=1

Mounting

/!\ Before mounting the starter, the Electric Motor must be fixed on the Electric Drive.
I have used this one : https://www.thingiverse.com/thing:2233507

Fix the StarterBody1 to the Electric Drive with the m3 screws.
Insert the StarterBody2 into the StarterBody1 ; you can glue it or you can fix it with m2x10mm screws (see the pictures ; you must make hole for this).
Glue the first StarterConnector on the StarterBody3.
Weld the wires on the Electric Motor and run them through the hole of the StarterBody3's StarterConnector.
Insert the StarterBody3 on the StarterBody2 ; you can glue it or you can fix it with m2 screws (see the pictures ; you must make hole for this). Be careful not to pull on the wires.
Glue the second StarterConnector on the StarterCommandBody (hole on the left side).
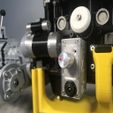
Fix the StarterCommandBody on the engine block with the m3 screws ; the holes of engine block already exists (look at the picture).
Insert the electric wires into the Braided Sheath and insert it into the StarterCommandBody ; then fix them on the Speed Controller. Be careful with the polarity.
Connect the Female Jack to the Speed Controller ; once the Female Jack is mounted on the StarterCommandDoor, the wires should be long enough to allow easy opening and closing. Be careful with the polarity.
Fix the Speed Controller with the m2x5mm screws and m2 jam nuts into the StarterCommandBody ; it is the most delicate part.
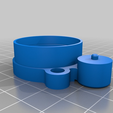
Fix the Female Jack on the StarterCommandDoor ; if necessary, glue the StarterCommandHubcap arround the head of Female Jack (look at the picture).
Fix the StarterCommandDoor and StarterCommandGasket on the StarterCommandBody with the m2x5mm screws.

More add-ons
https://cults3d.com/fr/collections-de-designs/dancan13f/toyota-22re-engine-add-ons

3D printing settings

-

Advertising


Issue with this design? Report a problem.

Would you like to support Cults?

You like Cults and you want to help us continue the adventure independently? Please note that we are a small team of 3 people, therefore it is very simple to support us to maintain the activity and create future developments. Here are 4 solutions accessible to all:

  • ADVERTISING: Disable your banner blocker (AdBlock, …) and click on our banner ads.

  • AFFILIATION: Make your purchases online by clicking on our affiliate links here Amazon.

  • DONATE: If you want, you can make a donation via Ko-Fi πŸ’œ.

  • WORD OF MOUTH: Invite your friends to come, discover the platform and the magnificent 3D files shared by the community!


Sharing and downloading on Cults3D guarantees that designs remain in makers community hands! And not in the hands of the 3D printing or software giants who own the competing platforms and exploit the designs for their own commercial interests.

Cults3D is an independent, self-financed site that is not accountable to any investor or brand. Almost all of the site's revenues are paid back to the platform's makers. The content published on the site serves only the interests of its authors and not those of 3D printer brands who also wish to control the 3D modeling market.

100% secure payment by credit card, PayPal, Apple Pay, Google Pay, etc.
View all payment options.