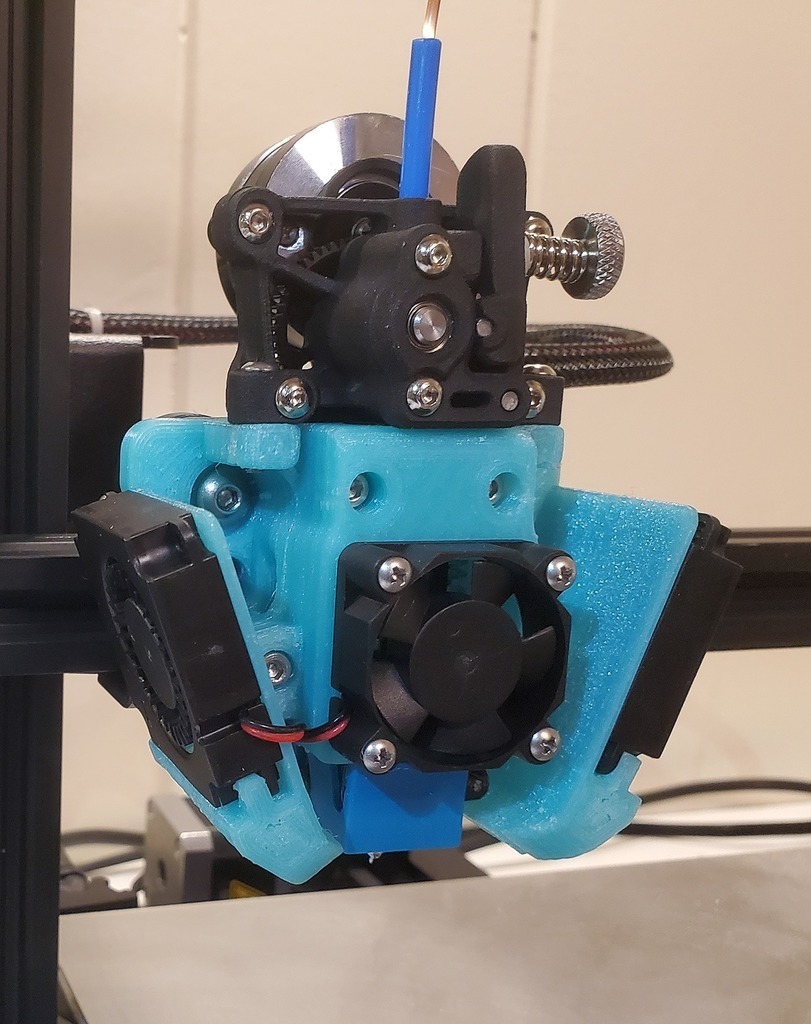
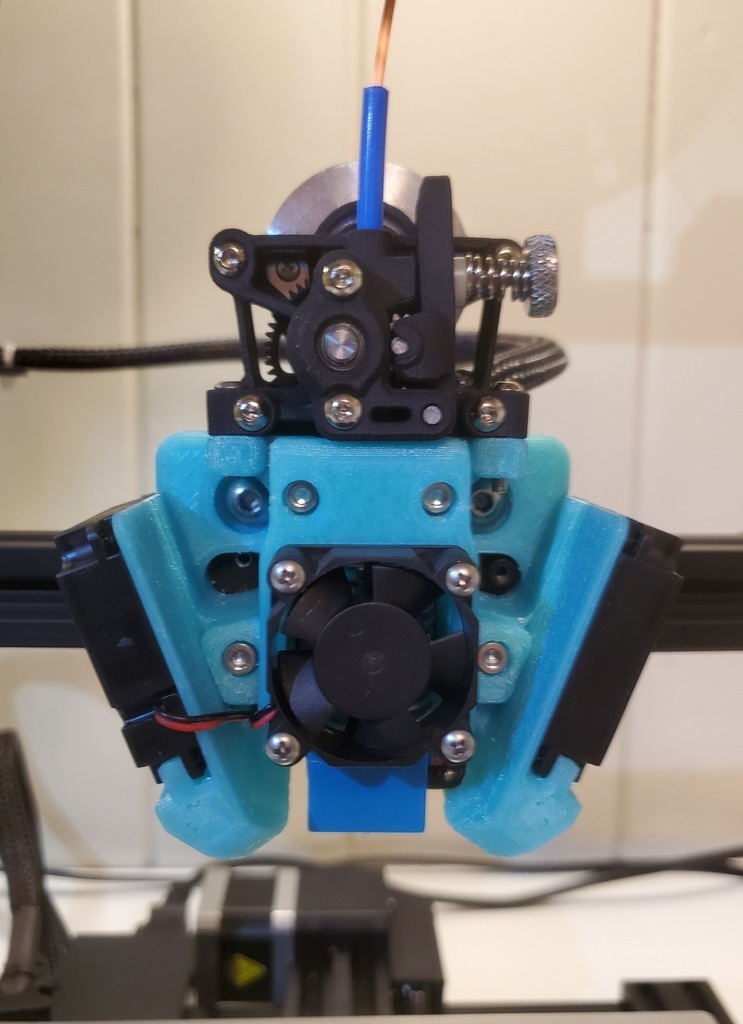
This is a direct drive toolhead for the Voxelab Aquila V2 that utilizes the Sherpa Mini extruder, an E3D V6 style hotend, and 2x 4010 radial blower part cooling fans. The hotend fan is just the stock 3010 that comes with most of the V6 style kits on Amazon or Aliexpress.
Things You'll Need to Accomplish this Install:
- Sherpa Mini Extruder
- V6 style hotend kit
- (2x) 4010 radial blower fans (1x would actually work fine, but would look pretty weird and unfinished)
- (4x) M3x16 screws and accompanying nuts
- (6-8x) Tiny screws to mount the fans
- Drill and a small bit (for aforementioned fan screws)
- Short length of PTFE bowden tubing
- A gcode offset (not a physical item, do not go looking for this at your local hardware store)
- Maybe a soldering iron or crimper, depending on the parts you buy
- IDK, prob some heat shrink or something. Just make it work and not catch on fire.
- Beers (quantity and type variable, depending on your age, habits, and situation)
- Common Sense and good enough work habits to not burn your house down
Details:
All parts need to be printed in PETG, ABS, ASA, or something other than PLA as to not melt near the nozzle. (Or print in PLA and melt it, IDC, I'm not the plastic police :P)
Align the back of the main body, the front of the cover, and back of the endstop mount to the build plate.
All parts require supports to print. My support settings (in Cura) to get clean enough results and easy enough removal with PETG:
- Support Density - 15%
- Support Interface - Yes
- Interface Thickness - 3x Layer height
- Interface Density - 80-90%
- Support Z distance - 2x Layer height
- Support X/Y distance (from overhang/supported area) - 0.1mm
- Z overrides X/Y
- Support minimum X/Y distance (from model/unsupported area) - 0.7mm
- Override fan speed on supported layers - 70-100% (Depends on your fan, I run 90%)
I bought a V6 hotend as a full kit with the fan, heater cartridge, thermistor, and hardware included on AliExpress for like $7. I recommend you do the same, or at least make sure you have all the parts needed to melt plastic. This was designed for the V6 type with the Bowden tube push-fit coupler integrated. I haven't tried the type with the threaded push-fit nut, but it's probably too tall. The one with nothing but a hole ("Wade Style") should work OK, but again, not tested.
Cut a short piece of PTFE tubing to go between the heatsink and Sherpa. You'll have to measure and adjust this yourself based on fit, as different heat breaks from different sellers will use different lengths.
The whole toolhead mounts on the 2 upper POM wheel screws of the x carriage. The stock screws are long enough to accommodate this, and don't need replaced.
You'll need (4x) M3x16 socket head screws and (4x) M3 hex nuts to attach the cover, as well as 6-8 small (~2mm) sheet metal or plastic thread screws for the fans. You can prob harvest these from the original Aquila toolhead or some other piece of electronics. I think I used imperial #2 x 1/2" pan head sheet metal screws that I had laying around. I purposely didn't model the fan mounting holes so this would print more cleanly, and drilled them manually afterward instead. Remix the model if you really want these can't be persuaded otherwise.
As an aside, I'd recommend picking up a metric screw set similar to this:
https://www.amazon.com/1080PCS-Assortment-Machine-Stainless-Hardware/dp/B09WCZ46VL/
if you decide to start disassembling and modding your printer(s):
I like to keep both button-head and socket-cap screws from M2.5 to M5, with matching nuts and washers. Prices and availability fluctuate a lot with these sets, so just see what's out there, and watch plasticfantasticdeals.com and 3dprintingdeals.com for sales to pop up periodically. You can also use links in the BOMs from the Voron sourcing guides - particularly the Stealthburner - and buy a selection from boltdepot.com in individual sizes.
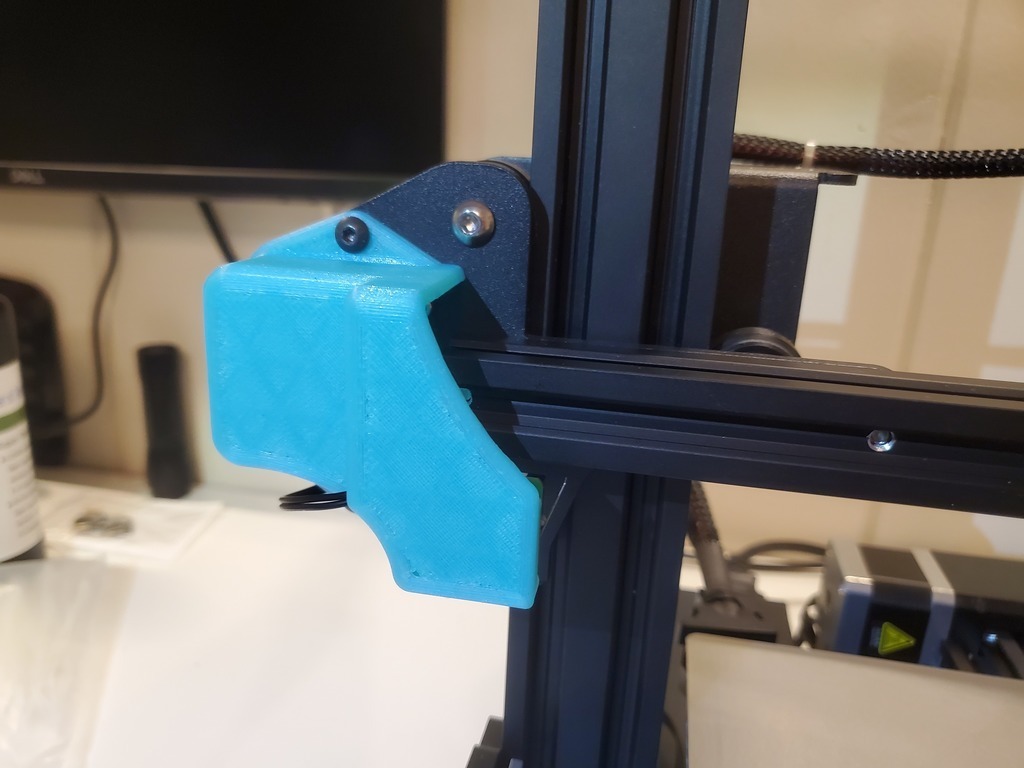
The X endstop mount/cover needs replaced, as the stock one hits the fan and doesn't allow the switch to engage. This also looks way cooler, and so is a double-win :)
A global coordinate offset is needed to compensate for the new position of the hotend tip. You can do this in the slicer start gcode, or in the START_PRINT macro if you're using Klipper. Add these lines of gcode right before the command to draw the purge line:
G1 X10 Y15 Z10
G92 X0 Y0 Z10
This commands the toolhead to move to x10, y15, z10, then resets the x and y axes to zero at that spot. (The z10 is to prevent the toolhead from scraping the edge of the build plate during the travel move. It doesn't necessarily need to be 10mm - I just use that 10mm height a few times in my start code - but the z value of both lines needs to match.) If you want the origin to be different from where I have it, just change the x and y values in the G1 line.
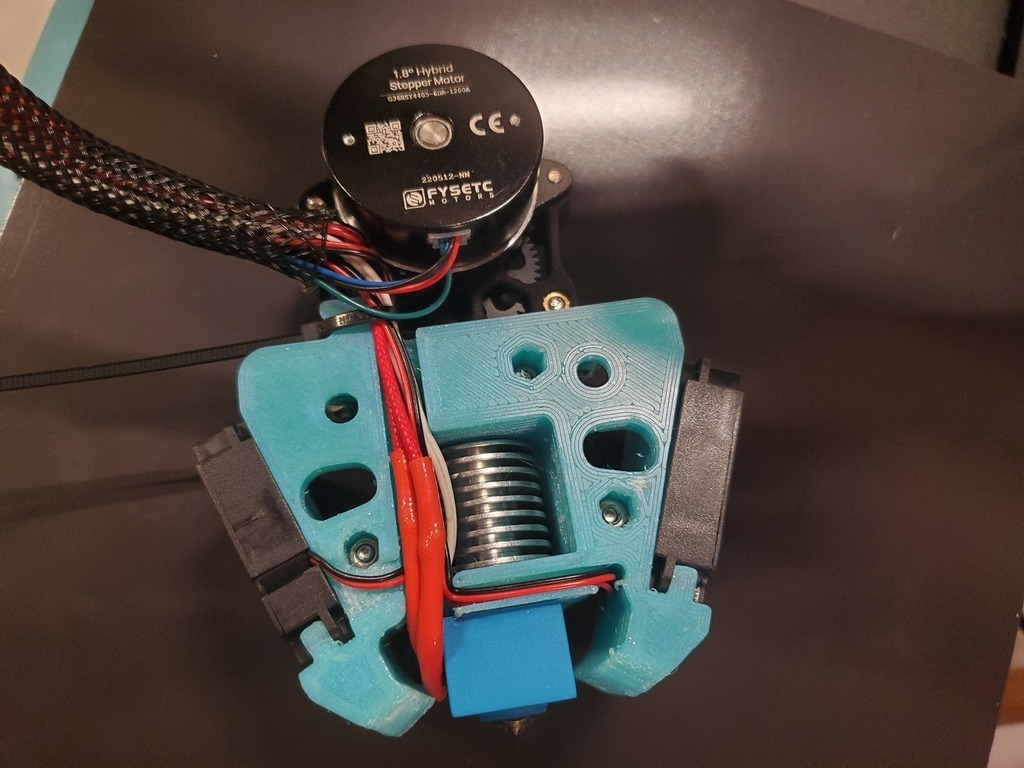
There is wire routing incorporated into the design. Yes, it is fairly tight. And yes, it should work with pretty much any fan and heater/thermistor wires. And yes, it does run next to the heatsink. And yes, in my experience it does stay comfortably cool with no risk of melting insulation. If this is a potential issue for you, wrap the wires in Kapton tape before routing and mounting. I used the cheapest parts China had to offer, and it all fit, and it all stays cool.
You will need to perform a PID tuning on your hotend after installation, and possibly specify a different thermistor type in your config file or firmware, depending on the new thermistor you use. Alternatively, you can reuse the old heater and thermistor to not specify a new one, but you'll still want to do a PID tune because of the new heater block. If you're not familiar with this, congratulations! By virtue of reading this, you're currently on the internet and can look it up yo damn self :P Videos and guides for the Ender 3 will translate just fine to the Aquila. Be next to the printer while it does the tuning.
I haven't mounted a bed leveling probe yet, but I'm looking at trying the Klackender probe:
https://github.com/kevinakasam/KlackEnder-Probe
Drop a comment with any questions or issues, and I'll do my best to help or adjust the design. I did this at least once, so I'm officially an expert now :)
Good Luck and Happy Printing!!
:format(webp)/https://fbi.cults3d.com/uploaders/22070274/illustration-file/a478bad4-24f7-4895-8861-1c633cdc3211/0b87665b-1244-4810-b6f2-eefb046e26df.jpg)


/https://preview3d-images.cults3d.com/pcwhgr98h9t6gev8u7j3cc91rrsv)
/https://preview3d-images.cults3d.com/ths4xvth39rzcgsz7k0wy479zcgc)
/https://preview3d-images.cults3d.com/9byztxazzjaq05af4ykuox211awk)


