Hello to all,
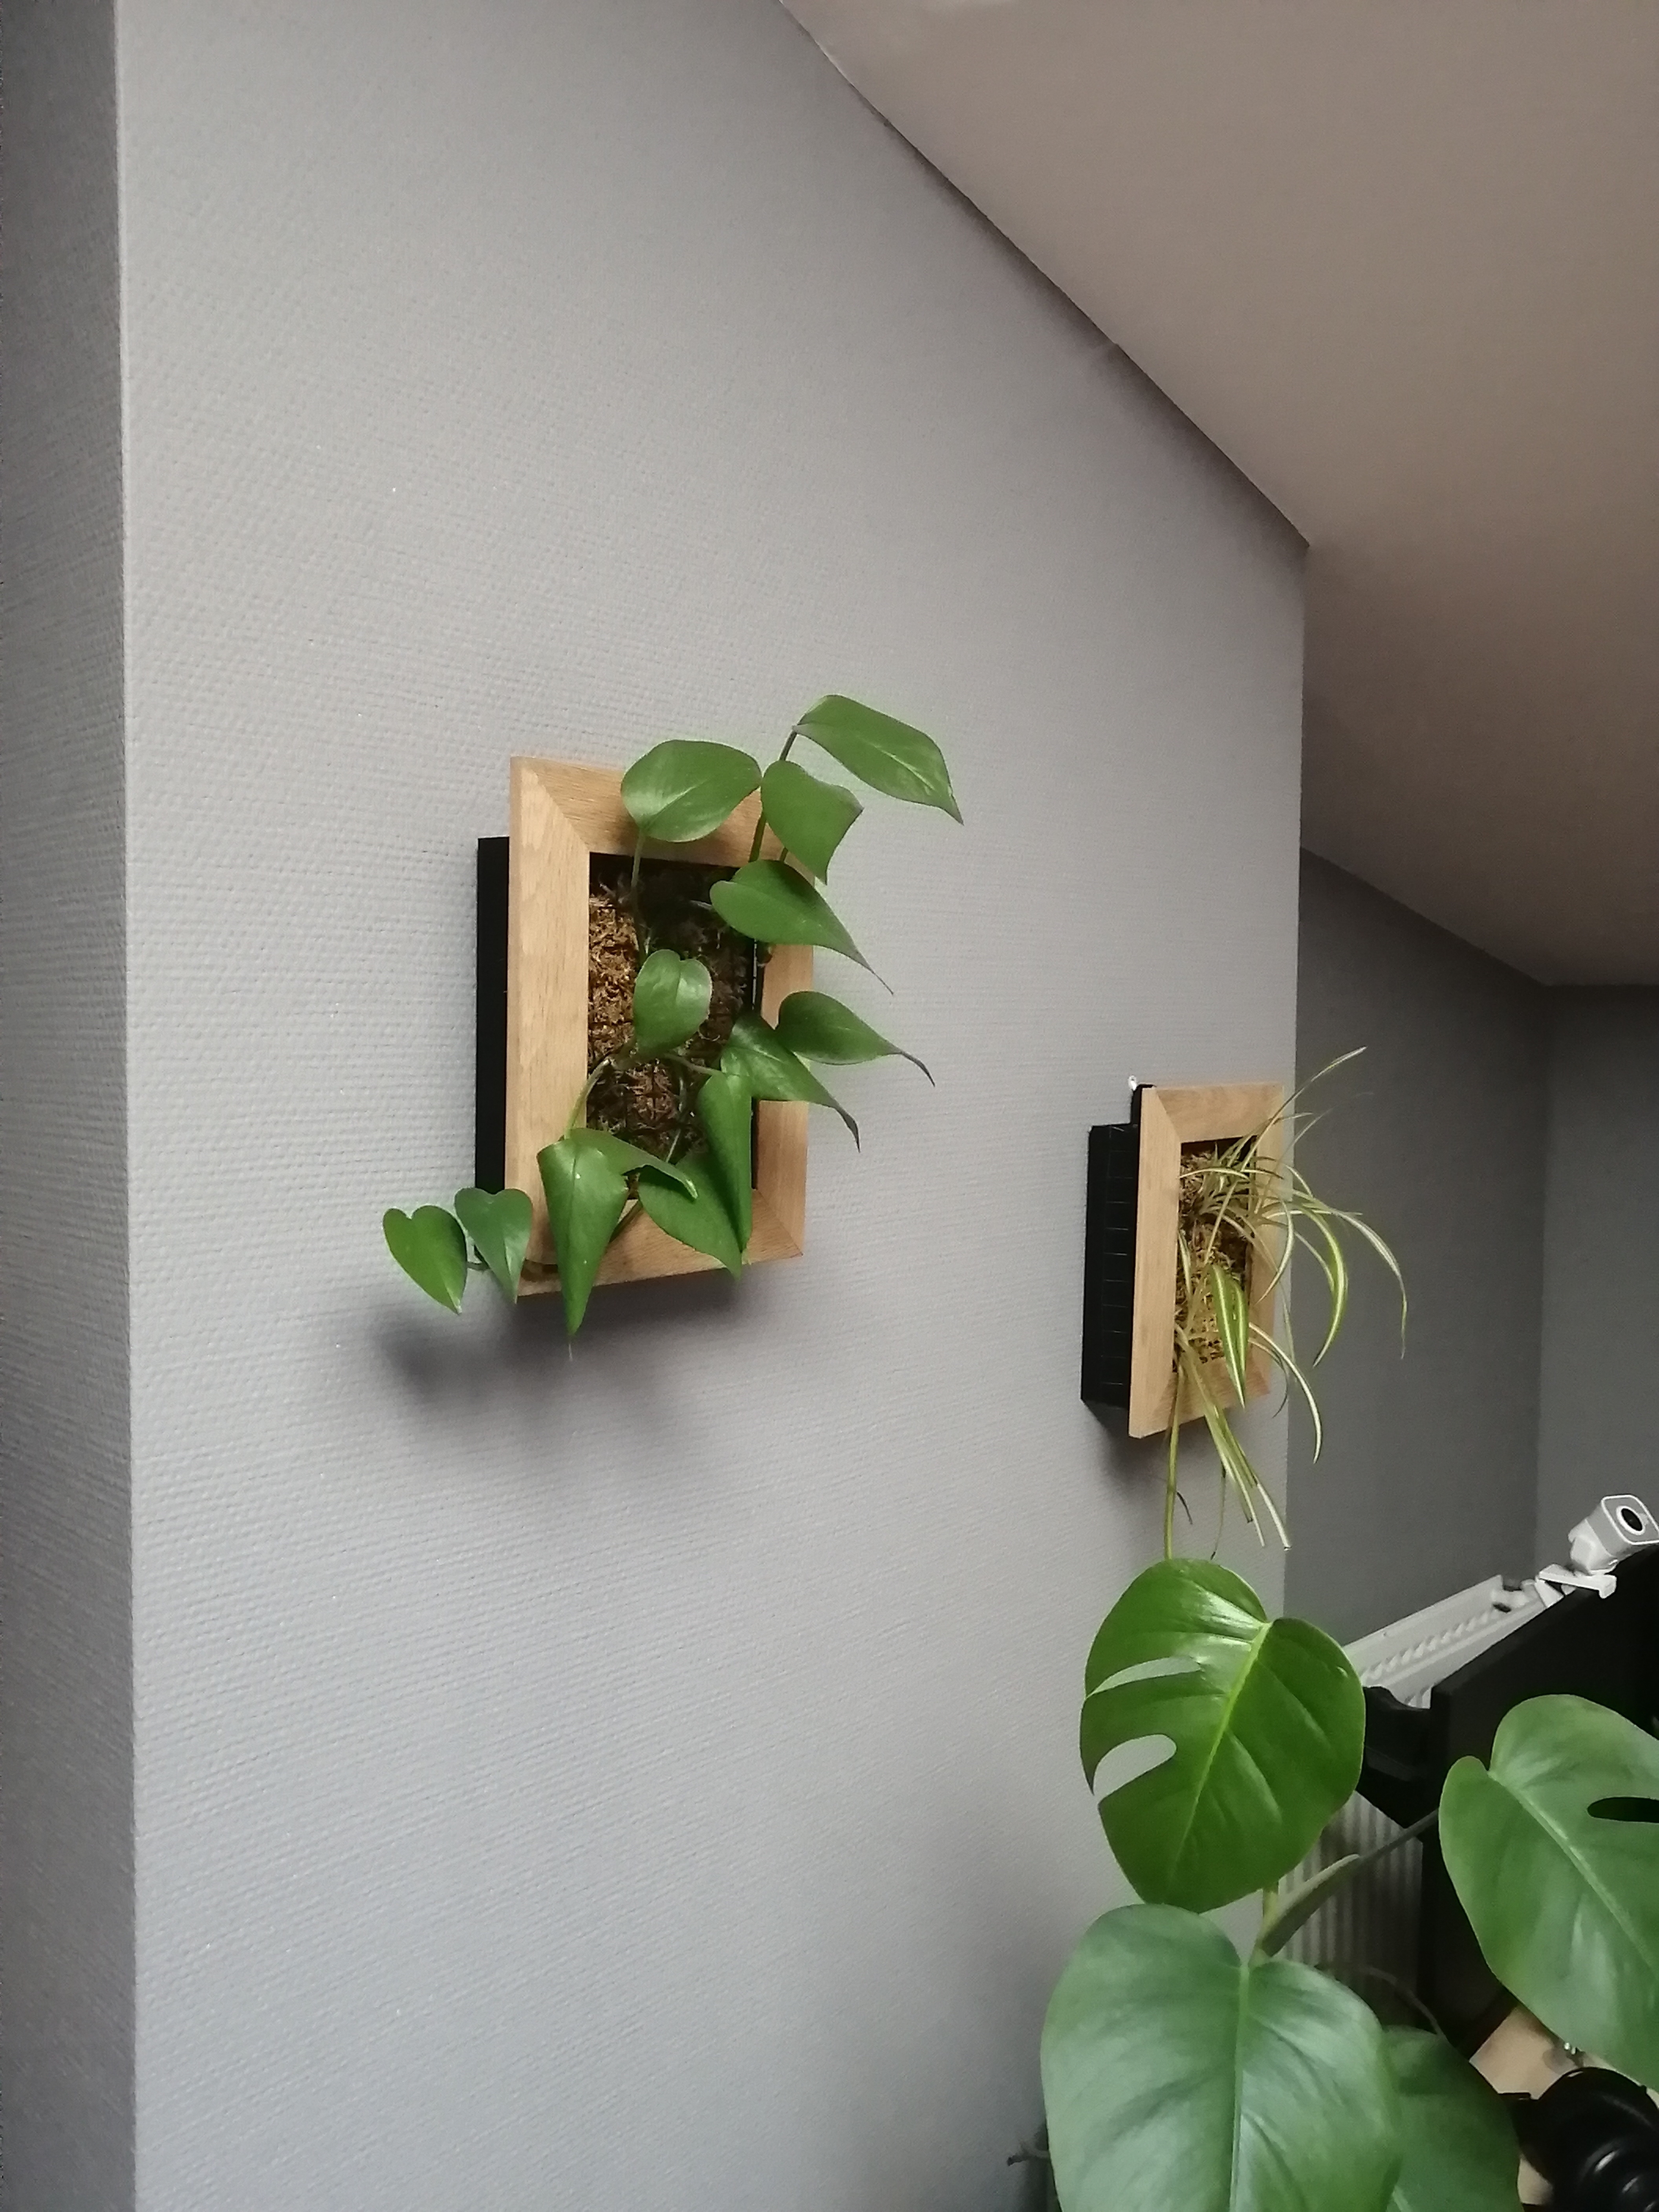
Here is my design of plant frame for indoor/outdoor. It's the result of several trials and here's how it works.
It is composed of 3 pieces to print:
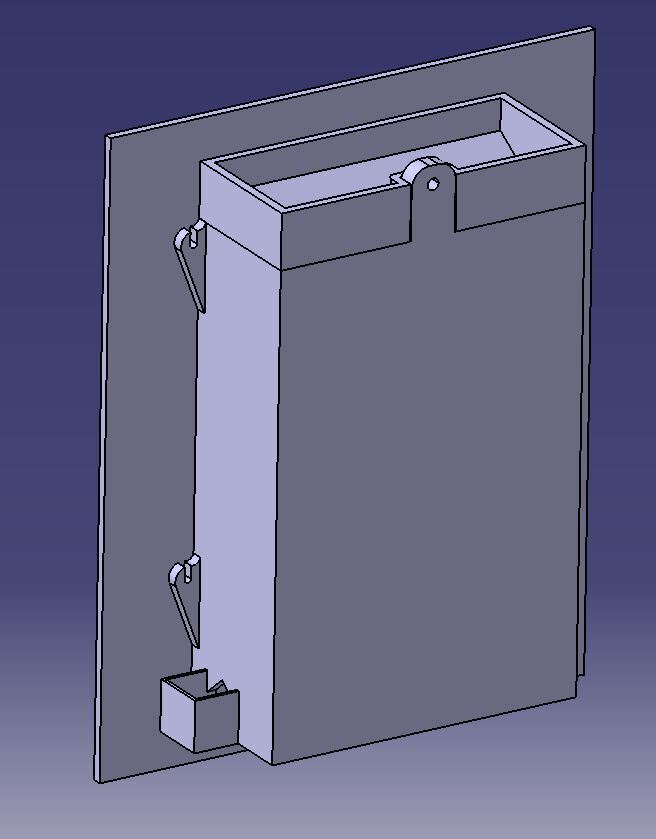
The main box that contains the plants.
A diffuser located on the upper part of the box and which allows to water the plants
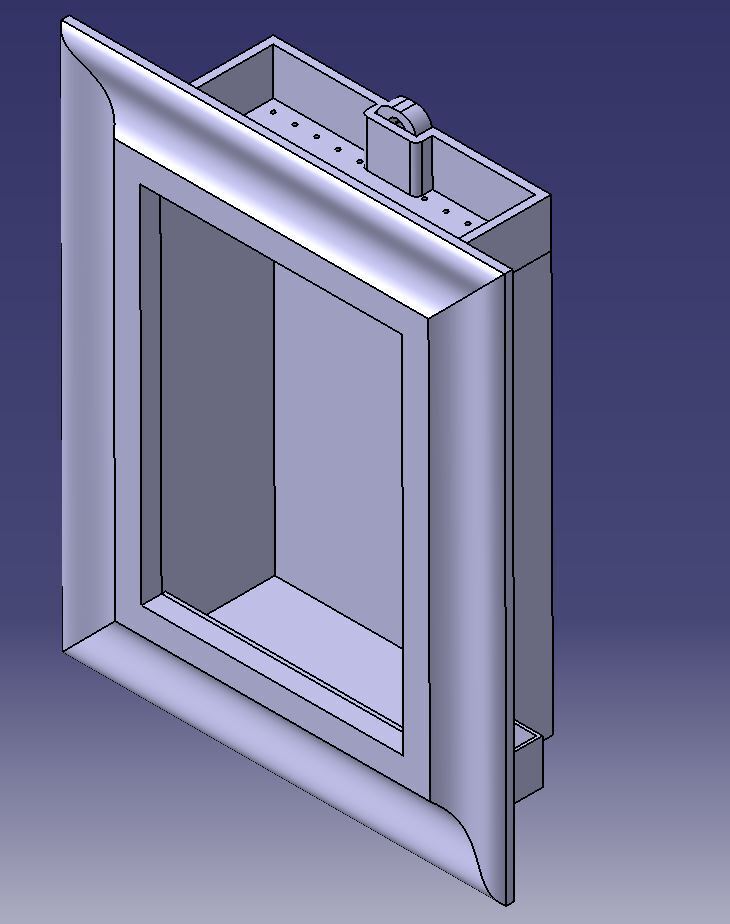
The frame which is used for the aesthetic aspect (hide the box) as well as to maintain the plants, the soil, the sphagnum in the box. For my part I used a commercial wooden frame. Any frame with an opening of 13x18cm will do for this version.
For the assembly of the case here are the necessary elements:
A plug for plasterboard
4 small wood screws to fix the frame
a metal hook or a screw to hang the frame on the wall
Plants, I took plants that require little maintenance. The drooping plants are suitable I find.
Substrate. For my part I used sphagnum moss only, it is rather recommended to put a base of potting soil and cover with sphagnum moss to keep water better.
A fine mesh or plant textile to hold the substrate in the frame.
Frame assembly:
1- Position the frame on a table (face towards the table) then the box on top of the frame so that the 4 supports are aligned with the holes in the frame. (If using a commercial frame it is possibly necessary to pre-drill the holes in the frame).
2- Screw the 4 screws into the frame without them clamping the frame and the case together. (the frame must remain removable). Then remove the frame from the box.
3- Add the mesh or canvas on the frame, the screws can help to hold it. If the screws are not enough tape can be used temporarily for mounting.
4- Fill box with substrate and put frame in position to hold substrate inside.
5- Make openings in the mesh or canvas to insert the plants into the substrate.
6- Hang on the wall.
7- Add the diffuser.
Watering:
Fill the diffuser with water and let the water run. There is an opening at the base of the frame to check the substrate is saturated with water.
It is also possible to remove the frame from the wall to water the plants.
I did not go as far as making a tuto of assembly with images, if you have any questions do not hesitate to contact me
See you soon
Hi all,
This is my indoor/outdoor plant frame design. It's the result of many tests and here's how it works.
It is composed of 3 parts to be printed:
The main box which contains the plants.
A diffuser located on the upper part of the box and which allows you to water the plants
The frame which is used for the aesthetic aspect (hide the box) as well as to maintain the plants, the compost, the sphagnum in the box. For my part, I used a commercial wooden frame. Any frame with an opening of 13x18cm will do for this version.
For the assembly of the box, here are the necessary elements:
A wall plug
4 small wood screws to fix the frame
a metal hook or a screw to hang the frame on the wall
Plants, I took plants that require little maintenance. Hanging plants are suitable I find.
Substrate. For my part I only use sphagnum, it is rather recommended to put a bottom of compost and cover with sphagnum to better keep the water.
A fine mesh or plant textile to hold the substrate in the frame.
Frame assembly:
1- Position the frame on a table (facing the table) then the box over the frame so that the 4 supports are aligned with the holes in the frame. (If using a commercial frame, it may be necessary to pre-drill the holes in the frame).
2- Aim the 4 screws in the frame without them tightening the frame and the box together. (the frame must remain removable). Then remove the frame from the box.
3- Add the mesh or the canvas on the frame, the screws can help to maintain it. If the screws are not enough, tape can be used temporarily for assembly.
4- Fill the box with the substrate and put the frame in position to hold the substrate inside.
5- Make openings in the mesh or canvas to insert the plants into the substrate.
6- Hang on the wall.
7- Add the diffuser.
Watering:
Fill the diffuser with water and let the water flow. An opening is located at the base of the frame to check the substrate is saturated with water.
It is also possible to remove the frame from the wall to water the plants.
I did not go so far as to make an assembly tutorial with images, if you have any questions do not hesitate to contact me
See you
:format(webp)/https://fbi.cults3d.com/uploaders/14547066/illustration-file/e32a14f9-2805-4054-98d2-f22d8e439a74/IMG_20221117_110034.jpg)


/https://preview3d-images.cults3d.com/c8vi0lxlimwm30ov6r22via0xs2k)
/https://preview3d-images.cults3d.com/4178tslwkj0qbsdhmxxta2w5z9qo)
/https://preview3d-images.cults3d.com/x8miy56hi5ary5rzigh88gjbkxoh)


