Skip to content

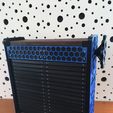
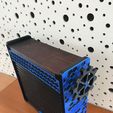
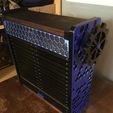
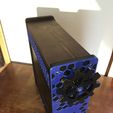
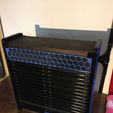
Tambour liqueur cabinet

Advertising
?
Creation quality: 5.0/5 (2 votes)
Evaluation of members on the printability, utility, level of detail, etc.

  • 1k views
  • 6 likes
  • 22 downloads
  • 1 collection

License
3D design format
STL Folder details Close
  • Cog.stl
  • Cog_plug.stl
  • Door_piece.stl
  • Door_stop.stl
  • Front_piece_connector.stl
  • Front_piece_left.stl
  • Front_piece_right.stl
  • Handle.stl
  • Inside_Cog.stl
  • Left_side_bottom.stl
  • Left_side_top.stl
  • Midle_tooth.stl
  • Overlay_front_piece.stl
  • Peg_4-9.stl
  • Peg_7-9.stl
  • Right_side_bottom.stl
  • Right_side_top.stl
  • Side_overlay_bottom.stl
  • Side_overlay_midle.stl
  • Side_overlay_top.stl
  • Side_overlay_top_for_cog.stl
  • Side_tooth.stl

Learn more about the formats

Publication date 2022-05-13 at 06:24
Design number 723279

3D printer file info

3D model description

For this build you are gonna need the following:
- 2x ball bearings (608z) 8x22x7mm (you can get them here)
- 460 mm of M8 threaded rod
- 2x 145x400x20 mm wooden plank
- 1x 420x375x4 mm plywood
- 1x M8 nut with locking insert
- 8x M3 8mm sink head screws
- 12x 4x40 mm wood screws
- 2x 4x16 mm wood screws
- 2x M3 15 mm round head screw
- 82x M3 10 mm round head screws
- 92x M3 nuts
- Piece of nylon cloth

You can get most of those parts in any hardware store. You are also gonna need two part epoxy glue, superglue and some glue that you can use to glue fabric to the plastic (I did use Chemopren standard).

You need to print following number of the parts:
- 1x Handle
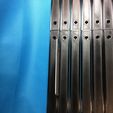
- 42x Door_piece
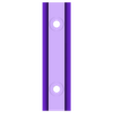
- 42x Side_tooth
- 21x Midle_tooth
- 1x Cog
- 1x Cog_plug
- 2x Door_stop
- 2x Inside_Cog

  • 1x Side_overlay_top
  • 1x Side_overlay_top_for_cog
  • 2x Side_overlay_midle
  • 2x Side_overlay_bottom
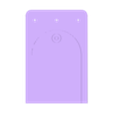
  • 2x Overlay_front_piece

  • 1x Front_piece_right

  • 1x Front_piece_connector

  • 1x Left_side_bottom

  • 6x Peg_7-9

  • 21x Peg_4-9

  • 1x Front_piece_left

  • 1x Left_side_top

  • 1x Right_side_bottom

  • 1x Right_side_top

Workflow:
1. Print all the parts
2. Glue the sides together with super glue or two part epoxy
3. Press the ball bearings in to the sides. It is tight fit, so it might require some sanding.
4. Assemble 21 door panels. Each consists from two door pieces and are held together by superglue. You need to make sure that you are gluing the parts as straigth as possible.
5. Glue the door panels on the cloth. You need to space them from each other, the spacing is little less than 1mm (I used credit card as a gauge).
6. Now you need to make holes in the cloth for M3 screws. I did burn the holes with soldering iron.
7. Screw two side tooths and one midle tooth on each door panel. Once again you need to make sure, that all is oriented as precisly as possible.
8. Prepare the wood and plywood, dimensions are mentioned abowe. I did stained it and than used carnaub wax as finnish
9. Glue two pieces of inside cog on the threaded rod. The rod needs to protrude on both sides, on one side (the side that will go into the ball bearing it should not be more than 7 mm)
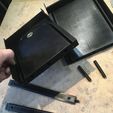
10. Dry fit the finished door piece into the slots in the sides. It has to move frely. If it does not, sand the slot until it does
11. Screw both wood parts into one side and put plywood into the slot in the back
12. Put the inside cog piece into its place and set the door piece into the slot.
13. It is time to put in the place the second side. Note, that all parts must fit precisly into their palce, ale it will not work. This step took me few atempts to fit all together. When all fits you need to screw the side in place.
14. Set in the front pieces and front piece connector. For this step it is good to slide the door piece to its back position.
15. Put the M8 nut inside the cog and than gloue the cog on threded rod that protrudes from side. Use two part epoxy as a glue for its strenght.
16. Glue the door stops into the slots in the back
17. Glue on the overlay pieces and screw in place the handle.

3D printing settings

If you can, you should substitute the pegs with steel rods of appropriate size. If this is not possibility for you, print the dowels with 3-5 peimeters.

Layer hight: 0,15
Filament: Prusament PLA
None of the parts require supports
I did print all the parts on Anycubic Vyper.

Advertising


Issue with this design? Report a problem.

Would you like to support Cults?

You like Cults and you want to help us continue the adventure independently? Please note that we are a small team of 3 people, therefore it is very simple to support us to maintain the activity and create future developments. Here are 4 solutions accessible to all:

  • ADVERTISING: Disable your banner blocker (AdBlock, …) and click on our banner ads.

  • AFFILIATION: Make your purchases online by clicking on our affiliate links here Amazon.

  • DONATE: If you want, you can make a donation via Ko-Fi πŸ’œ.

  • WORD OF MOUTH: Invite your friends to come, discover the platform and the magnificent 3D files shared by the community!


Sharing and downloading on Cults3D guarantees that designs remain in makers community hands! And not in the hands of the 3D printing or software giants who own the competing platforms and exploit the designs for their own commercial interests.

Cults3D is an independent, self-financed site that is not accountable to any investor or brand. Almost all of the site's revenues are paid back to the platform's makers. The content published on the site serves only the interests of its authors and not those of 3D printer brands who also wish to control the 3D modeling market.

100% secure payment by credit card, PayPal, Apple Pay, Google Pay, etc.
View all payment options.