This is a modified version of the model found here:
https://cults3d.com/en/3d-model/tool/cnc-3018-knife-holder
I have a MySweety 3018 pro CNC and laser engraver which this holder fits perfectly, however the original was too short and with my Z-axis as low as possible the drag blade tip is still higher than the X-axis carriage. So I cut the piece in half and made the drag-knife holder side slightly longer so that it will hang out of the mount lower. This will make it more difficult to insert/remove the drag knife, but that's a small hassle for having perfectly cut vinyls and stencils.
UPDATE:
V2 now includes a small cutout below the mount sections and above the blade holder to make changing out and adjusting depth of the blade. It also includes two small hooks at the bottom adjacent to the supports for the holder itself; these can be used to loop a rubber band over the top of the drag knife assembly to provide a constant yet adjustable downward force. My cutting surface was planed by the cnc with a surfacing bit so I thought pressure wouldn't help but it cuts so much more accurately and reliable with this small change. I have yet to test this design and currently loop a rubber band from the bottom into two grooves cut in my first elongated design.
UPDATE:
V3 is now posted, again I haven't had time to print and test this; I am still using V1 evil a rubber band looped around the bottom, but I mad a cutout at the bottom of the mount to improve clearance and give a better view of the cutter. I've also moved the rubber band hooks to the outside of the mount, if you have the same cnc stock mount as in my pic this may make it tough to slide it in, but I'm sure with some prying and working it around it should fit, if not I will make a v4 with cutouts that you loop the rubber band end through. I went with this design instead because it should be easier to loop the rubber band around each hook a few times to adjust tension, alternatively it could be attached the each side of a places plate that goes over the top of the drag knife, this could then be twisted to increase tension, but that might add radial pressure to the knife assembly and cause it to not be as accurate.
UPDATE:
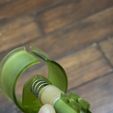
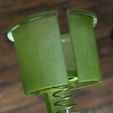
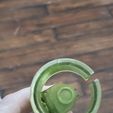
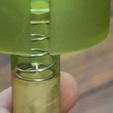
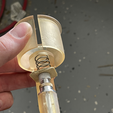
v4 is now posted, Removed the entire lower half of the mount in favor of an arm, my drag knife adjusted to its lowest height is about 13mm from the upper edge of the lip that keeps it from sliding through the mount and the spring I intend to use is 14x29mm so the circle cutout in the upper portion and distance from the knife holder are based off that and may need adjusting based on what springs you have available. The portion of the holder which adjusts the height of the blade is just about small enough to fit inside the spring; I figured I would cut a small piece of wood then drill a hole in the center so it slips over the holders plunger, but now I think I might print one so that I can sink the spring into the opposite side to prevent it from sliding off. I left flaps on the portion that holds the drag knife and made a 3.2mm hole in each so it can be tightened with a spare M3 bolt and nut, though a large bender clip could do the job as well, and with the spring in place, it shouldn't matter much if it gets pushed up further than intended. This also has not been tested but I will be starting the print shortly so I can give it a try later today; I'll update with pictures of what I end up with.
UPDATE:
V5 is now posted, the spacing was a little tight for the spring I have in V4, it has been printed but is untested as I am in the middle upgrading the workspace axis of my machine, as well as printing and mounts for and wiring limit switches. That said this seems as if not more stable and reliable from feeling it than my previous iterations and I am sure it would yield the best results from my machine to date. I've also included a spring support (DragKnifeSpringSupport) that should fit perfectly over the entire drag blade housing and rest on top the same collar used to keep it from falling through the mount, it sports the same spring indentation that's built into the mount spring arm and was another reason for me to move said arm further away from the assemble as it should be little thicker than my makeshift wood chip version. This will also make it easier to insert and remove the assembly. The mount spring arm has also been reinforced to accommodate its new residence. I may increase the inner diameter of the knife assembly holder itself as it's kind of a perfect fit; at least for my assembly, at the moment and I'd like to have it move a bit easier since I have a spring for tension now, though not so smoothly that it has space for inaccuracy/wobble. I should have all of my upgrades finished in a day or two and I'll be able to give this a test and make some final decisions for the last build which I'll of in clear green or solid grey so it doesn't turn yellow like the clear resin.
Photos have been added! And soon I'll test it, just finished a Y-Axis extension and added limit switches to the 3018, but I have to finish modifying a part to move the drag chain; I may add a place to mount the laser control board on the piece bridging that gap, but after all this is finished and I plane the rest of the larger spoil board I added in prep for the extra space, then glue down a fresh cut sticky mat, I will report back with results but I don't think I'll be let down. Though I need to find something that will post process my laser laser or cutter path files with swivel compensation for sharp corners, I usually use carbide create and add anywhere for .25 to .9 offset to inner and outer then select no offset when I make the path which I export to nc and use candle to treat the drag blade as if it's the spindle. If anyone knows a better way to tell a GRBL controlled 3018 to use a drag knife or of any nc post processors to add radius on sharp turns please let me know.

/https://fbi.cults3d.com/uploaders/15108501/illustration-file/0d08fee5-81dd-46e3-96c1-5b7ae77b61e1/tempImageRwjGP8.jpg)
