Skip to content

Tea Light Lithophane Holder

Advertising
Advertising
?
Creation quality: 5.0/5 (1 vote)
Evaluation of members on the printability, utility, level of detail, etc.

  • 3.7k views
  • 13 likes
  • 123 downloads

License
3D design format
STL Folder details Close
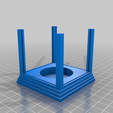
  • tll_base.stl
  • tll_blank.stl
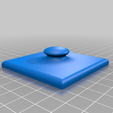
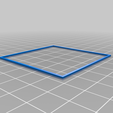
  • tll_frame.stl
  • tll_lid.stl

Learn more about the formats

Publication date 2022-05-30 at 23:02
?
Published to Thingiverse on: 2022-05-30 at 20:12
Design number 740236

3D printer file info

3D model description

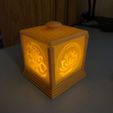
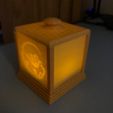
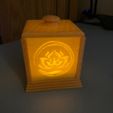
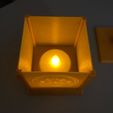
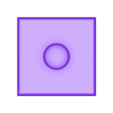
This is a little holder for an electric tea light that allows you to use generated lithophanes as the sides. I did this to make use of the ability in Cura specifically to import a picture file and have it automatically generate a lithophane. I have included blank sides to print or a "frame" which you can insert your lithophane into so that it will fit properly. (Blank sides should be printed vertically the same as the lithophanes) As long as your lithophane is 50mmx50mm square you can center it in the frame and use that if you would like and have other methods for making lithophanes. Below I am including the instructions for how to create the lithophanes in Cura and put them in the frame for printing.

(Note: This works best with higher contrast images and filament that is already pretty good at letting light through)
Instructions for Creating the Lithophane sides in Cura:
1) Make sure you picture is a square before importing into Cura
2) Open the frame file in Cura
3) Open your image file in Cura. Upon doing so you will be greeted with a pop up menu. Use the following settings:
Height: 1.0mm
Base: 0.4mm
Width: 50mm
Depth: 50mm
Darker/Lighter is higher depends on picture
Color Model: Translucency
1mm transmittance: 50
Smoothing: Leave at default
4) Sometimes even though the picture is square it will still be slightly off in either x or y position, so you can make select the lithophane object, make sure uniform scaling is off, and adjust the x or y so it is exactly 50mm square
5) Select both the lithophane and the frame, right click and select Center Selected, then right click and choose Group Models
6) Once they are grouped rotate the model 90 degrees so it is standing vertically. (Do not print these laying down. It will not have the accurate depth needed for a lithophane. After this you can move it around the build plate wherever you may need it)
7) Make sure you are printing with a brim and you will be good to go! I used a .4mm nozzle with .2mm layer height and .4mm line width and was able to get good results.

There will be some cleanup after but it should not be too bad and then the lithophanes will be able to slide into place. You can print multiple at once as well, or it will work just fine printing a single one as long as you know your print settings well.

Credit where credit is due, the images I used for my lithophanes are the clan symbols from the donghua of MDZS.

3D printing settings

-

Advertising


Issue with this design? Report a problem.

Would you like to support Cults?

You like Cults and you want to help us continue the adventure independently? Please note that we are a small team of 3 people, therefore it is very simple to support us to maintain the activity and create future developments. Here are 4 solutions accessible to all:

  • ADVERTISING: Disable your banner blocker (AdBlock, …) and click on our banner ads.

  • AFFILIATION: Make your purchases online by clicking on our affiliate links here Amazon.

  • DONATE: If you want, you can make a donation via Ko-Fi πŸ’œ.

  • WORD OF MOUTH: Invite your friends to come, discover the platform and the magnificent 3D files shared by the community!


Sharing and downloading on Cults3D guarantees that designs remain in makers community hands! And not in the hands of the 3D printing or software giants who own the competing platforms and exploit the designs for their own commercial interests.

Cults3D is an independent, self-financed site that is not accountable to any investor or brand. Almost all of the site's revenues are paid back to the platform's makers. The content published on the site serves only the interests of its authors and not those of 3D printer brands who also wish to control the 3D modeling market.

100% secure payment by credit card, PayPal, Apple Pay, Google Pay, etc.
View all payment options.