Skip to content

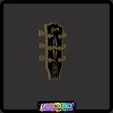
Gibson Guitar Headstock - Key Hanger / Wall Art

Advertising
Advertising
?
Creation quality: 5.0/5 (1 vote)
Evaluation of members on the printability, utility, level of detail, etc.

  • 8k views
  • 45 likes
  • 56 downloads
  • 1 make

License
3D design format
STL and ZIP Folder details Close
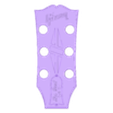
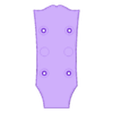
  • GIBSON FACE PLATE.stl
  • GIBSON HEADSTOCK.stl
  • GIBSON PINS.stl
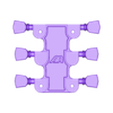
  • GIBSON TUNERS.stl
  • GIBSON V2 ADDED VERSION.zip
    • GIBSON LOGO.stl
    • GIBSON PINS.stl
    • GIBSON TUNERS.stl
    • HEADSTOCK.stl
    • TRUSSROD COVER.stl

Learn more about the formats

Last update 2022-11-22 at 07:55
Publication date 2022-07-02 at 14:46
Design number 771294

3D printer file info

3D model description

Never lose your keys again with this easy to use, stylish Gibson Headstock Key Holder. Simply attach to a wall or surface with only two 3.5mm screws. This product makes for the perfect gift or home accessory for any guitar or musically minded fan. Bring the Gibson flair home and hang your keys like a true Rockstar!

This gorgeous key rack is 3d printed from PLA plastic with six sturdy hooks to provide a stable perch for the things you need most on your way out, such as keys, masks, leashes and lanyards. Please note that the Tuning pegs do not turn and are to be glued in place after attaching the product to a wall.

For those that are unaware, an Ibanez, Dean ML and Fender version can also be found among my designs.

As always every like, follower and tip is much appreciated.

I can also be contacted via email - aa3dprinting7@gmail.com

3D printing settings

This was printed on an Ender 3 Pro, a dual extruder printer is not needed.

Printed with something known as "Filament Changes".
Essentially it's the pausing and changing of filament mid-print at a specific layer. I used a slicing software known as Ultimaker Cura.

Firstly if you don't know how to do a filament change: In Ultimaker Cura, under "Extensions", select "Post Processing" then "Modify Gcode" , pick " Add a script" and select "Filament change" then finally select the layer..

The layers to be selected for the filament changes are as follows (if printed on a 0.1 layer height).
On the Face Plate at layer 11.

Be sure to slice the model again after making the selection.

Advertising


Issue with this design? Report a problem.

Would you like to support Cults?

You like Cults and you want to help us continue the adventure independently? Please note that we are a small team of 3 people, therefore it is very simple to support us to maintain the activity and create future developments. Here are 4 solutions accessible to all:

  • ADVERTISING: Disable your banner blocker (AdBlock, …) and click on our banner ads.

  • AFFILIATION: Make your purchases online by clicking on our affiliate links here Amazon.

  • DONATE: If you want, you can make a donation via Ko-Fi πŸ’œ.

  • WORD OF MOUTH: Invite your friends to come, discover the platform and the magnificent 3D files shared by the community!


Sharing and downloading on Cults3D guarantees that designs remain in makers community hands! And not in the hands of the 3D printing or software giants who own the competing platforms and exploit the designs for their own commercial interests.

Cults3D is an independent, self-financed site that is not accountable to any investor or brand. Almost all of the site's revenues are paid back to the platform's makers. The content published on the site serves only the interests of its authors and not those of 3D printer brands who also wish to control the 3D modeling market.

100% secure payment by credit card, PayPal, Apple Pay, Google Pay, etc.
View all payment options.