Skip to content

Spiral Bridges Module for Out Of Marbles Machines

Advertising
Advertising
?
Creation quality: 5.0/5 (1 vote)
Evaluation of members on the printability, utility, level of detail, etc.

  • 1.3k views
  • 6 likes
  • 5 downloads

License
3D design format
STL and TXT Folder details Close
  • PRINT_SETTINGS_ASSEMBLY.txt
  • SB-Base.stl
  • SB-Bottom-Tower.stl
  • SB-EntryShute-Vase.stl
  • SB-Exit.stl
  • SB-HighBridgeVase.stl
  • SB-LowBridgeVase.stl
  • SB-Mid-Tower.stl
  • SB-TopTower.stl

Learn more about the formats

Publication date 2022-07-05 at 18:18
Design number 774182

3D printer file info

3D model description

Spiral Bridges module compatible with the fantastic marble machines from @OutOfMarbles (you must have one of the machines that accepts interchangeable modules) https://cults3d.com/en/users/OutOfMarbles/creations

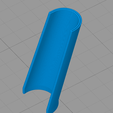
Consists of three spiral towers connected by thin bridges (bridges are designed to be printed in vase mode).

See the module in action on the Stairs machine here:
https://drive.google.com/file/d/17GuZxbdjtB-aXdOcaiVrdH0zLwbS0e-P/view

3D printing settings

BASE
.28 layer height
3 walls/perimeters
4 bottom and top layers
20% rectilinear infill

TOWERS AND EXIT
.12 layer height
3 walls/perimeters
4 bottom layers
5 top layers
20% infill

ENTRY SHUTE AND BRIDGES
USE VASE/SPIRAL MODE
Make sure your extrusion width is set to 0.4mm and not auto - any larger may create some weird gaps in the walls.
Printing these in vase mode should create a continuous loop outline (so appears as 2 perimeters in the slicer preview) - check the VaseModePreview.png file for an example. If it doesn't, re-visit your extrusion width settings.
.2 Layer height
Zero top and bottom layers
You may need a brim for adhesion
Print them individually and slowly (20mm/s)
Make a note of which bridge is which - they do fit in both locations but are subtly different

ASSEMBLY
Perform standard cleanup and trim any elephants foot off the vase mode parts.
Use CA glue (I use a gel) to attach the towers and exit to the base.
Gently trim any elephant's foot from the bridges and entry shute.
Use a small amount of CA to glue the bridges in place.
Check the fit of the entry shute before gluing by putting the module on a machine. The entry points of the various machines are not 100% consistent so you may need to trim a layer or two off the entry end. It should sit slightly below the shute on the marble machine.

Advertising


Issue with this design? Report a problem.

Would you like to support Cults?

You like Cults and you want to help us continue the adventure independently? Please note that we are a small team of 3 people, therefore it is very simple to support us to maintain the activity and create future developments. Here are 4 solutions accessible to all:

  • ADVERTISING: Disable your banner blocker (AdBlock, …) and click on our banner ads.

  • AFFILIATION: Make your purchases online by clicking on our affiliate links here Amazon.

  • DONATE: If you want, you can make a donation via Ko-Fi πŸ’œ.

  • WORD OF MOUTH: Invite your friends to come, discover the platform and the magnificent 3D files shared by the community!


Sharing and downloading on Cults3D guarantees that designs remain in makers community hands! And not in the hands of the 3D printing or software giants who own the competing platforms and exploit the designs for their own commercial interests.

Cults3D is an independent, self-financed site that is not accountable to any investor or brand. Almost all of the site's revenues are paid back to the platform's makers. The content published on the site serves only the interests of its authors and not those of 3D printer brands who also wish to control the 3D modeling market.

100% secure payment by credit card, PayPal, Apple Pay, Google Pay, etc.
View all payment options.