https://odysee.com/@RCX2020:8/AEAHPMAX:6
CHECK OUT VERSION 3: https://cults3d.com/en/3d-model/tool/aea-hp-max-45-50-box-magazines-version-3
EDIT 2: Added a 9 shot magazine as requested. Haven't printed it myself but the springs in the assortment box should work. Enjoy your sten gun!
EDIT: For all of you asking for a .357 version:https://cults3d.com/en/3d-model/tool/aea-hp-max-357-box-magazines-and-receiver
DISCLAIMER: Even though everything works, looks and fits great, I still consider this a work in progress! I'm looking for ways to increase the max slug length without decreasing structural strength and for ways to (slightly) increase capacity without making the magazines longer.
Long story short: Didn't like the standard magazines, had too much time on my hands and this is the result.
CONS:
Magazines are bigger
You will lose some ejected "casings" in the wild...
Slugs longer than 16.5mm won't currently fit (working on changing this to 20-21mm)...
PROS:
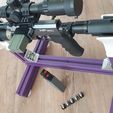
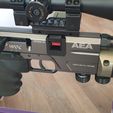
Magazine is now on the left side
You can do a one handed reload
Reloads are quicker
You can store magazines fully loaded without losing spring tension
Easy and very cheap to make.
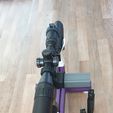
You can have a full uninterrupted 180mm long picatinny rail on top
Looks much cooler (in my opinion :-)
If, for some reason, you want this type of magazine on the right hand side you need to mirror the receiver AND the magazine!
There are two versions of each magazine core: A regular and an "OH" version. The "OH" version has a slot that permits the magazine to be inserted without pulling the (last bit of the) bolt back completely (the probe). This sacrifices a bit of structural strength but adds the benefit of a quicker and/or one handed reload.
Price per magazine is about two to three bucks (and a lot of spare springs). If you can source the correct springs seperately (shouldn't be too hard on Alie) this price goes down even further as opposed to 40 buckaroos for a standard plastic AEA magazine with a spring made out of play-doh...
STUFF YOU'LL NEED:
Some M2.5x5 or 6 (or close enough) machine screws (1 for the receiver and two per magazine)
Some tension and compression springs. I got the ubiquitous spring assortement box from a local hardware store. You can get this from Amazon or Alie or wherever. Example: https://amzn.to/3pgIhq1
Any kind of dovetail to picatinny adapter longer than 25mm (used to lock the receiver part to the rifle and to give it structural strength)
I printed everything in eSun PLA+ which seems to hold up just fine. Using Nylon for the receiver part would be even better.
INSTRUCTIONS:
1_RECEIVER
From the assortment box you need one spring approx. 16.5mm long x 9.95mm diameter x 0.71mm wire diameter. And one M2.5x5mm machine screw.
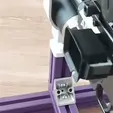
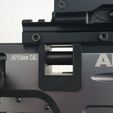
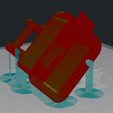
Insert the locking lever in its slot and place the button part in its place (see photos). slide/tilt the button up without sliding it completely from under the guide. Put the spring in the now visible spring retainer. Compress the spring and slide the button down over the compressed spring untill it seats itself. Now take your screw and secure the locking lever making sure no to overtighten it and making sure the screw doesn't protrude from the back.
Insert the receiver in the rifle from the top. Slide it down with the largest opening to the front and while pulling the bolt back. This can be quite snug. Be sure to not push down on the middle part of the dovetail but try to push down on the front and back walls. Once the receiver is fully seated you can use your dovetail to picatinny adapter as a bridge and lock it in place.
2_ and 3_MAGAZINE
4 and 6 shot magazines are identical except for the springs.
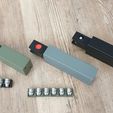
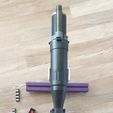
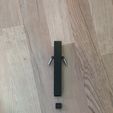
You can see how they go together in the picture. For each magazine you'll need to print a CORE a SHELL and a FOLLOWER ASSEMBLY. You'll need two M2.5x5mm (or longer) to lock the shell to the core, two tension springs and one compression spring.
For the 6 shot I used one 36mm long x 9mm diam x 0.8mm wire diam compression spring and two 25mm total length x 6mm diam x 0.5mm wire diam tension springs from the assortment box.
For the 4 shot I used one 19.5mm long x 10mm diam x 0.8mm wire diam compression spring and two 18 mm total length x 6mm diam x 0.5mm wire diam tension springs.
4_MAGAZINE_SLUG SLED
The "casing" for your slug. Load it in your slicer and multiply by as many as you want... You can also opt for the 4, 6, or 9 shot range slug sleds. They are easier to keep track of on a range but the get in the way in the field.
Questions or ideas? Put them in the comments on the bottom of this page!
Makes? Great! Show me!
Commercial interest? RCX2020@Protonmail.com Let me know, we'll figure something out...

/https://fbi.cults3d.com/uploaders/18048599/illustration-file/5601ffe2-6093-4ddb-a089-c73ed81ad73e/AEA-HP-MAX-45-Box-magazine.gif)
