PLEASE READ THIS IF YOU HAVE A FILAMENT PRINTER
*I made the project available again, but only to let people who bought it able to download it again and have access to the files. The whole system, after having several retex, appears to be way to difficult to make work properly with FDM Printers (troubles with glue, with leaks, with threads...). Due to the diversity of the whole 3D Printing fleet (materials, settings, printers, users, etc), the whole project needs to be adpated to every situation, and I don't have the time, nor the energy, to help every user. The instructions provide enough data, and if it's not working with these, I won't be able to help you more. If you insist on trying the project, you can still buy the file, but I recommend you to be fully aware of your printer performance and your troubleshooting skills. Overall, buy at your own risk ! Sorry !
PLEASE READ THIS IF YOU HAVE A RESIN PRINTER
*For people with SLA Printers (Resin printers), no problems ! Test have shown that the adapter works really great with resin printers. Just use the specific "monolithic" version included, it is specifically made for this ! Just insert your hose in the channel on the bottom with a nice load of glue, and you're done !
Hello !
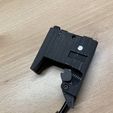
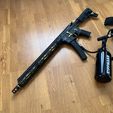
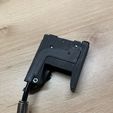
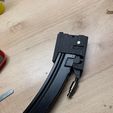
Here is an HPA adapter that allows you yo use Cyma (or equivalent) MP5 mags in your MWS, and replacing the gaz supply with HPA. It's lighter, cheaper, and more power consistent than the gaz system. Plus, you install it like you would change a mag, You insert it in the magwell, and that's done !
You need to put a 6mm Polyurethane (PU) hose for the seal. These are extremely cheap by the way.
Be aware that you will need a bit of work to make it air sealed :
The body has 2 parts: the adapter and the cover. You need to apply epoxy (I personally use Araldite Standard, easy to apply) resin like shown on the picture (the blue surfaces) with a small brush. This will make the system air sealed, and since the epoxy is a very strong glue, it will by the way bond the 2 parts together. Don't put too much, you don't want the system to be clogged by epoxy. That's why the use of a brush is heavily recommended. Once you applied epoxy, don't close assemble the system directly. You need to put the 6mm PU hose in the adapter, on the channel designed for it. Let a bit of lenght on the outside, and let it go 2-3 mm inside the small chamber (where you applied epoxy). Once you have placed the hose, verify that all the contact patches are epoxy covered, and then you can place the cover (this will, if done correctly, put the hose in sandwich between the 2 parts) and let it dry for a day. The best is to tighten it strongly with a clamp or a bench vice during the hardening process.
You need an M3x15 screw for the lever, an M3 Nut, and a 5.5mm spring. Use a Macroflex 6mm (EU or US, as you wish) for your air supplu connection.
You need to put these parts directly from your mag (or spare parts) to your adapter. You can try the models included in this pack, but I can't guarantee those will last long. You will still need a gaz route :
-MGG2-65 (feed lips, I included a file to print yours, but I recommend original ones)
-MGG2-70 (gas road)
-MGG2-71 (percussion valve extender, I included 2 files to print yours but this should be replaced as fast as possible by an original one, since the hammer directly hit have it, it won't last long. The "chunky" one is designed to take an M3x3 countersunk screw at the top, to absorbthe nergy of the hammer. I tested it on a stock mag, it seem to work well)
MGG2-70 (percussion valve). For the percussion valve, I recommend you use an Hi-Capa one. These are exactly the same and can be found for cheap. It is necessary to put some epoxy glue on the valve O-Ring, that's why I recommend using a cheap spare hi-capa valve. This will greatly help to obtain a good seal. The "improved" version of the adapter has a tighter section for the O-ring, this should help sealing, but can be too tight for some printers (O-rings are approx 8.3, the section is modeled at 8.5).
Be aware that the valve sits deep down in the mag/adapter, you will maybe need a special key to get it assembled/disassembled. I personally salvaged an old cheap metal flat slim wrench.
Use the stock metal pins for the lips and valve extender. You can make your own pins though, with 2mm steel rod and 3mm screw.
How I managed to get a good air seal :
https://youtu.be/NZlCBFEcNBU
Firing and Chrony tests:
https://www.youtube.com/watch?v=MrtqP_wrGAk
https://youtube.com/shorts/7RZ0NfVvim4?feature=share
https://youtu.be/WcezhJN-oBE
https://youtu.be/DWVeNqKtp6Q
PS. : due to the difficulty of getting a good air seal (this can be caused either by not having access to a good glue, the print material being too soft, or the printer itself), If you encounter trouble or aren't satisfied with the way the product is designed, don't hesitate to ask for a refund!
PS.2 : the design works, I managed to do 3 of these with enough seal (there is a very small leak though, like the air volume of a shot, every 5 minutes). I can't redesign the system, the whole performance depends on the production of the adapter itself.

/https://fbi.cults3d.com/uploaders/15787527/illustration-file/d4fc8a8e-70fe-4435-be74-58474715cf37/298336309_1069320147051724_7783235649016313412_n.jpg)


