https://youtu.be/SVMKxuZLZYg
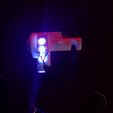
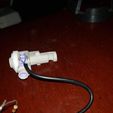
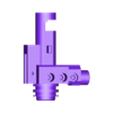
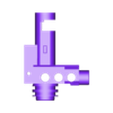
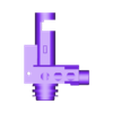
Just added holes for 5mm leds preferably ultra bright UV or Blue.....Will be trying in the near future but is untested as of yet.... One version has 5mm holes and the other has 5mm holes with a 3mm lip to prevent the leds from going in
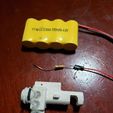
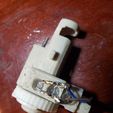
*Edit 07292020- Added one for 3 LEDs instead of 6 as 6 may be a little problematic to fit and wire into the upper. still could work but looking at it, i think 3 would be easier...I have a front wired gearbox right now so I had to leave some space for the gearbox wires to go through on the left side, so i just put the LEDs on the opposite side
Youre gonna probably need to watch a few diy vids on youtube before tackling this. If it works its super cheap to do. You will deff have to grind the LEDs down first and the one closest to the magazine will probably have to be glued after the first 2 are glued and dried so you can make sure the BB has a clear path. Another tip is whenever you grind the LEDs down, if you dont have a polishing wheel to shine them back up, you can use a little clear nail polish. It will smooth it back out and make it clear again. Also for the top 2 LEDs I had to grind off the little lip on the bottom of the LEDs in order to push them in further. I used a 300Ohm resistor because I had one laying around
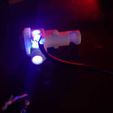
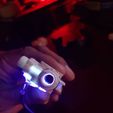
-Update 8/1/2020: IT WORKS!!! problem I have is the bucking doesnt fit into the hop up so i just went without bucking. I put a fat rubberband around it so the the arm on top has something to press against and a little more resistance since I dont have a full air seal....nonetheless they glow and shoot and it looks awesome. Ill be posting video soon but I dont have a clip yet. I did find out the inside of a cheap ink pen is perfect for the bbs so i glued 2 together and put a long screw in one end to gravity feed the bbs into the chamber until i can make a clip
-Update 8/19/2020
working well. I used a dollar store tactical flashlight to make a handguard grip. i just cut out the LED from the flashlight and used the resistor that was already attached. this was wired to the hop up so that i can turn it on and off from the flashlight. I then mocked up a picatinny top to accept the flashlight. I also cut the flashlight body right after the switch. I left a small hole in the flashlight and added an LED in the body of the grip. This is to indicate if the hop up is on or off so I dont leave it on and drain the battery, and also so it can easily be switched between tracer and no tracer. I will post pics soon
-update 8/25/2020
I bought a commercial unit AT1000 acetech drop in unit and it out performs the hutu by a lot. I only used 3 UV LEDs and at the time used whatever resistor I had. Once all pinned up, I also used the resistor that was already in the flashlight so I am sure the LED's are not as bright as they could be. Also, the commercial unit barely lights up red tracers but it does nonetheless. Looking into it I see 12 UV LEDs, So I am guessing if you make the 6 LED HUTU then use 3 blue LEDs and 3 UV Leds, 1 of each color directly across from each other. It can be 3 of the same color on the same side, or alternate, but it should be both colors on all 3 levels. That way Red and Green get the same amount of exposure. At least thats what i'm thinking. I will try on my next attempt, but right now I am satisfied. Still, once I saw the brighter performance of the acetech, I knew I needed to try again. This time I have a ton of resistors. If anyone has good results, please post the make and the method so we all can benefit.
-Update 10/1/2020-
made the one with 6 LEDs and I only had 1 blue led so I used that one closest to the air nozzle on one side and used 5 UV LEDs in the rest of the holes. Wired all that up to another dollar store flashlight, but this time I just used the resistor in the flashlight. Used the dremel to take off the end off the flashlight, then mocked up a cap for it, painted it and attached it to the rail. All the asthetics and stuff dont really matter as Im sure you will all do your own thing. But the 6 LED one works and works well. Just the 1 blue LED was enough to light up red tracers and the UV wporked well on the green tracers so im sure if it was split 3 blue and 3 UV, it would be just right. Using the existing resistor in the flashlight worked awesome too and I can switch it on and off with the button on the light. I did replace the LED from the flashlight with a UV LED so that I can tell if its on or not, same as before but I did not make it into a hand grip this time. Actually I did but the wiring was crap and after I attached it, it quit working so I decided to solder it instead of using just superglue and hotglue to hold wires in place. I just had to figure out how to take out the internals of the flashlight which was a lot easier than I thought. 6 LED hopup works well.

/https://fbi.cults3d.com/uploaders/13349916/illustration-file/79d046f1-95a5-4d1e-a653-a5de22469e26/20200731_021004.jpg)
