Please click LIKE if you print this... I just want to know
!!! Other designs were cannibalized in creating this design. If one was yours, THANK YOU for making this possible !!!
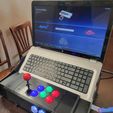
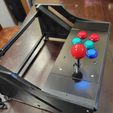
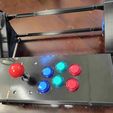
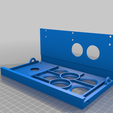
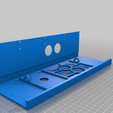
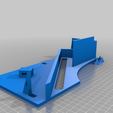
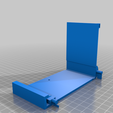
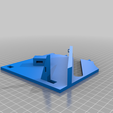
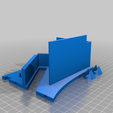
How many of us don't have an old laptop sitting in a closet or in the garage not being used for anything? Not many, right? Well, here is something you can do with that old laptop that you might enjoy if you like retro gaming and are on a tight budget. The unit will accommodate laptops from 14 to 17 inches. It has a built-in mechanism that will automatically center the floating control shelf (just 2 rubber bands). You need only obtain a few items. A list follows...
Arcade button and joystick set for ONE user (eBay or Amazon are good sources). This costs around $30.00 US. Find a source within the continent you live so you don't have to wait an eternity...
2 rubber bands
Super glue (dollar store is a good source)
Adhesive felt pad circles (dollar store again)
Small zip ties (you guessed it, dollar store again)
Some kind of filament... depending on the infill used in printing, it's hard to say how much filament you need. I used 10% infill in my mockup and it didn't use 500 grams total. If you want yours to be sturdier, use a higher infill ratio.
A 3D printer able to print at least 205 by 205 mm. I have files for both that type of printer and ones that print only on larger print beds (350mm+). The "regular" files will print on an Anycubic Mega S or an Ender 3 using the "no bed adhesion" setting.
A USB flash drive with BATOCERA linux installed. See https://batocera.org/download and https://batocera.org/how_to_install for details. Like me, remember that they don't get money for using their stuff. Please be nice to them. I told them you might drop by.
A laptop
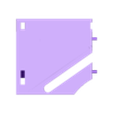
If you print this on a regular size 3D printer, print the files starting with the word "regular" as well as the file "sliding supports". The "sliding supports" will have to be orientated to print corner-to-corner (diagonal) on a regular printer. Each file mentions how many copies to print and if they also need to be printed mirrored (i.e. one for left side and one for the right). If you don't know how to mirror a model in your slicer, please research this first or you risk wasting a bunch of filament.
Follow the same pattern if you print on a larger printer. Make sure to still print the "sliding supports"
You should not need to print with supports. Mine turned out fine without it.
I printed mine using PLA but if you plan on leaving yours in the sun, use ABS or some other higher temperature filament.
If like most people you have a single 3D printer, plan on this print taking several days to complete. Please be patient because you will enjoy the result.
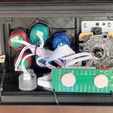
For me, wiring the buttons and joystick was the most challenging. The instructions don't tell you which buttons go to which plugs on the USB encoder board included with the button set. This led to a lot of trial-and-error testing. The best way to test this is to boot BATOCERA, plug in the USB encoder with everything plugged in based on a guess, open a game, test, unplug the USB encoder from the laptop, change which plug the button(s) are plugged in to, plug back in the USB encoder and keep testing the game. Doing this over and over eventually yielded the result I wanted. You may also notice your joystick is mounted upside down. This of course is also a pain. but when all is said and done, you will like the results.
When installing the floating deck, make sure to place 2 large felt circles on the underside of each end. This helps to tighten the tolerances and makes the floating deck float more smoothly.
I was unable to exit games and go back to the menu without pressing the ESCape key on the keyboard. This was the reason I mounted the laptop with the keyboard still usable.
If you have problems or questions, let me know. This is a work in progress so I am learning as I go. I will attempt to address/fix issues as time permits.
Happy gaming!!!
Mike

/https://fbi.cults3d.com/uploaders/24641093/illustration-file/6e00c21f-8a00-4c4b-8ba1-9993e2a7e5c1/20220806_with_17in_laptop.jpg)
