Introduction
Project Goals
I decided to design this temperature tower as when I test new filaments I sometimes only want to test for stringing issues but sometimes all I want to know is what temperature is best for overhangs and there was no temperature tower where I was able to disable the elements I didn't want. I also use an older version of cura making adding temperature changes a pain so I wanted some way to just have it done automatically with no special slicer setting. When I set out to design this tower I wanted it to fulfill the flowing criteria:
* All basic settings are fully customizable
* Different elements of the tower (eg. bridging test, stringing test) are able to be disabled
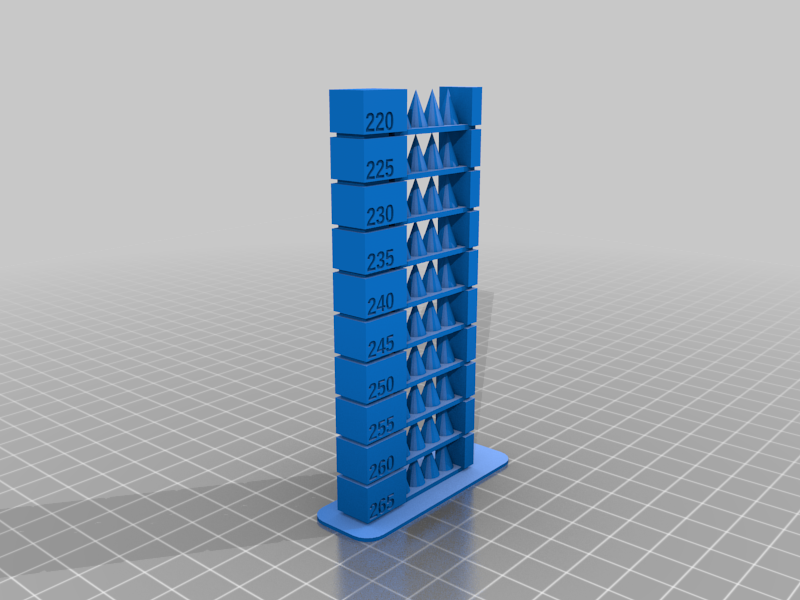
* Each element of the tower can be fully customized (for example adding lots of thin cones to really test for stringing issues)
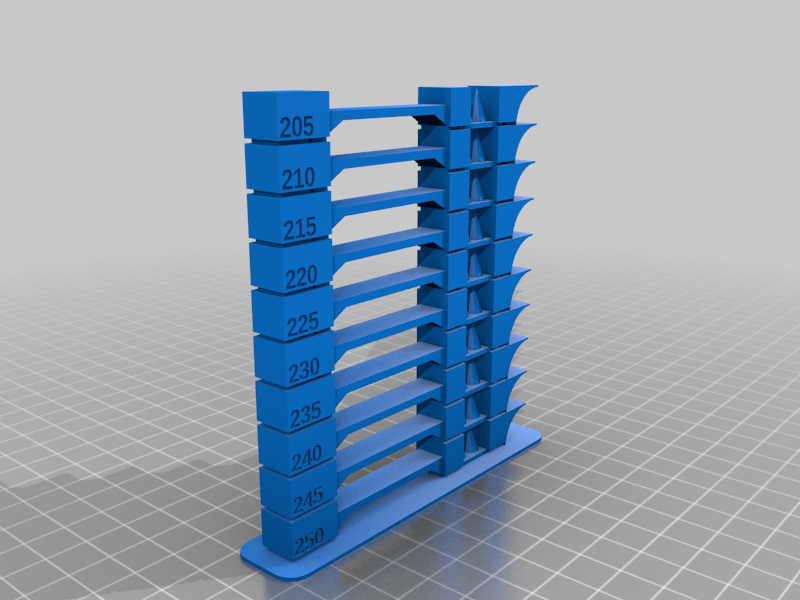
* The overhang test can have set angle "steps" which allows you to more easily see at which angle you start to encounter issues
* The bridge from the bridging test can be made really long as most temperature towers have short bridges which print fine at nearly any temperature on most of my printers
* Be able to make a really small tower that prints fast with only the temperatures and tests that you want to test for
* Look 1good
Summary
I feel I've managed to implement most of these goals so far and I'm eager to see what features/improvements others want so that I can make this the most adaptable, easy to use temperature tower on thingiverse.
The Tower
Introduction And Presets
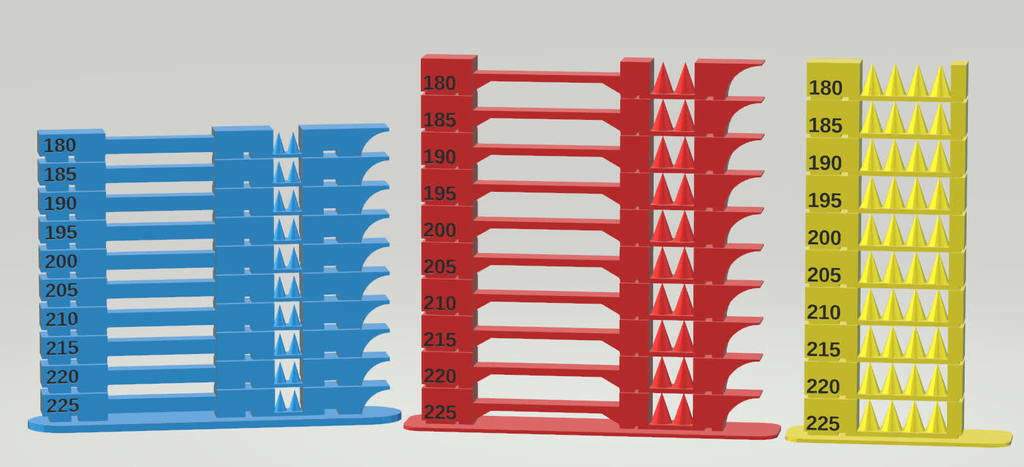
I've designed the tower to be as customizable as possible but I've also included some presets in the download as follows
* Standard - Standard settings in the customizer, about 4 hours print time.
* Compact - Customized settings to speed up print time as much as possible without sacrificing test quality, about 1 hours 45 mins print time
* Stringing - Extensive stringing test with 4 cones to really test for stringing issues, every other test was disabled, about 2 hours 15 mins print time.
* Minimal - Tests for a limited set of temperatures in 10C increments as well as reducing other tests as much as possible which still keeping useful results, good for a quick and nasty test of a new type/brand of filament. About 40 mins print time
I'm happy to add more presets to the temperature change script as well as the download if people find other settings more useful
Basic Settings List
- Levels - The ammount of levels in the tower
- tempIncrement - How many degrees to go up each level
- startTemp - Which temperature to use for the first level
- tempOrder - Whether the temperature goes up or down from the startTemp (Ascending means the temperature goes up by tempIncrement each level)
- baseType - What style of base to put on the tower
- levelDepth - How deep (or thick) the tower will be
- levelHeight - How high each level of the tower will be
- baseMargin - How big the base will be (How many mm margin will be on the base). As the automatic temperature script doesn't currently support rafts increasing this number can give an extra big base if you have trouble with warping
- enableTemperature, enableBridge, enableStringing, enableOverhang - Whether of not to include the given component in the tower
I'm happy to elaborate on any of the settings if anyone has any issues with them
Automatic Temperature Change Script
Basic Instructions
You can find the script in the Automatic_Temperature_Change_script.zip folder from the thingiverse download
I wrote the script so that you don't need to use any specific slicer settings to add temperature changes between each level. Just copy your gcode to the same folder as the exe, run it, select the options you want and when you've confirmed your choice it will automatically open the first gcode in the same folder and write the temperature changes for you.
- Extract Automatic_Temperature_Change.exe from the Automatic_Temperature_Change_script.zip folder from the thingiverse files
- Slice your model in your desired software and save your gcode
- Place the created gcode in the same folder in which you extracted the exe
- Double click to run the exe
- Type the number of the option you wish to use, for the towers included in the download choose "preset" by typing 2 followed by enter
- If you chose preset choose the number from the list which corresponds to your preset. If you chose automatic then it will prompt you to enter some basic variables that you set in the customizer then read you back your settings and ask you to confirm
- The script will now load the first gcode file from folder it's located in and add the temperature changes for you and give and give an output telling you at which heights and what temperature it's adding changes to.
- The script should have now created a new file named TempChange_NameOfOriginalGcode, copy this new gcode file to your sd card, octoprint or otherwise and print away!
Note:
If you get an error stating "Failed To Open File!", this means the script can't fine any gcode file in it's directory; make sure you've sliced your gcode and copied the gcode file to the directory as the script.
If you get an error stating "Failed To Create File" this is because the script can't create the new gcode file, this may be because you don't have permission to create files in that folder.
TL;DR Just Tell me How to Use The Script
- Download the zip from the thingiverse files
- Extract the script from the zip
- Slice your tower and move the gcode to the same folder as the script
- Run the script and follow the prompts
- The script will use the first gcode file in the folder
- Copy the create TempChange_OringalGcodeName.gcode file to whatever printer you want to print on
- Enjoy
Conclusion
I hope you find this tower useful if you have any issues with the customizer, this summary, the script or anything else or just have a suggestion of new features to add please leave a comment and I'll try my best to help.
I've been working on this for the past 2 weeks so if you find it useful or just want to be nice please leave a like, I'd really appreciate it.
And don't forget to drop a make, I'd love to see how others printers and settings work!
Changlog
- V0.1 Updated Script with static linked libraries since most people don't have gcc libraries to link to and I'm not using microsoft visual c++
:format(webp)/https://fbi.cults3d.com/uploaders/21514971/illustration-file/d1f68b18-b0d2-4f50-8495-6b11c715aeef/Capture-compressed.jpg)


/https://preview3d-images.cults3d.com/9khaxo2fsfnx6ryys6lv7wogdhdm)
/https://preview3d-images.cults3d.com/3177lqqmo05g7rrcbmlt6987nh3o)
/https://preview3d-images.cults3d.com/jvkdgfi11qbotrnem42emwz7oq2v)
/https://preview3d-images.cults3d.com/973ilwmx8o1ycu83qqz3e4axtq4q)
/https://preview3d-images.cults3d.com/n9tmzqetg8e3rc4hcomlatzsna8e)
/https://preview3d-images.cults3d.com/yw2u8fd5ps7gvmzmqmpig88f6777)
/https://preview3d-images.cults3d.com/4f8xfcg34ns083k4pswowciohofv)
/https://preview3d-images.cults3d.com/cpy07ff0d419nxd67y3xqfnzgs2f)
/https://preview3d-images.cults3d.com/m4w3swnao7mkgoyck4hys9a2vb5i)


