Skip to content

FlashForge Creator Pro 2 Bed Leveler

Advertising
Advertising
?
Creation quality: 5.0/5 (1 vote)
Evaluation of members on the printability, utility, level of detail, etc.

  • 1k views
  • 9 downloads
  • 2 comments

License
3D design format
Folder details Close
  • CreatorPro2-Leveler.stl

Learn more about the formats

3D model size X 95.5 Γ— Y 25 Γ— Z 16 mm
Publication date 2023-01-04 at 00:41
?
Published to Thingiverse on: 2020-12-17 at 16:49
Design number 992248

3D printer file info

3D model description

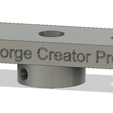
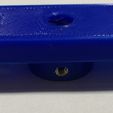
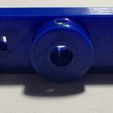
Bed leveler for FlashForge Creator Pro 2 with dial indicator OR caliper. Does not work on Creator Pro. The 2 is a bit wider.

Inspired by https://www.thingiverse.com/thing:1502857

Parts:
M3 heatset inserts: https://www.amazon.com/gp/product/B08BJD3W4X/ref=as_li_ss_tl?ie=UTF8&psc=1&linkCode=sl1&tag=noboysallowed-20&linkId=d31c83e0a88617efc1df7834995600ed&language=en_US
M3x12 or M3x15mm socket head screws: https://www.amazon.com/gp/product/B08BJD3W4X/ref=as_li_ss_tl?ie=UTF8&psc=1&linkCode=sl1&tag=noboysallowed-20&linkId=d31c83e0a88617efc1df7834995600ed&language=en_US
8mmx3mm Neo magnets: https://www.amazon.com/gp/product/B08BJD3W4X/ref=as_li_ss_tl?ie=UTF8&psc=1&linkCode=sl1&tag=noboysallowed-20&linkId=d31c83e0a88617efc1df7834995600ed&language=en_US
Dial Indicator: https://www.amazon.com/gp/product/B08BJD3W4X/ref=as_li_ss_tl?ie=UTF8&psc=1&linkCode=sl1&tag=noboysallowed-20&linkId=d31c83e0a88617efc1df7834995600ed&language=en_US
Caliper: https://www.amazon.com/gp/product/B08BJD3W4X/ref=as_li_ss_tl?ie=UTF8&psc=1&linkCode=sl1&tag=noboysallowed-20&linkId=d31c83e0a88617efc1df7834995600ed&language=en_US

Magnets not required but I put the holes since some like to use them. I use a caliper instead of dial indicator.

How to use with caliper (new method / December 2021):
Go to Level on the machine. Tighten all of the thumb screws. Set first thumb screw adjustment using the card provided by FlashForge.

Hit back arrow. Tap "No" to skip Z calibration.

Manually move the platform down to a comfortable level you can get your hands and arms in there. Make sure you don't go further than your caliper can reach the bed from the rails.

Slide the extruder out of the way.

Press Manual button then Z+ button to lock the platform in place.

Make sure you are measuring the front of the platform closest to the front thumbscrew.

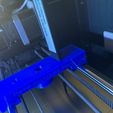
Place leveler on the extruder rails with the caliper slot on the back rail. Place caliper depth gauge through back slot on top of leveler. Ensure the caliper is sitting level and flush on top of leveler.

Slide the caliper gauge down until the depth gauge touches the platform. I do it with a little bit of pressure and not gingerly.

Read that measurement. That is your Z measurement for leveling the rest of the bed.

Move to the left thumbscrew, measure that and adjust until your calipers reads the same Z measurement as the front. Move the right and repeat. Move the caliper around the bed and it should be real close to the same all around.

Done.

How to use with caliper (old method):

Tighten all of the thumb screws and go through the normal level process for the front thumbscrew only. Once the front is adjusted, tap the back arrow. Skip Z calibration.

Place leveler on extruder rails Orientation does not matter.

Place caliper depth gauge through back slot on top of leveler. Ensure the caliper is sitting level and flush on top of leveler. It's best to hold this via the top jaw of the caliper.

Slide the caliper gauge down until the depth gauge touches the platform. I do it with a little bit of pressure and not gingerly.

Take measurement a few times and find a common average. Keep that measurement.

Go to "manual" mode on your Creator Pro 2. Quick press the Z+ button one time. This locks the platform in place. Take note of the Z number. Add the Z number to your measurement from above.

Example:
Measurement: 34.4 mm
Z: 0.28
34.4 + 0.28 = 36.48
36.48 would be the measurement you use to level the rest of the plate. If your caliper only reads to 0.0 and not 0.00, simply round up or down. Getting the Z closest to your caliper's accuracy is best so a 1.01 is better than a 0.28 if your caliper reads 0.0.

By hand slide the right extruder back to the home position out of the way. The extruder rails should move forward and back freely.

Move extruder rails and leveler to different parts of the plate and take measurements. You can use either caliper slot for this. Unscrew the thumbscrews until you hit your platform depth.

3D printing settings

-

Advertising


Issue with this design? Report a problem.

Would you like to support Cults?

You like Cults and you want to help us continue the adventure independently? Please note that we are a small team of 3 people, therefore it is very simple to support us to maintain the activity and create future developments. Here are 4 solutions accessible to all:

  • ADVERTISING: Disable your banner blocker (AdBlock, …) and click on our banner ads.

  • AFFILIATION: Make your purchases online by clicking on our affiliate links here Amazon.

  • DONATE: If you want, you can make a donation via Ko-Fi πŸ’œ.

  • WORD OF MOUTH: Invite your friends to come, discover the platform and the magnificent 3D files shared by the community!


Sharing and downloading on Cults3D guarantees that designs remain in makers community hands! And not in the hands of the 3D printing or software giants who own the competing platforms and exploit the designs for their own commercial interests.

Cults3D is an independent, self-financed site that is not accountable to any investor or brand. Almost all of the site's revenues are paid back to the platform's makers. The content published on the site serves only the interests of its authors and not those of 3D printer brands who also wish to control the 3D modeling market.

100% secure payment by credit card, PayPal, Apple Pay, Google Pay, etc.
View all payment options.