Skip to content

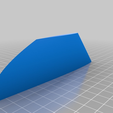
Twintip symetric fins, 38.1mm or (1.5 inch for imperial USA) hole spacing.

Advertising
Advertising
?
Creation quality: 5.0/5 (1 vote)
Evaluation of members on the printability, utility, level of detail, etc.

  • 454 views
  • 5 downloads

License
3D design format
Folder details Close
  • twintip1_fluidity.stl
  • twintipmould1_fluidity.stl

Learn more about the formats

Publication date 2023-01-05 at 06:54
?
Published to Thingiverse on: 2015-03-22 at 07:21
Design number 994436

3D printer file info

3D model description

Built my first ever kiteboard and the other fins on here weren't quite to my taste. This one is mathematically designed and with a round leading edge. Google the "Coander effect" if you want to see why I didn't make the leading edge sharp. :-)

Dimensions:137.2 long x 8.98 thick x 40mm deep.

I'm only just learning kiteboarding, lots of on line research and I've windsurfed lots but I haven't rigged up and hit the water with a kite yet.

See the instructions too, it's a big ask to 3D print plastic durable enough for stresses of real life use on a board like this!

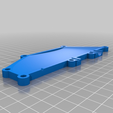
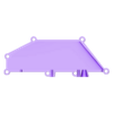
Second part is a mould. Mirror image to get second half of mould!

3D printing settings

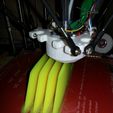
If you can, print in nylon. I have (currently) an open delta printer and my dx.com nylon warps like crazy. Taulman bridge, low warp ABS or T-glass would probably work better. I'm going to try mine with some PLA first. "Collect" or "like" as I may make a mould design too and add to the files.

Holes are designed for 3mm diameter, 25 mm deep. drill to proper 3mm thickness and tap with a "bottom tap" and some lube. Don't tap with a fast electric drill or you'll do more melting than threading! Back it off and clear it out of the hole a few times before the end as well, too much swarf will spoil the thread.

To use the mould, print normally and then mirror image around x or y axis and then rotate around the same axis to place flat again. Ideally print in something like ninjaflex or harder and paint with PVA release agent. Place together (you may want to use holes to make a couple of wood hole templates) and clamp assembly together. If you've printed in something hard, tape the attachment holes and insert some fin screws ready to pour around.

Fill the funnel with a medium polyurethane 2-part mix for a fast set, mix in some chopped fibres for a stronger piece. Low viscosity resins will help wetting out. Unscrew the screws after the fin has had plenty of time to set.

Here's an example polyurethane, note the short pot life:

http://www.fibreglassshop.co.nz/collections/polyurethane-plastics/products/smooth-cast-300-polyurethane-plastic

Let me know how you go!

Advertising


Issue with this design? Report a problem.

Would you like to support Cults?

You like Cults and you want to help us continue the adventure independently? Please note that we are a small team of 3 people, therefore it is very simple to support us to maintain the activity and create future developments. Here are 4 solutions accessible to all:

  • ADVERTISING: Disable your banner blocker (AdBlock, …) and click on our banner ads.

  • AFFILIATION: Make your purchases online by clicking on our affiliate links here Amazon.

  • DONATE: If you want, you can make a donation via Ko-Fi πŸ’œ.

  • WORD OF MOUTH: Invite your friends to come, discover the platform and the magnificent 3D files shared by the community!


Sharing and downloading on Cults3D guarantees that designs remain in makers community hands! And not in the hands of the 3D printing or software giants who own the competing platforms and exploit the designs for their own commercial interests.

Cults3D is an independent, self-financed site that is not accountable to any investor or brand. Almost all of the site's revenues are paid back to the platform's makers. The content published on the site serves only the interests of its authors and not those of 3D printer brands who also wish to control the 3D modeling market.

100% secure payment by credit card, PayPal, Apple Pay, Google Pay, etc.
View all payment options.