Skip to content

M12 Mount for RPi Cam v2 (mod)

Advertising
Advertising
?
Creation quality: 5.0/5 (1 vote)
Evaluation of members on the printability, utility, level of detail, etc.

  • 678 views
  • 1 like
  • 10 downloads

License
3D design format
Folder details Close
  • M12-Case-Combo.scad
  • M12-Case-Combo.stl
  • M12Mount_JB1.scad
  • M12Mount_JB1.stl

Learn more about the formats

Publication date 2023-01-05 at 09:42
?
Published to Thingiverse on: 2019-01-10 at 19:47
Design number 994643

3D printer file info

3D model description

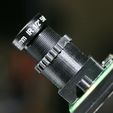
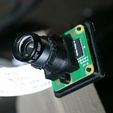
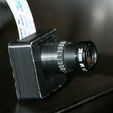
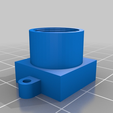
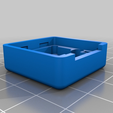
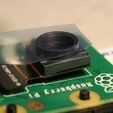
This is a tweak to vaqueram's M12 mount to allow the use of longer M12 lenses that need to sit closer to the sensor. On this one, nothing prevents you from screwing the lens right down against the sensor block (so be careful). As with any M12 mount, you do have to remove the tiny factory-stock lens from the sensor block first. The Raspberry Pi camera board I got from Amazon came with a round white plastic tool meant for refocusing the lens, but it also works for just removing the lens entirely. If you don't have one of those, there are other tools on Thingiverse that work, for example https://www.thingiverse.com/thing:1574661

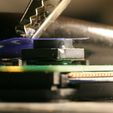
Note also: the current v2.1 Raspberry Pi camera comes with the sensor block not firmly attached to the PCB, but propped up on an adhesive-backed compliant foam cushion. It therefore sits at some variable angle which is not anything like parallel to the PCB. I had to remove this cushion/pad with tweezers, substitute a drop of epoxy, and carefully reposition the sensor block parallel to the PCB while the epoxy cured. If you do not do this, your sensor will not be parallel to the lens (scheimpflug condition), and you will likely not be able to get the whole frame in focus no matter how you adjust the lens. For this procedure I first mounted the camera PCB on this backplate https://www.thingiverse.com/thing:2307685 so the top surface would be level.

Having done that, the lens holder works as expected. I printed with a UM2 at 0.1 mm layers and it is impressive to me that the 0.5 mm pitch threads do work. With this printed holder (same as the real molded or machined parts) you do have to be very careful when first putting in the lens, so it doesn't get misaligned and cross-threaded.

I include an example image using a f=25mm M12 lens, from a distance of about 18 feet. There is a yellow spot in the center, due to the Pi's built-in lens shading algorithm that is tuned for the stock lens and not this one.

UPDATE: Added a modified version of the original front part of the R-Pi camera case with a square hole, so it will fit over this M12 mount. It would be logical to just combine the two into one solid front case + M12 mount, but there might be printing difficulties.

Note: if you want to use or modify the included OpenSCAD file, you will also need to obtain the screw thread library "polyScrewThread_r1.scad" from https://www.thingiverse.com/thing:8796

3D printing settings

-

Tags

Advertising


Issue with this design? Report a problem.

Would you like to support Cults?

You like Cults and you want to help us continue the adventure independently? Please note that we are a small team of 3 people, therefore it is very simple to support us to maintain the activity and create future developments. Here are 4 solutions accessible to all:

  • ADVERTISING: Disable your banner blocker (AdBlock, …) and click on our banner ads.

  • AFFILIATION: Make your purchases online by clicking on our affiliate links here Amazon.

  • DONATE: If you want, you can make a donation via Ko-Fi πŸ’œ.

  • WORD OF MOUTH: Invite your friends to come, discover the platform and the magnificent 3D files shared by the community!


Sharing and downloading on Cults3D guarantees that designs remain in makers community hands! And not in the hands of the 3D printing or software giants who own the competing platforms and exploit the designs for their own commercial interests.

Cults3D is an independent, self-financed site that is not accountable to any investor or brand. Almost all of the site's revenues are paid back to the platform's makers. The content published on the site serves only the interests of its authors and not those of 3D printer brands who also wish to control the 3D modeling market.

100% secure payment by credit card, PayPal, Apple Pay, Google Pay, etc.
View all payment options.