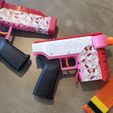
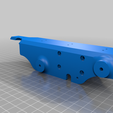
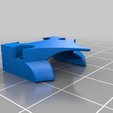
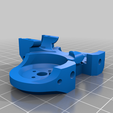
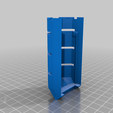
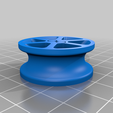
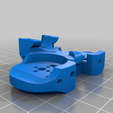
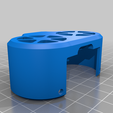
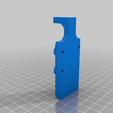
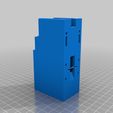
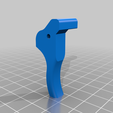
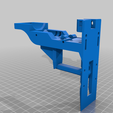
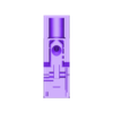
This is an original Foam Dart Blaster called "Velcro"
Features:
- Brushless flywheel motors
- Solenoid pusher
- Talon Magwell
- Select fire switch
- Pistol format
- Battery is in grip
Left handed people
Mirror the select fire switch, rear frame, and cover. The rest should be symetrical.
What you need:
- Printed Parts
- 2 x Emax RS 1408 brushless motors - 3600kv OR Airblade AB 1606 brushless motors - 3600kv
- 1 x Magpul MOE AR15 grip (don't use an airsoft clone)
- 1 x FJ-Z05 solenoid (2.5a, not 400ma)
- 1 x stiff pen spring
- 2 x 2mm pin by ~20mm (one for trigger, one for mag release)
- 1 x DRS4010 rotary switch
- 2.8mm pins with flat heads (I just cut down some nails)
- M3 / M3.5 x 8mm screws for solenoid (get what matches solenoid)
- 2 x M3 x 50mm sockethead bolts (These go from the rear frame, through the mag, and into the motor cage)
- 4 x M3 x 65mm sockethead bolts (These go from the rear frame, through the mag, and into the motor cage)
- 2 x M3 x 8mm sockethead bolts (These go from the motor cage support into the motor cage)
- 1 x M3 x 10mm sockethead bolt (holds the microswitch down)
- 5 x ebay heated thread inserts (get a pack of various sizes - but I tend to use 6mm and 4mm for the motor cage)
- A selection of M2.6 self-tapping screws in 8mm
- 15a microswitch
- Wire
- XT30 connectors
- Optionally 5mm IR LED with photo diode in matching wavelength + 100 ohm resistor
- Optionally Magnetic mounting system
- 3S or 4S LiPO (3s - Bolt 500 with XT30; 4s - BetaFPV 450 with XT30)
Electronics:
This blaster is made to be compatible with Narfduino Brushless Compleat. However with careful component selection, you can also use blheli_32 and a small microcontroller + mosfet + buck converter (or just buy a Narfduino). Source code is included for Narfduino Brushless Compleat/Compact.
Solenoid Modification
The blaster will operate just fine with the solenoid as it comes, but you can shave parts of the solenoid to get a couple of extra mm of throw. If you do this, use the "Pusher Extd" model.
To modify the solenoid:
1. Remove plunger. Remove about 3mm of the black base and sand flush with the metal slug. Sand the black base to make it slightly thinner if you want to add an additional spring (I used a stock 35mm solenoid spring - they're shit normally)
2. Use a knife to trim the back of the solenoid body where the plunger's guide extends past the body.
3. Carefully open the solenoid body by prying apart the shell and popping out the front plate. Remove the bushing from the solenoid core. Drill about 6-10mm from the inside of the bushing out. Then trim about 3mm of the rear of the bushing to make it shorter. Ensure it's flat.
4. Reinstall is reverse of disassembly. You should now have a few extra mm of throw
Build notes
- Use the 2mm pin to hold the trigger in place. Trigger should swivel freely on the pin
- Run the main power harness through the blaster body on the left. Once you are happy with it, install the switch
- If you print the grip, make sure there is enough room for the LiPO and you have a mounting hole as well as the wiring hole
- I used 18awg main battery wires, and 20awg for the solenoid.
- To make the switch fit, cut off the NC terminal, insulate it, and fold the NO terminal across the top
- You will need to tap the threads for the magnetic holster mount
- The mag spring may need the top u-bend to be squished a bit
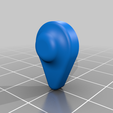
- DRS4010 is a 10 way binary switch. On the back, you'll notice a common, a 4 pins labelled 1, 2, 4, 8. Clip 4 and 8. Install with 1 & 2 facing the front of the blaster. Have the switch selected on "1" and push the nub onto the switch facing down. The switch should press-fit into the frame body, and the cover will hold it in place.
- Use some CA glue to hold the pusher in place. Even though a tight press fit, under full auto, it may come loose.
Licensing
- Non-commercial license is in effect. This license flows to derivative works.
- You are free to remix / modify the blaster as you see fit. Wanna make a brushed version? OK. Wanna make a springer version? Cool. Wanna make it take FDL electronics? Fine.
- If you post a remix, please link back to the original
- Commercial use is allowed with the purchase of a Narfduino board at a ratio of one board = one commercial build
Attributions
- Ansuzalgiz: Hummingbird for the AR15 grip concepts
- Woody: for mag concepts
- PFDL: for the barrel attachment concept
Demo
https://youtu.be/ltP_i0phjuU

/https://fbi.cults3d.com/uploaders/26507194/illustration-file/3286e8ef-c85b-4ff7-aafe-589bebb4ac31/Thingiverse.jpg)
