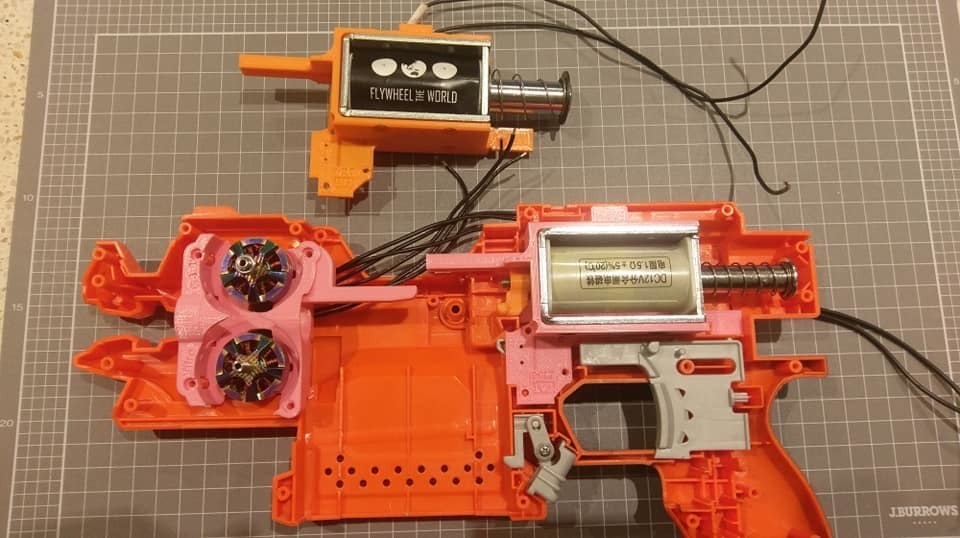
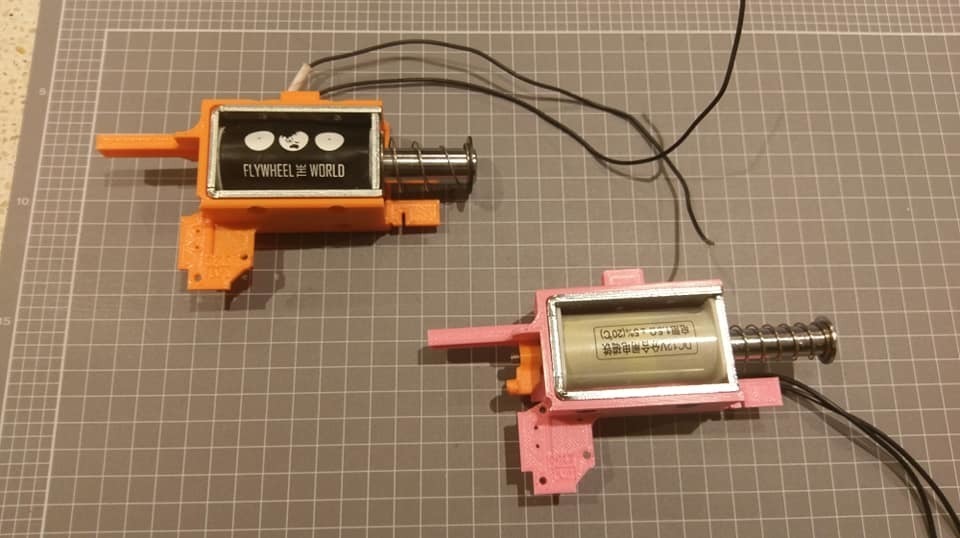
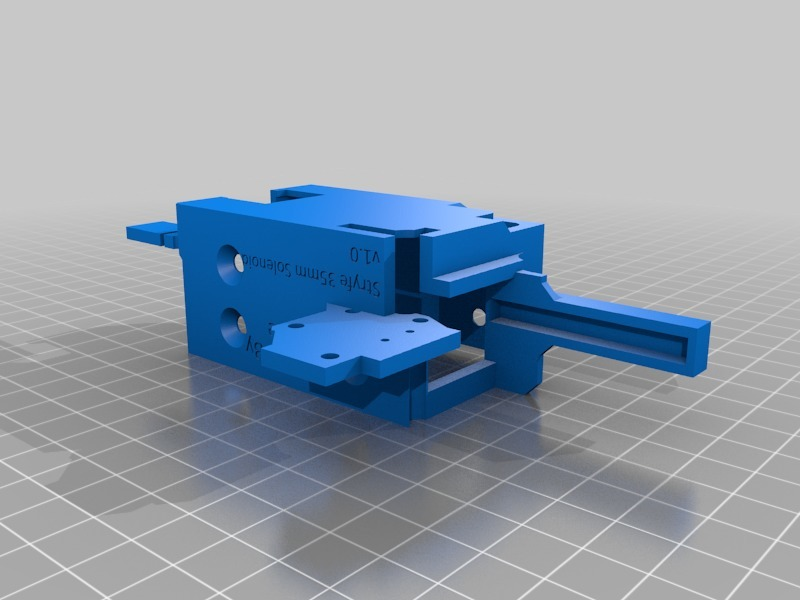
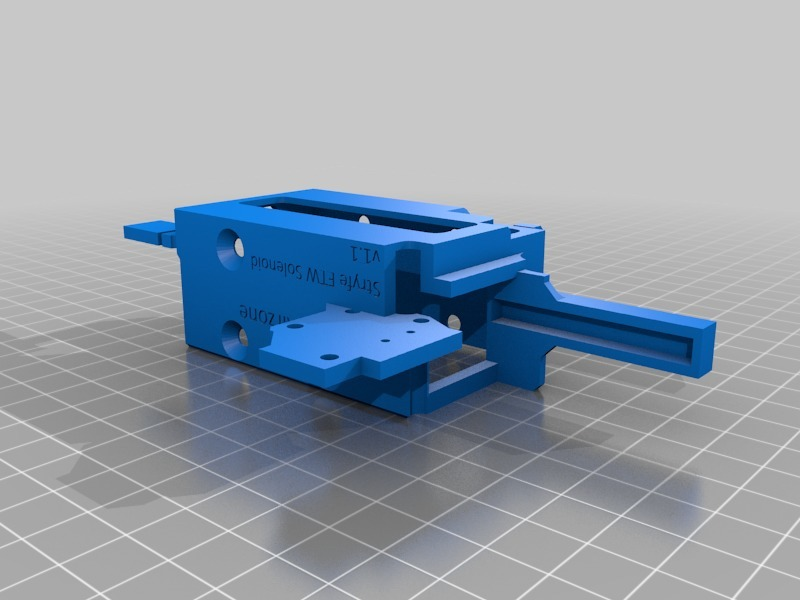
This is a solenoid pusher assembly for the Nerf Stryfe.
This cage will replace the stock mag switch lock cover, and will allow the use of the stock mag lock switch if you want to have an input into an Arduino for an ammo counter reset. You can also install a tiny microswitch on top to act as a 2-stage trigger switch.
One cage assembly is compatible with the Flywheel The World solenoid (google them to get one).
The other cage assembly is compatible with the generic 35mm solenoid that is out there on aliexpress/ebay/etc. This has also been tested to work fine.
Currently the pusher nub is the same for each cage.
Compatibility with other solenoids is not guaranteed or implied.
WARNING
This is a one-way deal. If you start to install this, you're not going back. Make sure you have all the necessary expertise, tooling, and parts ready to go.
You will lose a good portion of your battery bay, so I would suggest using a stock mount battery.
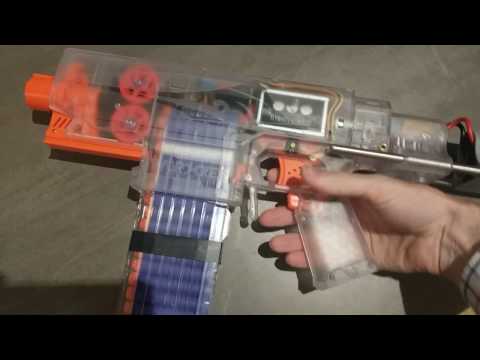
Video of Solenoid Blaster in Action
https://youtu.be/pT_aiZbrsOY
(yeah, there's some cool recoil) This is a Swordfish, but it's much the same thing.
Print Instructions
The Solenoid Cage should be printed using a strong infill setting. I actually did mine at 100% with 0.1mm layer height (to ensure dimensional accuracy). The overhangs are critical, so I made sure I had a high % support, with a roof. You absolutely must get the overhangs flat.
The pusher nub can be printed at 100% infill using a strong filament. I use Polymaker Polymax. 0.1mm layer height, because there is an internal thread.
The template can be printed using whatever setting you want.
Special considerations for the FTW solenoid
By and large, this is a great solenoid, but with the following caveats:
1) Do not use on 4s. Although the coils can handle it fine, the landing pad cannot and you will mushroom the internal pusher bar over time. Within about 1000 shots, the solenoid will jam. This can be repaired with a file.
2) The spring retention circlip is pretty big. Please pay extra attention when cleaning out the solenoid's travel area to ensure it's not catching.
Special considerations for the 35mm solenoid
These come with a brass and steel nut on the end. You'll need to remove these. They are torqued together, so please use a spanner and not pliers. Right tools for the right job people.. :)
The return spring on these is garbage. You'll need to replace it with a spring that is stronger, but not too strong. I'm sorry, these's no easy answer here. I found a source of 0.8mm x 45mm springs that fit well.
Please thread the nub on all the way. It's fine that there will be some thread out the front of the nub. You'll also need to make more mods to the rear of the blaster, and lose the screw post back there.
Also due to the lower build quality, you may have to jiggle with the cage to get it to fit. I have found that they are all a little different.
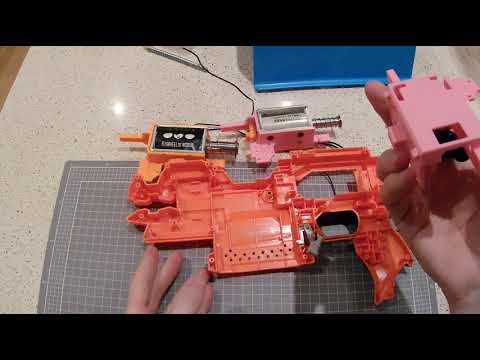
Install Instructions
https://youtu.be/i3_B2BE2948
(it cuts out in a few places, but nothing all that critical)
Wiring Instructions
Well, this is largely up to you. I have seen solenoids installed as directly wired semi-auto setups, but I prefer an Arduino control.
I have included my own wiring diagram that gives Bluetooth capability using a HC-05 BT module, and an Arduino Pro Micro. My firmware in included too, which gives all the pin assignments. This is set up for a brushless system (i.e. the Ultrasonic system) and will not operate with a set of DC motors.
Help??
Come check us out over at Making Stuff Awesome on Facebook.
License
Absolutely no commercial use of these models, firmware, circuit diagrams, etc are allowed. Blaster commissions featuring these models are not allowed unless authorized by myself in advance.
If you do not have access to a 3d printer, please contact myself, Flywheel The World, or you can use 3dHubs (or similar print bureau).
If you have anything else in mind, please contact me.
Change Log
16 Jun 19 - Initial Release.
17 Jun 19 - FTW Solenoid improved screw location (0.2mm adjustments - so you will probably not need to reprint)
:format(webp)/https://fbi.cults3d.com/uploaders/26507194/illustration-file/0ab1dfd3-89d2-427c-a88c-5d36068b58d7/Solenoid_1.jpg)


/https://preview3d-images.cults3d.com/a4ubxzrex6g6xcezn61jk21vq9wv)
/https://preview3d-images.cults3d.com/duijcvd82b8ss906rnuqoana94fh)
/https://preview3d-images.cults3d.com/rovexarzd9y4ij1agw5hm2y4x7zr)


:format(webp)/https://fbi.cults3d.com/uploaders/26507194/illustration-file/c6414a6f-2739-4ffc-a623-b6a39fbc3478/218457527_350225949944040_8658277798196041907_n.jpg)
:format(webp)/https://fbi.cults3d.com/uploaders/26507194/illustration-file/3286e8ef-c85b-4ff7-aafe-589bebb4ac31/Thingiverse.jpg)
:format(webp)/https://fbi.cults3d.com/uploaders/26507194/illustration-file/e4acb41b-4879-4a39-af55-afd9bc21c1cd/86183357_492827491415507_2161838343531266048_n.jpg)
:format(webp)/https://fbi.cults3d.com/uploaders/26507194/illustration-file/db5adc57-12a9-4497-a9b7-e6c9c8a29585/HPA_FDL_v73.png)