Skip to content

NanoDrak_RamAir_Full Kit_V3

Advertising
Advertising
?
Creation quality: 5.0/5 (1 vote)
Evaluation of members on the printability, utility, level of detail, etc.

  • 805 views
  • 8 downloads

License
3D design format
STL Folder details Close
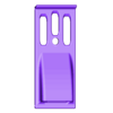
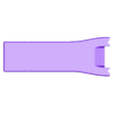
  • NanoDrak_RamAir_Kit_BatteryBay-v3.stl
  • NanoDrak_RamAir_Kit_Bulkhead-v3.stl
  • NanoDrak_RamAir_Kit_ElectronicBay-v3.stl
  • NanoDrak_RamAir_Kit_ElectronicBay2-v3.stl
  • NanoDrak_RamAir_Kit_SideBay-v3.stl

Learn more about the formats

Publication date 2023-01-12 at 13:37
Design number 1006325

3D printer file info

3D model description

This was designed with a new build in mind, although modifications can be made to an existing build to install the new bulkhead. The battery and airflow covers are dependent on the bulkhead being installed. The newly printed bulkhead is threaded to accept the thumb screws included in every Nano Drak kit. Two additional screws will be needed and can be printed if none are available to you.

-New build- cut out the existing foam block from the center of the bay to the floor of the battery tray. if you cut all the way thru the bottom this will not work for you so do not do that ( pic included in post)

Once the foam is cut out properly then add the newly printed bulkhead in with a good amount of goop or welders adhesive on the sides and bottom of the print. Scuffing up the sides and bottom with sandpaper wouldn't hurt to ensure a good texture for the glue to adhere to.

leave the print to set up overnight

When you glue in the main channel spars with hot glue for ease of removal if needed later, make sure to get a good amount all over the underside of the print and in the channel to ensure a good locked-in bulkhead.

lastly, install the channel caps provided in the kit as you normally would for this kit once all the glue is set up you should have a pretty solid bulkhead installed

-Existing build- with a very sharp razor or knife cut very carefully around the existing foam bulkhead while not harming the main channel spar inside the foam channel.

use an Exact-O knife to remove the remaining foam from around the main spar.

get a good amount of hot glue on the inside of the main channel of the newly printed bulkhead. you want the glue inside the channel to encase the main spar a good amount.
Use goop to seal and lock in the outer perimeter of the bulkhead

Once the glue has set up you should be good to go with installing the new covers provided in this download


Holes in the battery bay cover and sma side bays will accept a 1.5mm control rod to pass thru and bent on both sides at a 90 degree and poked into foam dipped in goop to ensure bays are locked in the sma covers will be hinged with this same technique. use glue on the underside of the battery bay and goop to seal in the top, do not glue the sma down only use glue on the rods poked in foam to ensure a good hinge

sma side bays will require a 256 rod in the back side hole and motor magnets embedded in the foam to ensure the bay stays closed.

Install Vids Here:
https://www.youtube.com/watch?v=NkjqgB9icn8
https://www.youtube.com/watch?v=lQeaaCqVfKs

Advertising


Issue with this design? Report a problem.

Would you like to support Cults?

You like Cults and you want to help us continue the adventure independently? Please note that we are a small team of 3 people, therefore it is very simple to support us to maintain the activity and create future developments. Here are 4 solutions accessible to all:

  • ADVERTISING: Disable your banner blocker (AdBlock, …) and click on our banner ads.

  • AFFILIATION: Make your purchases online by clicking on our affiliate links here Amazon.

  • DONATE: If you want, you can make a donation via Ko-Fi πŸ’œ.

  • WORD OF MOUTH: Invite your friends to come, discover the platform and the magnificent 3D files shared by the community!


Sharing and downloading on Cults3D guarantees that designs remain in makers community hands! And not in the hands of the 3D printing or software giants who own the competing platforms and exploit the designs for their own commercial interests.

Cults3D is an independent, self-financed site that is not accountable to any investor or brand. Almost all of the site's revenues are paid back to the platform's makers. The content published on the site serves only the interests of its authors and not those of 3D printer brands who also wish to control the 3D modeling market.

100% secure payment by credit card, PayPal, Apple Pay, Google Pay, etc.
View all payment options.