Skip to content

Photon S RC 203 filter duct

Advertising
Advertising
?
Creation quality: 0.0/5 (0 votes)
Evaluation of members on the printability, utility, level of detail, etc.

  • 355 views
  • 1 download

License
3D design format
Folder details Close
  • Photon_S_RC_203_filter_duct.step
  • Photon_S_RC_203_filter_duct.stl

Learn more about the formats

Publication date 2023-01-14 at 12:23
?
Published to Thingiverse on: 2019-12-06 at 20:27
Design number 1009482

3D printer file info

3D model description

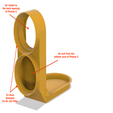
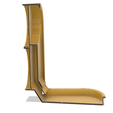
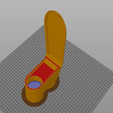
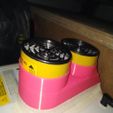
Inspired by the work of richardmike4 https://www.thingiverse.com/thing:3750679, I also want to minimize some resin odor when using the Anycubic Photon S. I do not have access to a similar filter used by richardmike4 so I make use of what is available I can find, RC 203 filter. The printed air duct can be fastened with double sided tape or you can just tape it on the bottom of the Photon S aligning with the fan exhaust hole. No screws needed and no modification on the printer that changes parts permanently. This is easy to print, no support needed, just cut the 0.2mm bridge support on where you put the filter to make the hole. I choose the RC 203 filter that is used for spraying paint as the rest are just for dusts.

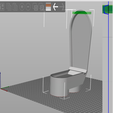
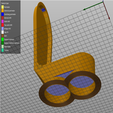
For the top most to print well with less overhang, lower the layer height at the upper most part. Sample photo is shown using the Prusa slicer applying variable layer height to minimize overhang and make a successful print out of it. A step file is also included for easy modification.

You can also put an extension air duct at the lower filter opening, maybe with another fan to vent outside the house the filtered air coming from the bottom of the Photon S. The upper filter opening is for the air going in the Photon S intake vent at the lower back.

Filter used on this project is the RC 203. https://blueeagle-safety.com/Shop/respirators-rc203/

Update:

Dec 29, 2019 - Tested to work without issues of smell of resin in the living room area. I did not have a vent hose, just the two RC 203 filters working with the filter duct as design. Updated step file and screenshots. It is recommended to fill-in the gap between the door and the box of Photon S, I use masking tape around the edge. This helps ensure no fumes coming out from those gap around the door edges. Resin fumes is produced and vent out by the fan at the bottom during printing as the resin is cured by UV light. After printing, no fumes is produced and fans are off.

3D printing settings

-

Advertising


Page translated by automatic translation. See the original version.
Issue with this design? Report a problem.

Would you like to support Cults?

You like Cults and you want to help us continue the adventure independently? Please note that we are a small team of 3 people, therefore it is very simple to support us to maintain the activity and create future developments. Here are 4 solutions accessible to all:

  • ADVERTISING: Disable your banner blocker (AdBlock, …) and click on our banner ads.

  • AFFILIATION: Make your purchases online by clicking on our affiliate links here Amazon.

  • DONATE: If you want, you can make a donation via Ko-Fi πŸ’œ.

  • WORD OF MOUTH: Invite your friends to come, discover the platform and the magnificent 3D files shared by the community!


Sharing and downloading on Cults3D guarantees that designs remain in makers community hands! And not in the hands of the 3D printing or software giants who own the competing platforms and exploit the designs for their own commercial interests.

Cults3D is an independent, self-financed site that is not accountable to any investor or brand. Almost all of the site's revenues are paid back to the platform's makers. The content published on the site serves only the interests of its authors and not those of 3D printer brands who also wish to control the 3D modeling market.

100% secure payment by credit card, PayPal, Apple Pay, Google Pay, etc.
View all payment options.