Skip to content

Headphone Rest - v3 (for Notebooks/Laptops)

Advertising
Advertising
?
Creation quality: 0.0/5 (0 votes)
Evaluation of members on the printability, utility, level of detail, etc.

  • 838 views
  • 1 like
  • 1 download

License
3D design format
STL Folder details Close
  • hpr_basis_v3.stl
  • hpr_slider_v3.stl

Learn more about the formats

Publication date 2023-01-22 at 11:27
Design number 1022374

3D printer file info

3D model description

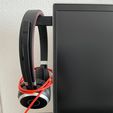
The goal of my design is to create some kind of rest or hook for a headphone / headset while you are working on your notebook/laptop.

My headphone was always laying arround and I wanted a cleaner desk.

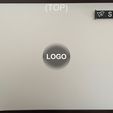
The headphone rest have to be placed / double tape glued onto the backcover of the notebook/laptop.

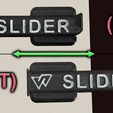
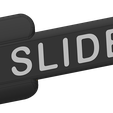
The headphone rest can be slided out to hang on your headset to the hook and if you put your notebook/laptop in a bag for travel etc.. you can just simply slide the rest in.

The example pictures will show you where to place it and how to use it :)

If you like my design, i would appreciate it if you buy it to support me for my time to create it and make future designs possible.

Note: Double side tape - i used a 0.8mm thin double sided tape with a width of 30mm (which fits perfect for the design), you may use a 3M or a similar tape from amazon, aliexpress, local store etc.

Befor you glue it onto the notebook/laptop - make sure both have temperatures > 20Β°C and the spot where you tape it onto the notebook/laptop is free of dirt, dry and cleaned (like with isopropylalcohol ...) to get a nice bond. (Make sure you do not damage the backcover by the material used).

If you like the design, you can fill out the offset surfaces with a white/colored waterproof pencil to give it a highlight.

3D printing settings

Print material: PETG (recommended)

Nozzle size: 0.4mm

Layer height: 0.16mm or 0.12mm works perfect. (maybe 0.2mm works too, but i have not tested it since the parts are small)

Print duration: 1 set (base + slider) was 42min on my Prusa MINI+

Postprocessing:

  • Place the double sided tape on the back of the base

  • Put a very very small dip of grease / oil onto the "inner rails" of the base

  • Connect the slider into the base with a little force to "snap in"

  • Try to move the slider from side to side, if it runs smoothly all good, if not, maybe a little sanding/mechanical smoothing is needed.

Advertising


Page translated by automatic translation. See the original version.
Issue with this design? Report a problem.

Would you like to support Cults?

You like Cults and you want to help us continue the adventure independently? Please note that we are a small team of 3 people, therefore it is very simple to support us to maintain the activity and create future developments. Here are 4 solutions accessible to all:

  • ADVERTISING: Disable your banner blocker (AdBlock, …) and click on our banner ads.

  • AFFILIATION: Make your purchases online by clicking on our affiliate links here Amazon.

  • DONATE: If you want, you can make a donation via Ko-Fi πŸ’œ.

  • WORD OF MOUTH: Invite your friends to come, discover the platform and the magnificent 3D files shared by the community!


Sharing and downloading on Cults3D guarantees that designs remain in makers community hands! And not in the hands of the 3D printing or software giants who own the competing platforms and exploit the designs for their own commercial interests.

Cults3D is an independent, self-financed site that is not accountable to any investor or brand. Almost all of the site's revenues are paid back to the platform's makers. The content published on the site serves only the interests of its authors and not those of 3D printer brands who also wish to control the 3D modeling market.

100% secure payment by credit card, PayPal, Apple Pay, Google Pay, etc.
View all payment options.