Skip to content

Keychain wrench and bottle opener

Advertising
Advertising
?
Creation quality: 5.0/5 (1 vote)
Evaluation of members on the printability, utility, level of detail, etc.

  • 1.5k views
  • 1 like
  • 5 downloads

License
3D design format
STL Folder details Close
  • Cheie_cu_cheie_aruncata_4.stl
  • Cheie_cu_cheie_aruncata_M3.stl

Learn more about the formats

Publication date 2023-01-27 at 18:02
Design number 1032474

3D printer file info

3D model description

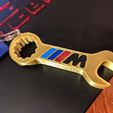
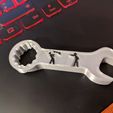
There are two variants. One with the M logo, one with two mechanics with a wrench flying. I will add more car logos if this design sells more than 5 times and you can download it for free if you get this one, you will be notified by Cults :)

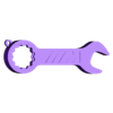
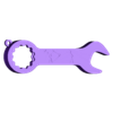
Are you a car guy/girl? Sure you are! Are you a DIY guy/girl? As you know wrench is always needed. But what about one that can open bottles? Not only that but you get to build it the right way, the mechanic way, the DIY way!

You need one bolt/screw(M4 – 8 mm length), one nut(M4), and one washer(I used a 6.4mm that was 1.6mm thick, the thicker the better because this is the part that will do the cap opening)

Did I mention it’s s a keychain?

You CAN print this model and sell the print.
You CAN NOT sell the STL file.

3D printing settings

Go 100% infill for strength, at least for the part that is used to open bottles.

  • I did it with no support although you do have 2 spots where the nut and washer would go where it will be printing mid-air. The spots are small enough and I had no problem here, only needed some cleaning afterward. You can add supports if you want but they may be tricky to get out.
  • Layer height 0,1 - 0,2mm
  • Slow first layer 15mm/s
  • Some top skin layers for a nice finish and to hide the infill 4, 5 layers
  • Prints speed (ex: 20 - 50 mm/s or more, you know your printer)
  • optional: Skin overlap percentage (60%) / Combing mode - Not in skin
  • The variant with the guys throwing the wrench is delicate. You should do the print with only one wall so it won’t get messy. Nonetheless, it may require cleaning and it is delicate, it’s a small design.

Postprocessing. Add the nut inside, add the washer in the lower part and join them together with the screw, and nut.
I printed it on my standard creality cr6 with a 4mm nozzle.

Advertising


Issue with this design? Report a problem.

Would you like to support Cults?

You like Cults and you want to help us continue the adventure independently? Please note that we are a small team of 3 people, therefore it is very simple to support us to maintain the activity and create future developments. Here are 4 solutions accessible to all:

  • ADVERTISING: Disable your banner blocker (AdBlock, …) and click on our banner ads.

  • AFFILIATION: Make your purchases online by clicking on our affiliate links here Amazon.

  • DONATE: If you want, you can make a donation via Ko-Fi πŸ’œ.

  • WORD OF MOUTH: Invite your friends to come, discover the platform and the magnificent 3D files shared by the community!


Sharing and downloading on Cults3D guarantees that designs remain in makers community hands! And not in the hands of the 3D printing or software giants who own the competing platforms and exploit the designs for their own commercial interests.

Cults3D is an independent, self-financed site that is not accountable to any investor or brand. Almost all of the site's revenues are paid back to the platform's makers. The content published on the site serves only the interests of its authors and not those of 3D printer brands who also wish to control the 3D modeling market.

100% secure payment by credit card, PayPal, Apple Pay, Google Pay, etc.
View all payment options.