Hi !
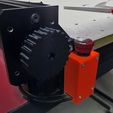
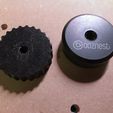
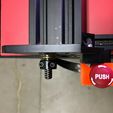
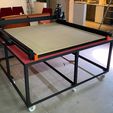
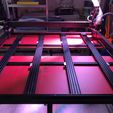
I lost my tensionner knob for my great Ooznest Workbee 1500x1500 so i decide to design a new one...
Adapted to 8 mm acme screw with 4 start and If your WorkBee has the upgraded longer lead screw lengths that protrude out the end plates and the tensioning system. (Workbee V2 & V2.2)
I needed the tensioner to replace the faulty bearings over time.
These originals F688ZZ radial bearings are subject to axial stress, they are not designed for this and their grade of use is ABEC3 (standard use).
Ranks range from 3 to 9 which is for military/space.
High rated ABEC bearings are intended for precision applications like aircraft instruments or surgical equipment. Lower graded bearings are intended for the vast majority of applications such as vehicles, mechanical hobbies, skates, skateboards, fishing reels and industrial machinery. High ABEC rated bearings allow optimal performance of critical applications requiring very high RPM and smooth operation.
So I have chosen to replace grades 3 with grades 7, the price is only slightly higher.
Regarding the Axial effort on te bearing, The solution is to add axial bearings over the Radial F688ZZ ABEC7 bearing,
Fortunately my workbee arrived with longer axes, which makes it possible to make a very interesting modification...
The axial bearing is supported not on the hub of the radial bearing but on its shoulder.
First free the acme screw rods from the flexible motor shaft coupler, unscrew the clamp beside the stepper motor.
On the front side of the cnc, remove the clamp and remove the old F688zz
re-assemble everything with new bearings as shown in the picture.
Do not forget to fill the radial bearings with lithium grease.
!!!! Never put grease on the acme drive shafts!!!
re-assemble everything as shown in the picture.
Do not forget to fill the radial bearings with lithium grease.
momentarily lock the unit with the clamp.
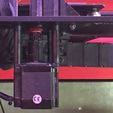
Proceed in the same way on the stepper motor side.
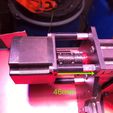
It is necessary to add 4 spacers of 6mm to the spacers already in place and to replace the 4 low profile M5 screws for fixing the motors by M5 screws of 55 or 60mm long.
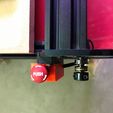
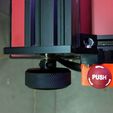
Refer to the manufacturer's stepper motor assembly procedure (Oozenest or other) for the timing, orientation of the motors (wires down), adjustment of the flexible coupling... (the acme screw must not touch the motor shaft in the flexible coupling) and finally on the front side of the cnc, blocking and tensioning the acme screw with the tensioner.
!!! Never put grease on the acme screw drive shafts, always use a dry lubricant so that the dust does not stick to the shaft and eventually prevent the gantry from moving smoothly and without jolts.
Don't get it wrong, this job looks like nothing but it is normal that it takes you half a day (or more) to do it properly.
I will publish soon a durst protection (like the covers on the front edge acme roods of the cnc) for the motor saft/flexible coupler assembly in order to avoid durst on the axial bearing
You won't recognise your machine afterwards, it will become fluid, silent... I promise you that ;)
Part list :
(supply more to have a reserve)
6 Radial Bearings ABEC7 https://s.click.aliexpress.com/e/_AtO0aH
6 Axial Bearings https://s.click.aliexpress.com/e/_An0tzB
12 Spacers M5 6mm https://s.click.aliexpress.com/e/_AaSeYv
12 M5x60mm Low Profile Screws
Bearing Grease https://s.click.aliexpress.com/e/_9hwSp3
or SKF LGMT2 or LGMT3 (Lithium Bearing Grease)
More stuffs are coming like Left & Right Stop Button, Probe holder, Motor assembly durst protection, Exhaust tube handler...
Follow or come back later...
Happy Printing !
Please like and post your prints !
Renba
P.S. Just after printing it and testing it successfully, I found the original tensionning knob, it had rolled under a shelf... :)

/https://fbi.cults3d.com/uploaders/14471952/illustration-file/35bdca01-2e6b-4e11-ae58-1f6fda6f1dc5/2r.jpg)
