Skip to content

fimi x8 se battery connector / dual car charger

Advertising
Advertising
?
Creation quality: 5.0/5 (1 vote)
Evaluation of members on the printability, utility, level of detail, etc.

  • 685 views
  • 8 downloads

License
3D design format
Folder details Close
  • x8_connector_bottom.stl
  • x8_connector_top.stl

Learn more about the formats

Publication date 2023-02-15 at 21:09
?
Published to Thingiverse on: 2019-05-30 at 21:52
Design number 1068009

3D printer file info

3D model description

If you build this there is no warranty from me if you kill your battery/drone or anything else. I take no responsibility for any resulting failure/demage/missed profit/etc. You can only build and use your own risk.

2019.07.24. Now I used to charge many times my 2 batteries with this charger on my motorbike, without problem. What I dont like, in this "smart" charger is 2 thing:
- when the battery is about 80% charged it does not start charging it (to make the battery lifetime longer)
- when the motorcycle battery is drops under a voltage it protects it and does not charge fimi batteries

I measured the power usage (from 12V input) when it has 3 leds light in the battery. And it is 14V*1.59A=22.26W, the original charger maximum 13.05V*3A=39.12W. So the battery regulates the chargning current.

2019.05.30. So far, I have fully charged one battery and charged 2 pieces for about 10 minutes.


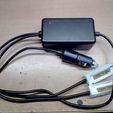
So, there is no existing dual car charger for fimi x8 se. I made one.

  • Order a dji mavic air charger from aliexpress. (The charger voltage is 13.2V, original fimi is 13.05, so this will work.)
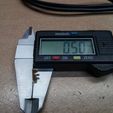
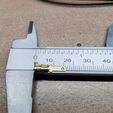
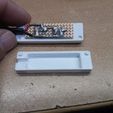
  • buy a 2x8pc pins (check the photos)
  • buy one small universal PCB
  • cut the mavic connectors, the red will be the + the black is ground, white not need.
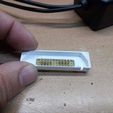
  • cut universal pcb to correct size (10 pin, for the connectors, and 3-3 pins on the side), check photos
  • make the "wire lines" on the PCB with soldering iron (- - + + NC NC + + - -), check the pinout on your original fimi adapter
  • cut down the back of the pins (first make it flat), solder it into PCB (Need to make paralell with each other. If it is near good after soldering, then you can adjust it with pliers.)
  • connect the +/- wires to PCB

Connect the adapter to car, check the output voltage polarity!!!!!!

If the polarity is good try to charge your battery, if it is charging then you can put the housing.

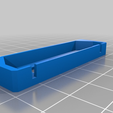
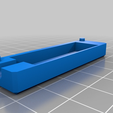
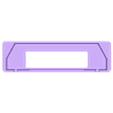
  • print the housing, clear the hole (you can drill with a 3mm, or 3.5 mm drill, to fit the other part)
  • put the top part to the battery
  • connect the charger to battery
  • we glue the housing together you need to work fast!
  • glue the 2 parts (watch not to glue the housing to the battery couse then you are in trouble)
  • then I put some hotglue on top of the PCB to fill the space from the house bottom part, while it is hot fit the parts and keep it tight while it is drying.

Thats all your charger is ready.

3D printing settings

-

Advertising


Issue with this design? Report a problem.

Would you like to support Cults?

You like Cults and you want to help us continue the adventure independently? Please note that we are a small team of 3 people, therefore it is very simple to support us to maintain the activity and create future developments. Here are 4 solutions accessible to all:

  • ADVERTISING: Disable your banner blocker (AdBlock, …) and click on our banner ads.

  • AFFILIATION: Make your purchases online by clicking on our affiliate links here Amazon.

  • DONATE: If you want, you can make a donation via Ko-Fi πŸ’œ.

  • WORD OF MOUTH: Invite your friends to come, discover the platform and the magnificent 3D files shared by the community!


Sharing and downloading on Cults3D guarantees that designs remain in makers community hands! And not in the hands of the 3D printing or software giants who own the competing platforms and exploit the designs for their own commercial interests.

Cults3D is an independent, self-financed site that is not accountable to any investor or brand. Almost all of the site's revenues are paid back to the platform's makers. The content published on the site serves only the interests of its authors and not those of 3D printer brands who also wish to control the 3D modeling market.

100% secure payment by credit card, PayPal, Apple Pay, Google Pay, etc.
View all payment options.