Skip to content

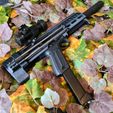
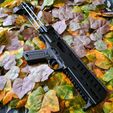
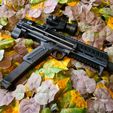
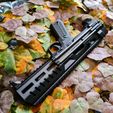
STV-7 bodykit for the AAP-01

Advertising
Advertising
?
Creation quality: 0.0/5 (0 votes)
Evaluation of members on the printability, utility, level of detail, etc.

  • 3.7k views
  • 8 likes
  • 2 downloads
  • 1 comment

License
3D design format
STL Folder details Close
  • Charging handle base.stl
  • Charging handle.stl
  • Main Body cutdown 1.stl
  • Main Body cutdown 2.stl
  • Main Body.stl
  • Stock clip x2.stl
  • Stock spacer x2.stl
  • Stock.stl

Learn more about the formats

Publication date 2023-02-17 at 18:51
Design number 1071171

3D printer file info

3D model description

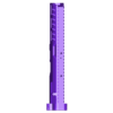
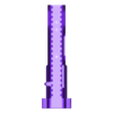
This is a printable bodykit for the Action Army AAP-01. It is loosely based on the H&K MP7, and is designed to easily fit over your pistol and be secured with only a few bolts. The reciprocating bolt allows easy cocking of the weapon, whilst retaining the ability to fire even with the stock collapsed.

To print the part "main body" you need a printer capable of printing objects 332mm tall, if you have a smaller printer this part has been split into two parts that will fir on all Ender 3 sized printers.

The bolts required and assembly instructions are as follows:
Attach "charging handle base" to the bolt of the gun - 1 M5x10 Button head
Place the nuts into the hexagon holes in "charging handle base" - 2 M3 Nyloc
Slide the AAP-01 into the bodykit
Attach "main body" to AAP-01 with the top bolts - 2 M3x20 Cap Head
Attach "charging handle" - 1 M3x12 Countersink - M3x20 Cap Head

Assembly of the stock
Start by drilling the holes in your stock rods - 4x6mm steel rod the length of these must be identical. play around with whatever length works best for you, this is not an adjustable length stock, so whatever length you choose locks you in. I chose 240mm long for all 4
The holes required are 3 x 2.5mm per rod, dry assemble the stock components first to find the hole locations from the prints, then mark and drill.
To assemble put the 4 rods into their holes in the stock, then use 4 M22x18 Cap heads, the bolts should self tap into the print
Slide the 4 rods into the main body, then attach "stock spacer" using 4 M2x10mm Cap heads
Attach "stock clip" onto the main body with 2 M2x20mm Cap heads
You will then need to add the stock clip springs, for this you will need 2 4x15mm extension springs, secure them in place with some short lengths of filament.

If you download this kit and get stuck with the assembly, please feel free to message, I'll probably make a short assembly video explaining the steps in more detail

3D printing settings

Standard PLA settings, support required on most parts. Brim recommended on the part "main body"

Advertising


Issue with this design? Report a problem.

Would you like to support Cults?

You like Cults and you want to help us continue the adventure independently? Please note that we are a small team of 3 people, therefore it is very simple to support us to maintain the activity and create future developments. Here are 4 solutions accessible to all:

  • ADVERTISING: Disable your banner blocker (AdBlock, …) and click on our banner ads.

  • AFFILIATION: Make your purchases online by clicking on our affiliate links here Amazon.

  • DONATE: If you want, you can make a donation via Ko-Fi πŸ’œ.

  • WORD OF MOUTH: Invite your friends to come, discover the platform and the magnificent 3D files shared by the community!


Sharing and downloading on Cults3D guarantees that designs remain in makers community hands! And not in the hands of the 3D printing or software giants who own the competing platforms and exploit the designs for their own commercial interests.

Cults3D is an independent, self-financed site that is not accountable to any investor or brand. Almost all of the site's revenues are paid back to the platform's makers. The content published on the site serves only the interests of its authors and not those of 3D printer brands who also wish to control the 3D modeling market.

100% secure payment by credit card, PayPal, Apple Pay, Google Pay, etc.
View all payment options.