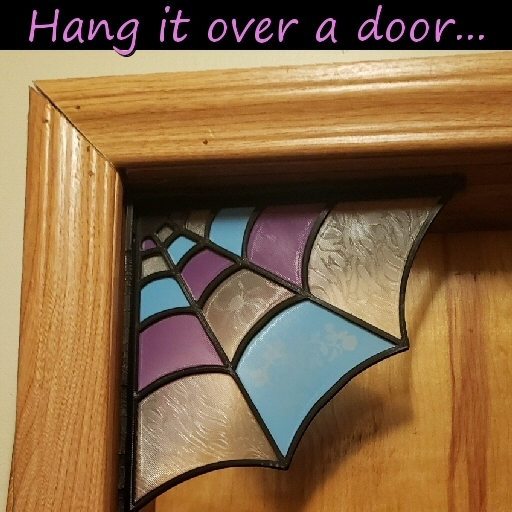
Who says cobwebs are unsightly? Why not decorate with them instead? This cute spider web corner décor makes a spooky addition to any window, doorway, entrance - anywhere a corner resides!
There are multiple ways to print and hang this, and not just as a Halloween decoration either, as every fan of horror movies and the macabre in general will tell you.
OPTION #1 - With or Without Bracket
Your first option is to print it with or without a bracket. With a bracket, it has two recessed nail holes for easier hanging. The bracket itself is also part of the decor, being shaped to mimic the curvature of a web.
Or, you can print the plain top, with no bracket. this version is a sleeker design overall. It's also light weight enough to support hanging it with mounting puddy, instead of putting holes in your walls or doorways.
OPTION #2 - Solid Colors or Inlaid Designs
There are three color sections that can go inside the decorative spider web. they are labeled "Color x4", "Color x5", and "Color x6". The names are chosen for the number of pieces involved.
In the example images above, I have Color x4 printed in light blue PLA filament. It contains four sections - three small ones and one large. The large one has a rose vine design inlaid into the piece.
For Color x6 (containing 6 separate pieces), I have used a clear PLA filament. The design for this section is random curves on the two largest sections, with a spider in the center section. I thought the spider showed up best on the clear filament.
Note: Color x5 does not have an inlaid design option.
So, you can choose to print the inlaid designs (wRose) and (wSpider), or you can simply print the (Plain) colors, without the inlay.
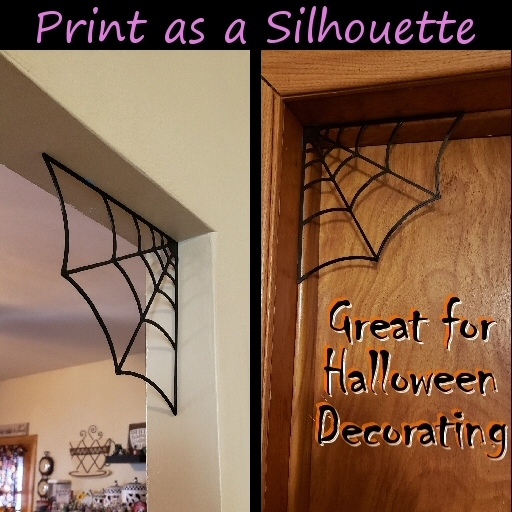
OPTION #3 - Last but not least, you can forgo all colors and simply print out the "Spider Web - Top" (without bracket). This gives you a perfect silhouette of a spiderweb that can be easily hung anywhere with mounting putty. It's a lot more subtle, and makes a great Halloween decoration! Plus, if you choose the silhouette option, there's absolutely no assembly required.
PARTS & ASSEMBLY
The Spider Web has a number of pieces to it, especially the inside colors. I've combined each Color area into its own files. Color x6 contains all 6 pieces, and they're laid out close together for quick printing. You'll need to print out all three Color files (x4, x5, and x6) in whatever colors you prefer. And remember, there are Plain or designed versions of Colors x4 and x6.
For the Top section, you can print it with or without a bracket. Assembly is the same either way.
If you look closely at the Bottom section, there are recesses on one side (the side facing up when it prints). Your color sections should fit perfectly into these recessed areas. Think of it like a children's puzzle. It's obvious where everything goes, and if it doesn't fit easily, it's probably in the wrong spot.
Using tiny dots of glue around the edges, put all the colors into their positions. Let this dry just enough that you can flip it over without them falling out. Then add a bit more glue to the Top section. Flip the Bottom over and line it up with the Top.
If you've printed the Top with Bracket, this will be extremely easy. The bottom slides right into the corner. You can lay a book or something else flat and heavy on top of it while it dries.
If you chose the no-bracket version, you'll need to line up all the edges, then use clothes pins or office clips to hold it together while the glue sets.
DIMENSIONS
Fully assembled, the spiderweb corner door molding measures:
Full Web With Bracket
X = 21.49cm (8.46in)
Y = 21.49cm (8.46in)
Z = 1.35cm (0.53in)
Full Web Without Bracket
X = 20.3cm (8.0in)
Y = 20.3cm (8.0in)
Z = 0.4cm (0.16in)
Web Silhouette Only (Top / No Bracket)
X = 20.3cm (8.0in)
Y = 20.3cm (8.0in)
Z = .18cm (0.07in)
If you like the Spiderweb Corner Decor, please check out our ever-growing portfolio of STL models.
IMPORTANT: Unless otherwise noted, ALL GetPrinted3D designs are Copyright protected. When you purchase a file, you do NOT have the right to sell the file or printed model. Files may not be redistributed under any circumstances. The models are for personal and private use, and may not be sold commercially without the explicit written consent of GetPrinted3D.
You can obtain a Commercial License to legally sell our designs here:
- https://www.patreon.com/GetPrinted3D
:format(webp)/https://fbi.cults3d.com/uploaders/26463760/illustration-file/35df2029-54b7-461b-889a-8bb8fb9e7572/SpiderWeb-IMG.jpg)


/https://preview3d-images.cults3d.com/awhszz7i3seqp32f293asvjm63we)


