Skip to content

TPU Test Cube Prusa MK3S with Config for Ninjaflex

Advertising
Advertising
?
Creation quality: 5.0/5 (1 vote)
Evaluation of members on the printability, utility, level of detail, etc.

  • 2.3k views
  • 2 likes
  • 114 downloads

License
3D design format
Folder details Close
  • 20cubewith10mmhole_v1.gcode
  • 20cubewith10mmhole_v3.stl
  • 20mmcubewith10mmhole.f3d

Learn more about the formats

Publication date 2023-02-16 at 21:11
?
Published to Thingiverse on: 2020-05-10 at 23:33
Design number 1069702

3D printer file info

3D model description

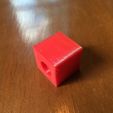
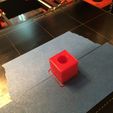
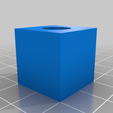
This is simple test cube of 20mm dimensions with a 10mm hole. The Fusion 360 file is included as well.

I had a lot of trouble getting TPU to print and wanted to share how I did it. For adhesion issues on the MK3s I used blue tape on the PEI sheet per the recommendations on the Ninjatek site for Ninjaflex site - https://ninjatek.com/printing-guidelines/

I then loosened the bondtech screw till it didn't catch the nut and then screwed it in only a half turn or so as soon as it caught the nut, so it is basically as loose as possible. I read this was important to prevent the TPU from winding around the bond tech gears.

For the temp for this filament from the link above it says 225-235 so I wanted to make sure it melted because in previous runs it was too gummy so used 247 on the first layer and 240 on the rest in my config.

I changed all the speeds to the lowest recommended, such as 10mm for the first layer. There are a few other settings that I got from the config file here which I started with - https://forum.prusaprinters.org/forum/original-prusa-i3-mk3s-mk3-how-do-i-print-this-printing-help/please-help-with-tpu-settings/ and then changed the following:

retraction length = 2.5
lift z = 0
retraction speed = 75
deretraction seed 35
first layer temp = 247
other layer temp = 240

print setting speed (15: all perimeters, support material interface, 20: infiill, solid infill, support material, gap fill, 10: top solid infill, 100: travel, 10: first layer speed)

I included the .ini settings config file for the Prusaslicer for the MK3s and the generated gcode as well. Good luck!

Note pics are of a version I made before I had the hole centered properly which is fixed now.

3D printing settings

-

Advertising


Issue with this design? Report a problem.

Would you like to support Cults?

You like Cults and you want to help us continue the adventure independently? Please note that we are a small team of 3 people, therefore it is very simple to support us to maintain the activity and create future developments. Here are 4 solutions accessible to all:

  • ADVERTISING: Disable your banner blocker (AdBlock, …) and click on our banner ads.

  • AFFILIATION: Make your purchases online by clicking on our affiliate links here Amazon.

  • DONATE: If you want, you can make a donation via Ko-Fi πŸ’œ.

  • WORD OF MOUTH: Invite your friends to come, discover the platform and the magnificent 3D files shared by the community!


Sharing and downloading on Cults3D guarantees that designs remain in makers community hands! And not in the hands of the 3D printing or software giants who own the competing platforms and exploit the designs for their own commercial interests.

Cults3D is an independent, self-financed site that is not accountable to any investor or brand. Almost all of the site's revenues are paid back to the platform's makers. The content published on the site serves only the interests of its authors and not those of 3D printer brands who also wish to control the 3D modeling market.

100% secure payment by credit card, PayPal, Apple Pay, Google Pay, etc.
View all payment options.