Skip to content

The last unicorn

Advertising
?
Creation quality: 5.0/5 (2 votes)
Evaluation of members on the printability, utility, level of detail, etc.

  • 11.5k views
  • 94 likes
  • 684 downloads
  • 2 collections
  • 2 makes

License
3D design format
OBJ Folder details Close
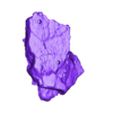
  • Unicorn - Body - Left Part.obj
  • Unicorn - Body - Middle Part.obj
  • Unicorn - Body - Right Part.obj
  • Unicorn - Cliff.obj
  • Unicorn - Clip 1.obj
  • Unicorn - Clip 2.obj
  • Unicorn - Clip 3.obj
  • Unicorn - Clip 4.obj
  • Unicorn - Ears.obj
  • Unicorn - Eye - Eyewhite.obj
  • Unicorn - Eye - Highlight.obj
  • Unicorn - Eye - Iris.obj
  • Unicorn - Eye - Pupil.obj
  • Unicorn - Eyes plus Horn Holder.obj
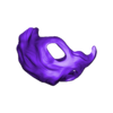
  • Unicorn - Head -- brim plus support recommended.obj
  • Unicorn - Hoof - Back Left.obj
  • Unicorn - Hoof - Back Right.obj
  • Unicorn - Hoof - Front Left.obj
  • Unicorn - Hoof - Front Right.obj
  • Unicorn - Hoof Floof.obj
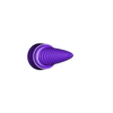
  • Unicorn - Horn.obj
  • Unicorn - Leg Tassle - Left Leg Part 1 -- support needed.obj
  • Unicorn - Leg Tassle - Left Leg Part 2 -- support recommended.obj
  • Unicorn - Leg Tassle - Right Leg Part 1 -- support recommended.obj
  • Unicorn - Leg Tassle - Right Leg Part 2 - support needed.obj
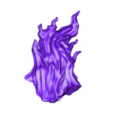
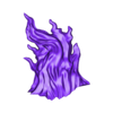
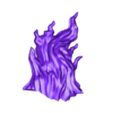
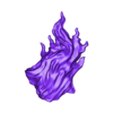
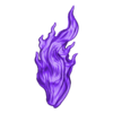
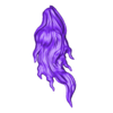
  • Unicorn - Mane - Lower Part Ver.2 -- inner brim recommended.obj
  • Unicorn - Mane - Upper Part -- support needed.obj
  • Unicorn - Neck.obj
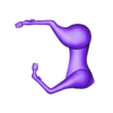
  • Unicorn - Tail Tassle - Left Part -- support needed.obj
  • Unicorn - Tail Tassle - Right Part -- support needed.obj

Learn more about the formats

Last update 2023-09-19 at 12:11
Publication date 2023-02-20 at 02:30
Design number 1075197

3D printer file info

3D model description

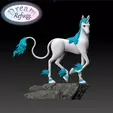
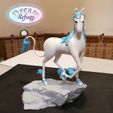
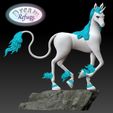
The Last Unicorn is an invention of the novelist Peter Soyer Beagle from 1968 . As an animated film, the novel was adapted in 1982. The model is a replication of the cartoon character.

This is a fan project and do not own the copyright rights for the figure. Therefore, I provide it here for free because I have a lot of fun with the model and this I like to pass on.

If you like the model, however, I am very happy for any donations ( there is a link to this in my profile ). This would also motivate me a bit for example to make a model of the red bull in the same style.

The model is a very personal project of mine as it was one of my now deceased father's favorite knitted figures. He sadly did not live to see the completion of this model and so the completion of this project is somewhat bittersweet for me.

I gave myself the brief of needing as few supports as possible for each part. Because, honestly, removing supports and touching up the imperfections is a pain.

Also, the model should be able to be assembled without glue. This took a few iterations but eventually I was successful.

The complete unicorn can be assembled without gluing the parts. The individual parts are joined via grooves and a plug-in system.

The parts from the eyes are simply clipped together.

The eyes are rotatably mounted.

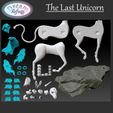
There are 47 parts required which can all be printed with a 0.4 nozzle.

I used my Snapmaker 350 for this and the slicer software was Prusa slicer with the Arachne circumference generator.

The model can certainly be printed larger.

Printing the model smaller is probably feasible with smaller nozzle diameters. To what extent the parts can then still be joined without glue must then be tried out.

As an indicator of whether the print is feasible in the current scale, it is the individual parts of the eye and the connecting clips 2&4 to print as these have the finest details.

Assembly is relatively simple.

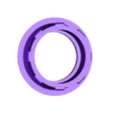
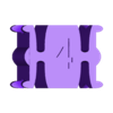
The 3 parts from the main body are joined together with the #1 clips. Be careful not to pinch some skin from your finger. These clips hold pretty tight.

The tassel from the tail and the tassels from the legs are joined together with clips 4 directly to the tail and legs, respectively. DO NOT join the tassels individually or you may not be able to get them apart.

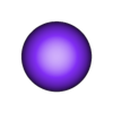
The eyes are assembled in the order Iris->Pupil->Highlight->Eyewhite and can be pressed together with one click.

The head is composed as follows:

First, the horn is pushed in completely from the back.

The two eyes are inserted from the back.

Then the "Eyes plus Horn Holder" is inserted from the back until it is flush. The ears are inserted diagonally from the back.

The neck is slid onto the assembled main body.

The head is then slid onto the neck.

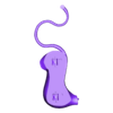
The hair is joined with clip 2 and then joined from the top over the ears onto the head and body.

The Hoof Floofs are slid onto the legs and then the hooves are inserted.

Attention the hooves Left and Right are not identical but have a different angle. However, they can be easily reinserted if you have made a mistake here.

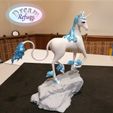
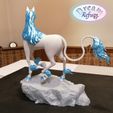
Then place the unicorn on the cliff and you're done. :-)

If there are any problems with printing individual parts or any other questions, just drop me a line. I try to answer promptly.

3D printing settings

Model that are needed more often:

4x clip 1

4x clip 4

4X Hoof Floof

The 4 parts from the eye 2x each

The 4 parts of the leg tassels L&R each 2x

In the filename of each file you can see if I recommend or think it is necessary to use a brim or supports. All other files are printable without brim and supports. The files are all saved in the print orientation as I printed them.

For fine, thin parts like the horn, I recommend printing several of them at once so that the printer gives the layers some time to cool.

For the clips 1 -4 it is enough to use only one contour.

The clip function of my parts will definitely not work with all printer and filament combinations.

If the parts won't join with the original clips then you can try scaling the problematic clips a few percentage points accordingly.

In an emergency, of course, you can still use a glue.

Advertising


Page translated by automatic translation. See the original version.
Issue with this design? Report a problem.

Would you like to support Cults?

You like Cults and you want to help us continue the adventure independently? Please note that we are a small team of 3 people, therefore it is very simple to support us to maintain the activity and create future developments. Here are 4 solutions accessible to all:

  • ADVERTISING: Disable your banner blocker (AdBlock, …) and click on our banner ads.

  • AFFILIATION: Make your purchases online by clicking on our affiliate links here Amazon.

  • DONATE: If you want, you can make a donation via Ko-Fi πŸ’œ.

  • WORD OF MOUTH: Invite your friends to come, discover the platform and the magnificent 3D files shared by the community!


Sharing and downloading on Cults3D guarantees that designs remain in makers community hands! And not in the hands of the 3D printing or software giants who own the competing platforms and exploit the designs for their own commercial interests.

Cults3D is an independent, self-financed site that is not accountable to any investor or brand. Almost all of the site's revenues are paid back to the platform's makers. The content published on the site serves only the interests of its authors and not those of 3D printer brands who also wish to control the 3D modeling market.

100% secure payment by credit card, PayPal, Apple Pay, Google Pay, etc.
View all payment options.