USE AT OWN RISK!
Current Version PRE-BETA 0.213 All good!
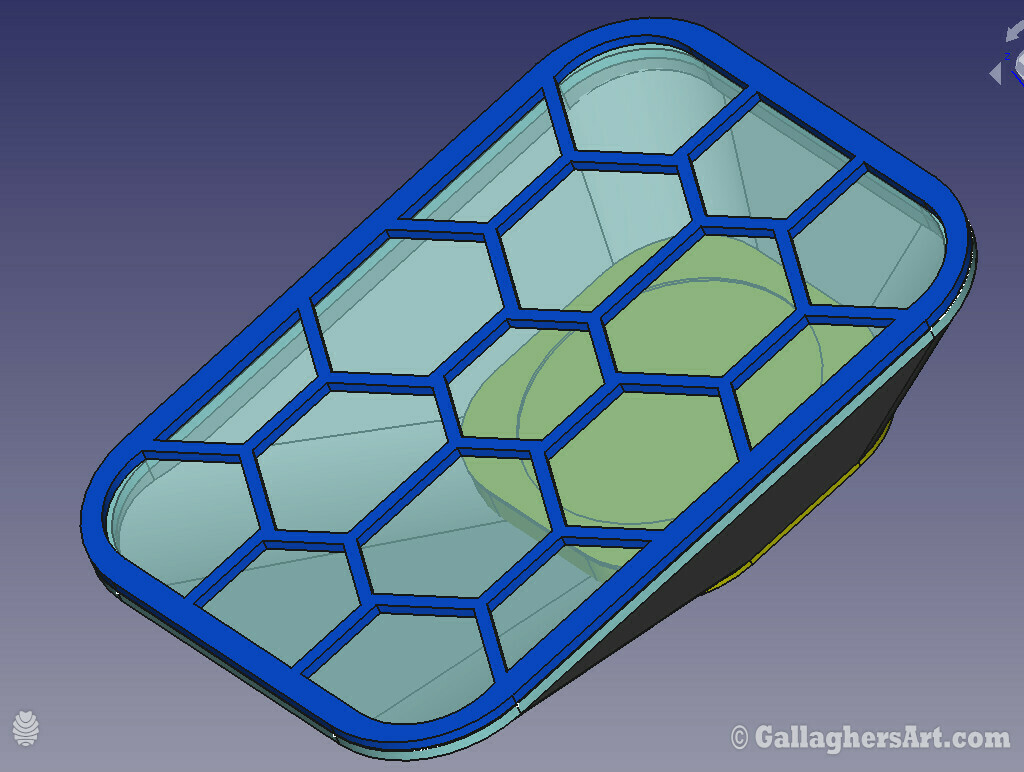
This is a total remake of my original versions. This time I made them in FreeCAD using a spreadsheet to control all aspects of the design for an easy and quick way to make changes.
I’m currently only posting the full set of files and FreeCAD source files so you can make things fit 100% with your printer/s, ONLY on my website (no login /ads / other junk not required, just click the direct link/s you want). https://gallaghersart.com/page/mask_v3_easily_configurable_with_a_spreadsheet_in_freecad_make_them_your_own
I have also posted some STL of various configurations, from sturdy/test to quick print single use and more.
I’m just now learning FreeCAD, wish so much I did sooner, thanks to YouTube user “MangoJelly Solutions” for the very few videos of his I have been able to watch so far. I like how he shows you what you need to know, I wonder how these designs would be better after I have watched all his videos.
I’m sure I could have done things better, and I learned through out these designs. (so some files my have different styles or formats as I learn) sorry… And spelling errors, but code works
Please use as you desire for personal, non-profit, or going to good use. No thanks is required. My work is free to all, but if you make profit please think of me as I have no income, and I’m still using a laptop that I got just as Vista was released a long, long time ago..
My current config and sample files are set to. (*note: I have not yet fine tuned my printer with an Accelerometer on my Duet, or fine tune speed.) Original mask design took 2-4 hours to print set, now under :30. Hope even faster.
• 0.8 nozzle and line,
• 1.6mm side walls,
• 0.2 layers,
• 0.2 bridge layers 50% bridge fill 45% bridge flow,
• 22.1916 max print angle, no support.
• Printing in ABS
Make them your own: from all the above settings (I have notes within the spreadsheet as an attempt to give directions. And will post some images and videos(maybe) as I make them.)
• Filter size,
• Cover thickness,
• Wall thickness,
• Clip thickness,
• Clip lock thickness,
• Angles of lock placements /size,
• Easy over ride to fit your printers ability,
• How tall (taller the less the print angle, longer print times),
• Cover overlaps border to secure filters,
• Change cover thickness to match your filters thickness,
• Change center hex cover size to make the design your own,
• H and Z over rides for cover to get tight fit with your printer/s,
• Change how tight your lock is with your printer/s,
• Change angle of rotation of lock to your filter,
• Move lock H and V within your filter areas,
• Cover grill thickness,
• and more..
Hints for good prints.
• NO SUPPORT, only good Bridge layers (Air-Tight mouth piece may require limited supports at this time)
• Spacer layer is to get the sides to be flat before the bridge layer or cover (uplift of corners should go no more that 2-3 mm MAX, you have to watch out for your Bltouch and such for impacts) Just because the uplift was ok when you printed once does not mean it will always when using 2 parameters for the sides
• Spacer is also used to keep covers on the mask
• melt on filters will need more of a border 3-4mm
• making center cover hole too small will make areas of the cover grill to get blobs of filament that will effect top layers.
• Slice so all side layers have a seem at the least overhang corner, with no travel to next layer. Sides should start and end at this seem. Making thin walled sides and continuations flow,
• Expect errors in my design, please let me know so I can fix (site comments broken right now so email “masks AT gallaghersart DOT com”)
• When making changes in the spreadsheet it may take your PC some time to recalculate the models, save often to a new file name as some changes can break the model and undo may not work correctly.
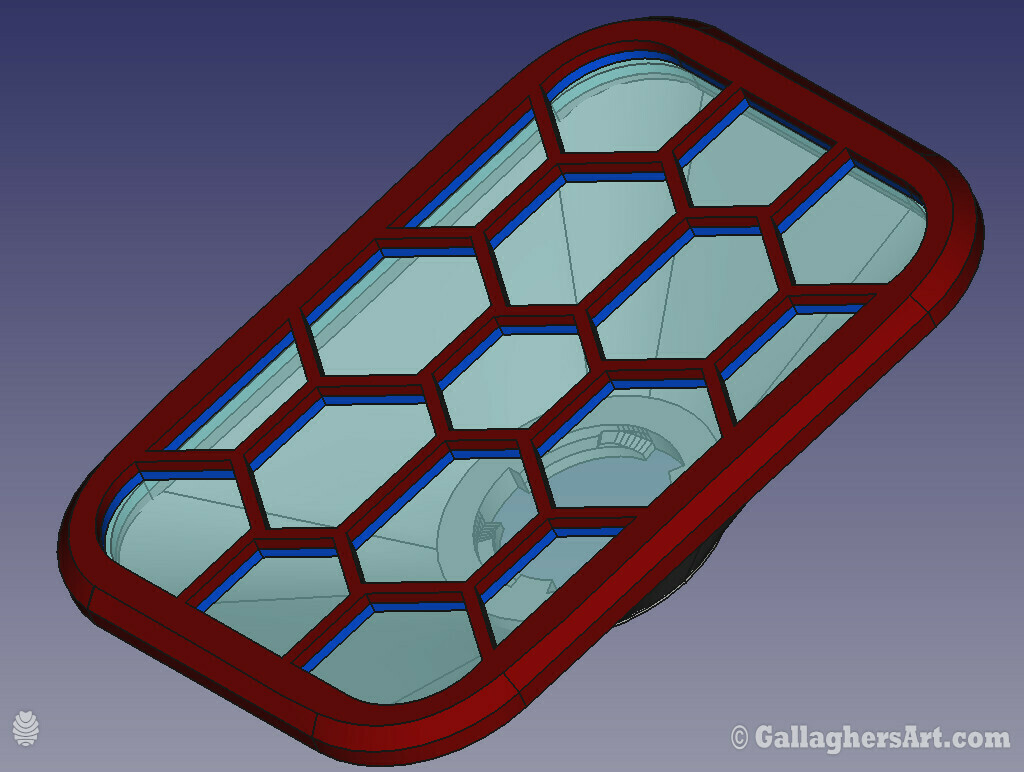
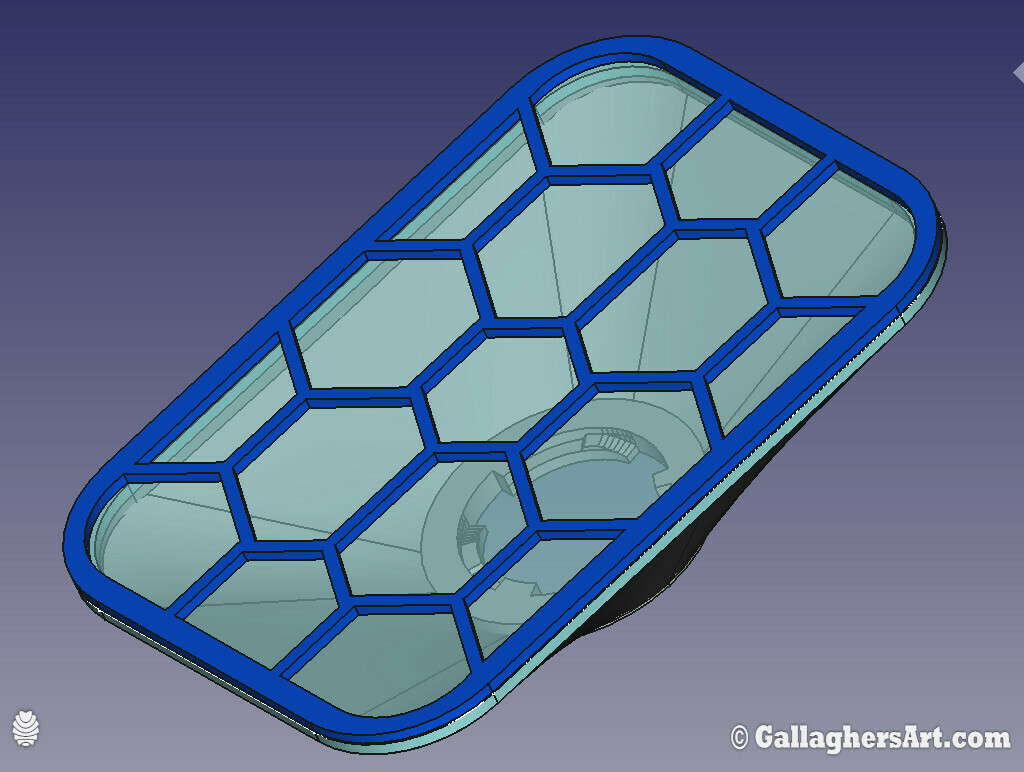
Grill and Grill Cover are for repeated use, cleaning and using new filters each use. @:30min to print
Print with just bridge layer or no bridge layer for melt on filters / single use. Less than :20min print
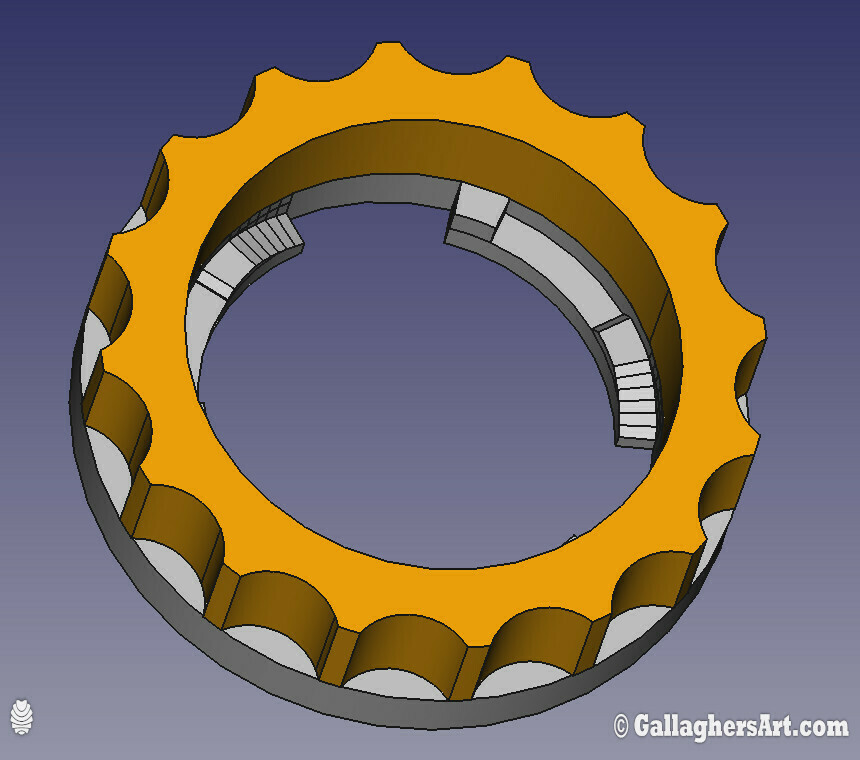
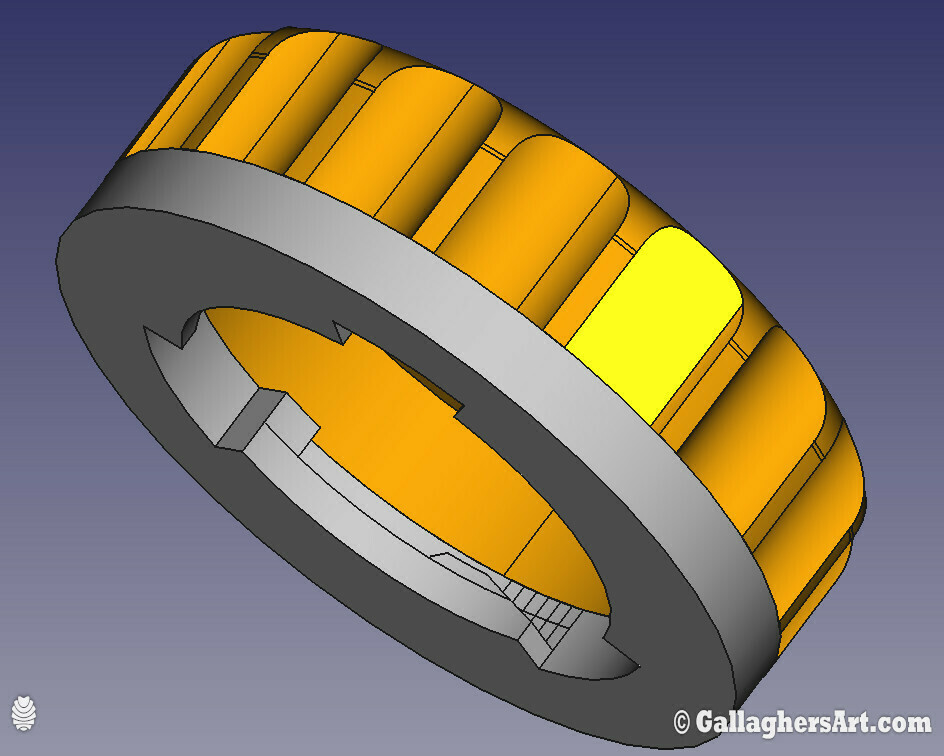
In masks with 0deg for “BASE_LOCK_ANGLE” would be used without air-outtake, as outtake collides with these filters. You can make them much taller so they clear each other, but then you have long print time and a loss of more visual clearance.
If using air-outtake filter than the air-in needs have lock bases rotated. “BASE_LOCK_ANGLE” 105deg for right filter, 260deg for left filter.
To give maximum visual clearance from the mask, moving the base lock will enable this. Using “BASE_DROP” and “BASE_SIDE_MOVE”. Having the lock base moved from center of mask will require a higher print levels (“IN_THICK_TOTAL2” for air-in and “OUT_HEIGHT2” for air-out) so long slope side will still print. Dropping the air-outtake “OUT_DOWN” will also require more height and longer print times. But give you much more visual clearance.
When adjusting the height view the Sketches within the part named “Angles”. If you have these sketches open when you change the height you may need to open the height measurement and then close it to update the sketch with you overhang angles. Keep adjusting to match your printers max overhang angle. The lower it is the faster it will print.
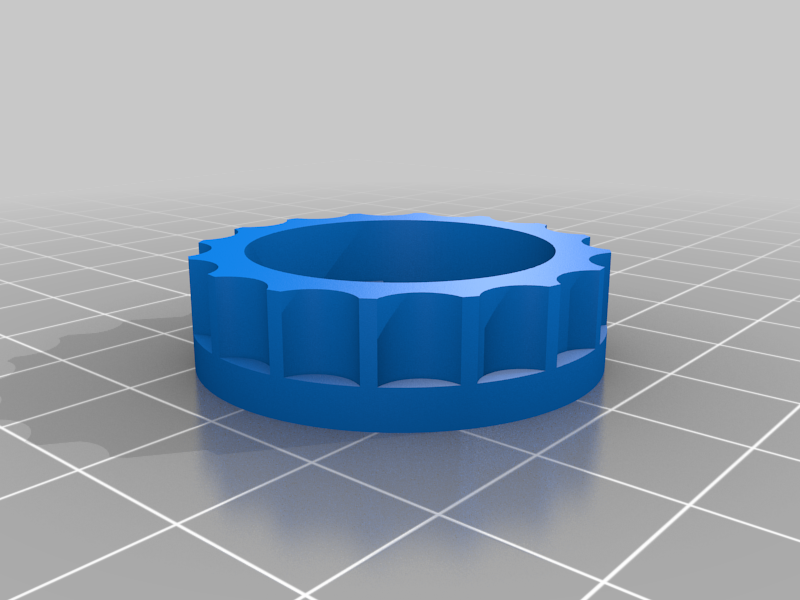
My new out-filter does require modifying you 3M 6300 masks straps. You will have to remove outer valve cover. Use a large flat head to wedge it off. Then you will need to cut out the center area, leaving 2 parts to the strap, reconnect the strap to the mask, you can find a way to attach the bottom parts below the out valve (rope, fuse plastic trip, etc..).
The layers attached to the lock base could use thinner layers than 0.2. the smoother the lock clip the longer the 3M mask will last. As FDM used for these ARE HARDER THAN THE 3M MASK, SO 3M MASK WILL WEAR OUT OVER TIME. You can replace the air-in and air-out 3M flaps, you can not replace the mount if it becomes broken or worn out. These filters should turn to the lock position with little effort. I also have a small Chamfer to unlock filter (BASE_CHAMFER_REMOVE, must be = or less than of LOCK_STOP_THICK).
If your finding it hard to lock in place you can make the lock area height by editing “LOCK_STOP_THICK”, default is 0.6mm, should equal layers height.
air
Air-Tight Mouth Adapter for 3M 6300 face mask
STL’s are tuned for my printer using 0.8mm nozzle, so core files can be changed by you for perfect fit.
I would 1st print the version that has the “CENTER_SEAL_THICK, and SEAL_THICK” as 3mm.. this should give you a tight fit to your mask. If not then adjust the spread sheet.
Once you have your fit then subtract your seal / gasket compressed thickness from the “CENTER_SEAL_THICK, and SEAL_THICK”.
Pictures coming soon.
More write up concerning this.
Maybe a video
How to get started: Print off the in-test, out-test, and center-test for the airtight-mouthpiece and see how they fit to your mask. They should not be loose or needing any force to fit onto the face-mask mounts for the custom filters. The out air will / may require some little force to slid on. They have 2 tabs that should be filed down a bit. Printing them any smaller does not work. Rotating the air-in filters should have a slight give but once in place they should not be able to unscrew on there own. If they need adjusting just edit the spreadsheet for your needs.
How I clean: (you do your thing, I make no guarantees or warranty, you use at your own risk). Once back home I remove and trash used filters. Wipe masks dry, spray with disinfectant. wash/wipe clean. Then I have a box of 4x USB UVC led strips lined in a foil lined box. 2 led strips ends go into my mouth piece and then rest encircle the mask. I leave on over night. The light makes my eyes hurt if I look at them, should be using UV eye protection.
SO how fast / low can you print these?
Enjoy!
`mike
:format(webp)/https://fbi.cults3d.com/uploaders/27199038/illustration-file/0854ce37-98b3-412b-b31c-580bb93676be/GallaghersArt_MASK_3Bsm.JPG)


/https://preview3d-images.cults3d.com/8z6mjdj3h9ibss9v5e97sgsvuq6w)


