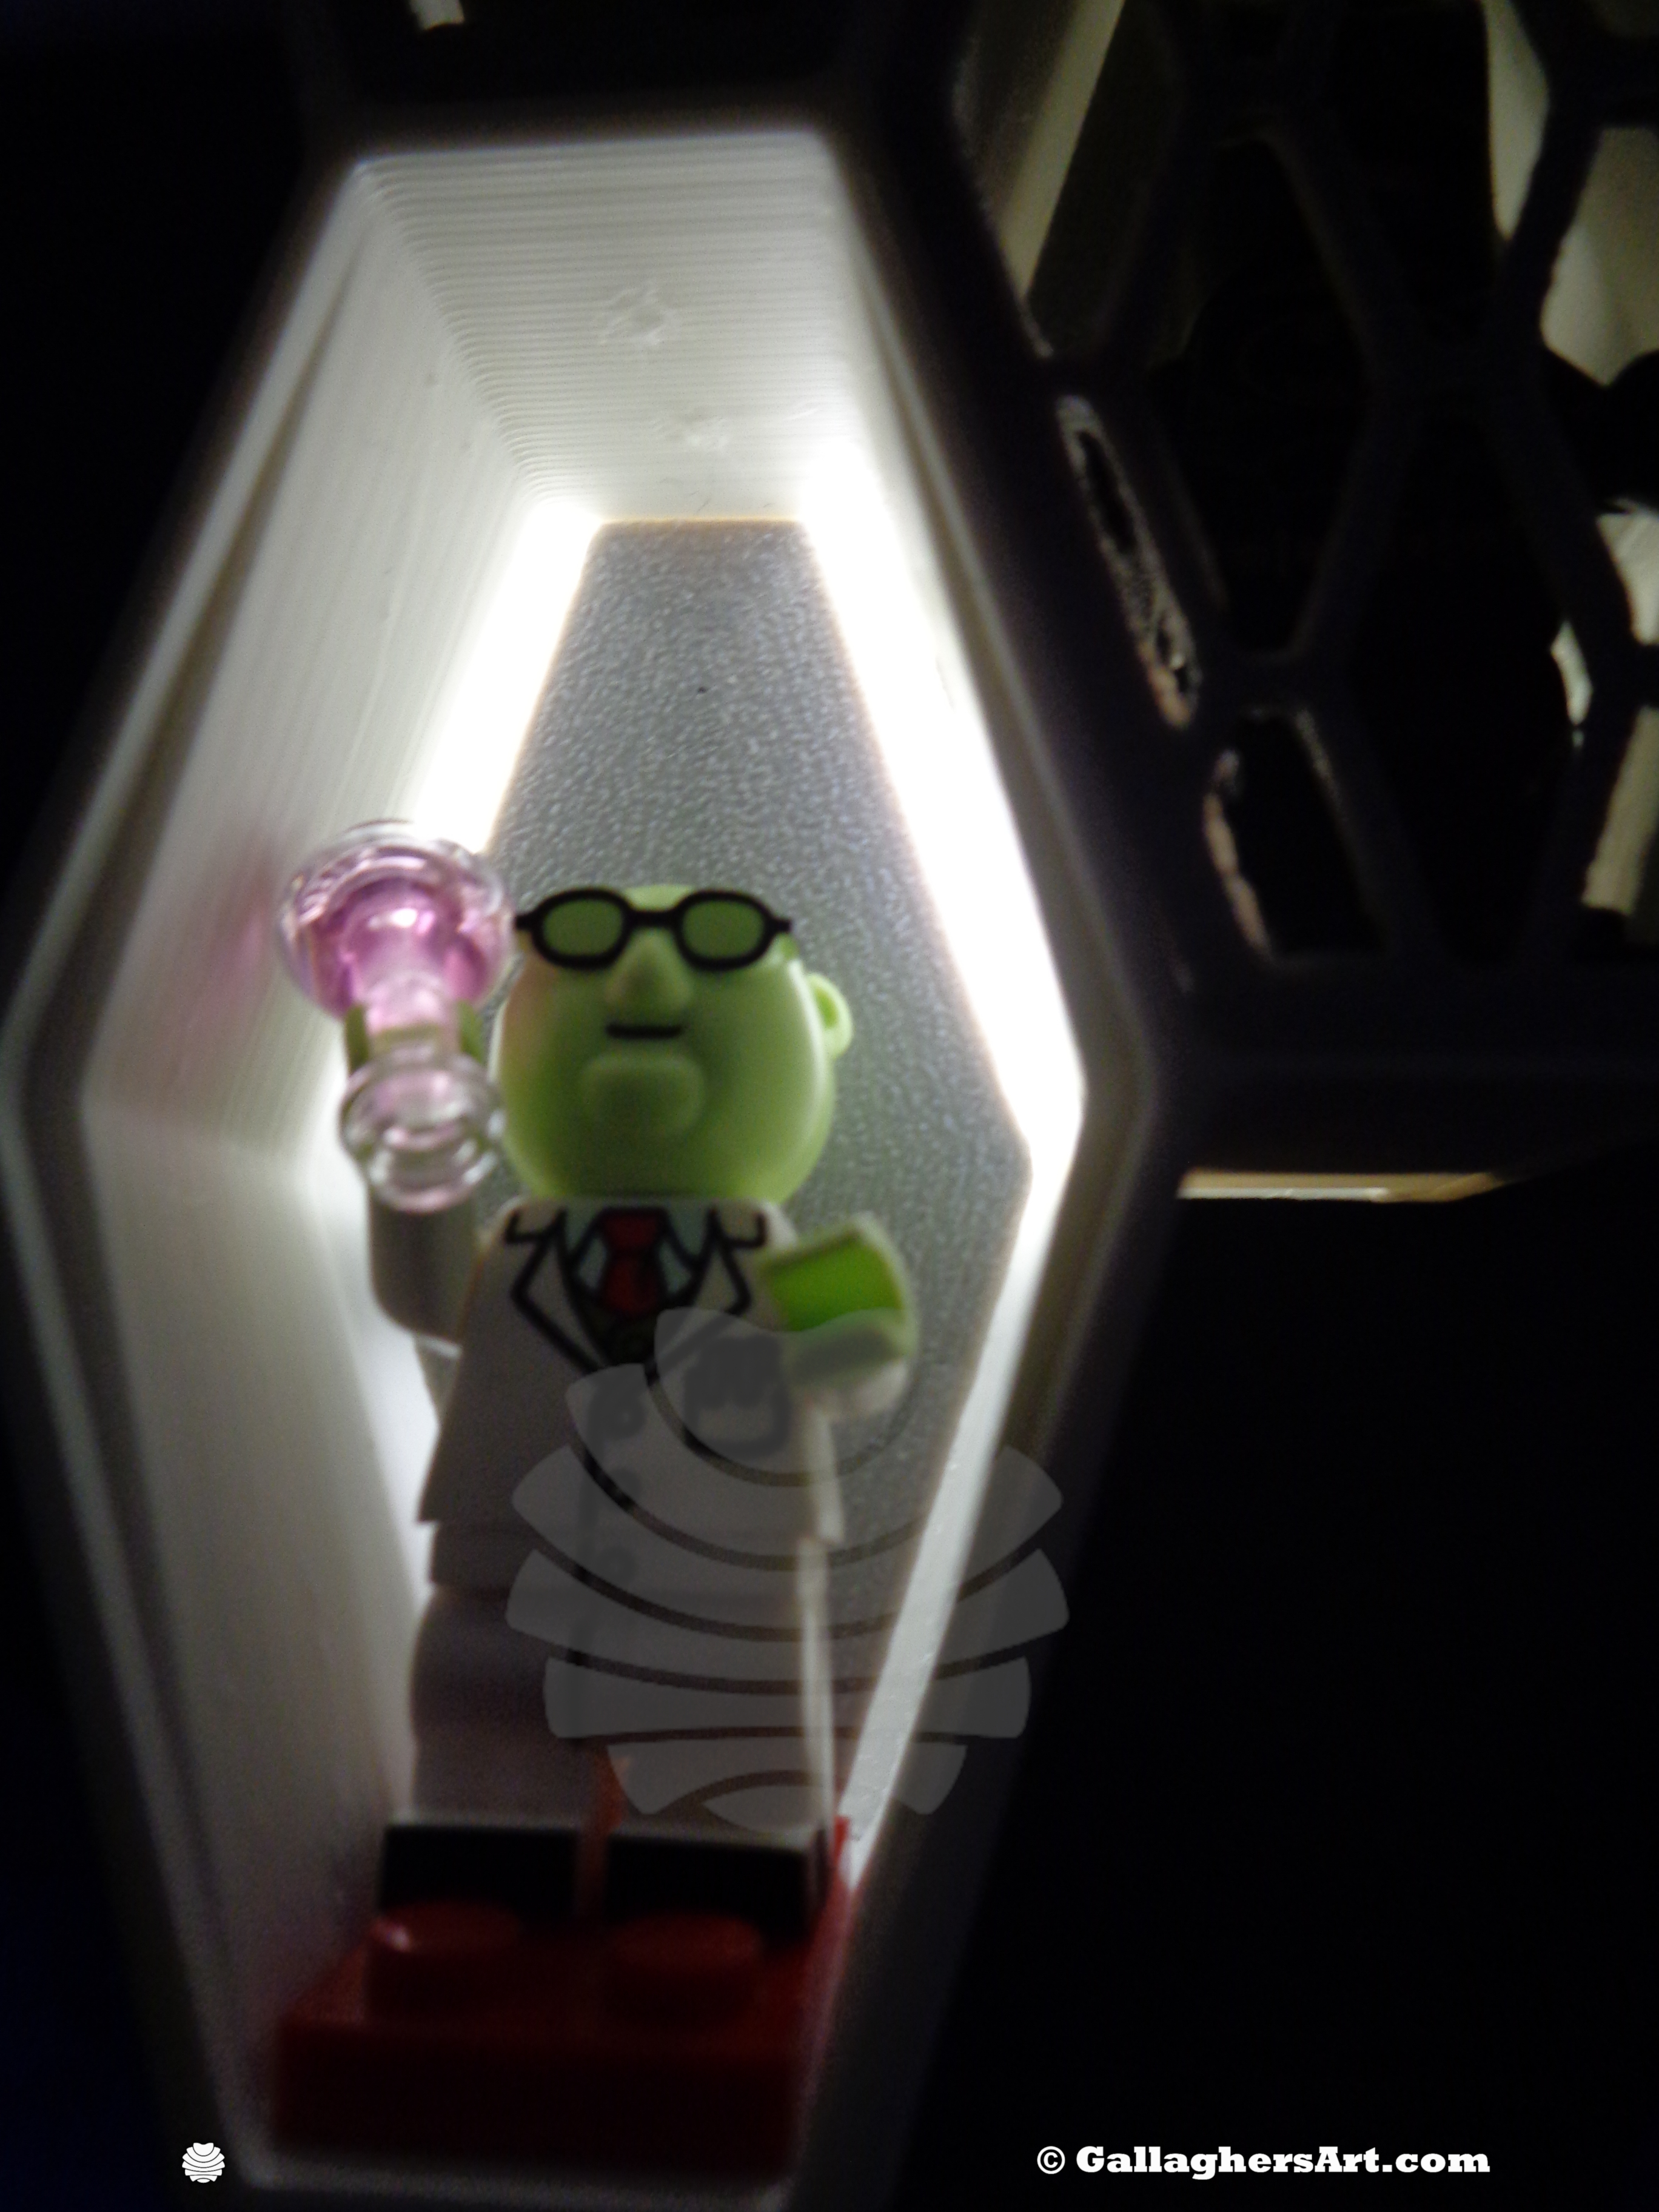
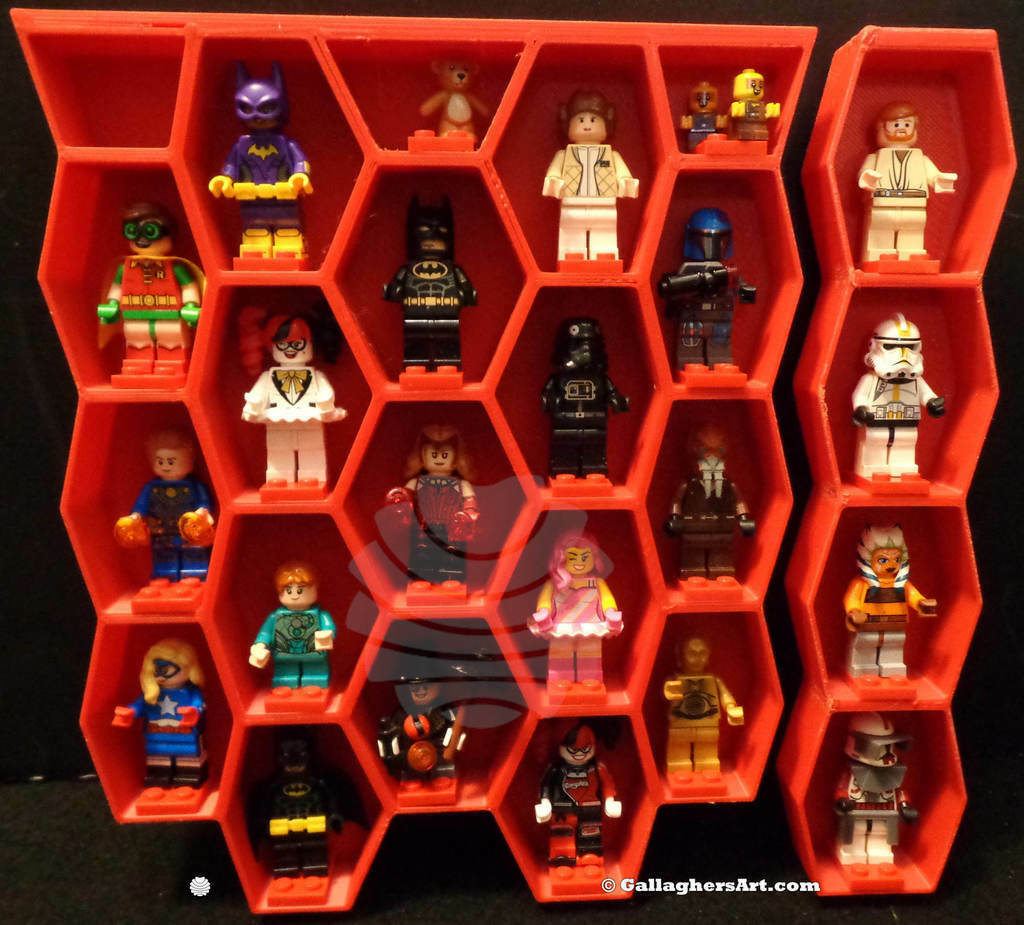
Parametric Modular Collectible Display Case, now with LED Back-Lighting
**2023 Dec. 3rd update, Vase Modules.
2023 Aug 5th, Sorry for the delay to update this, I had a loss in the Family and just now getting back into any head space that I can work on this.
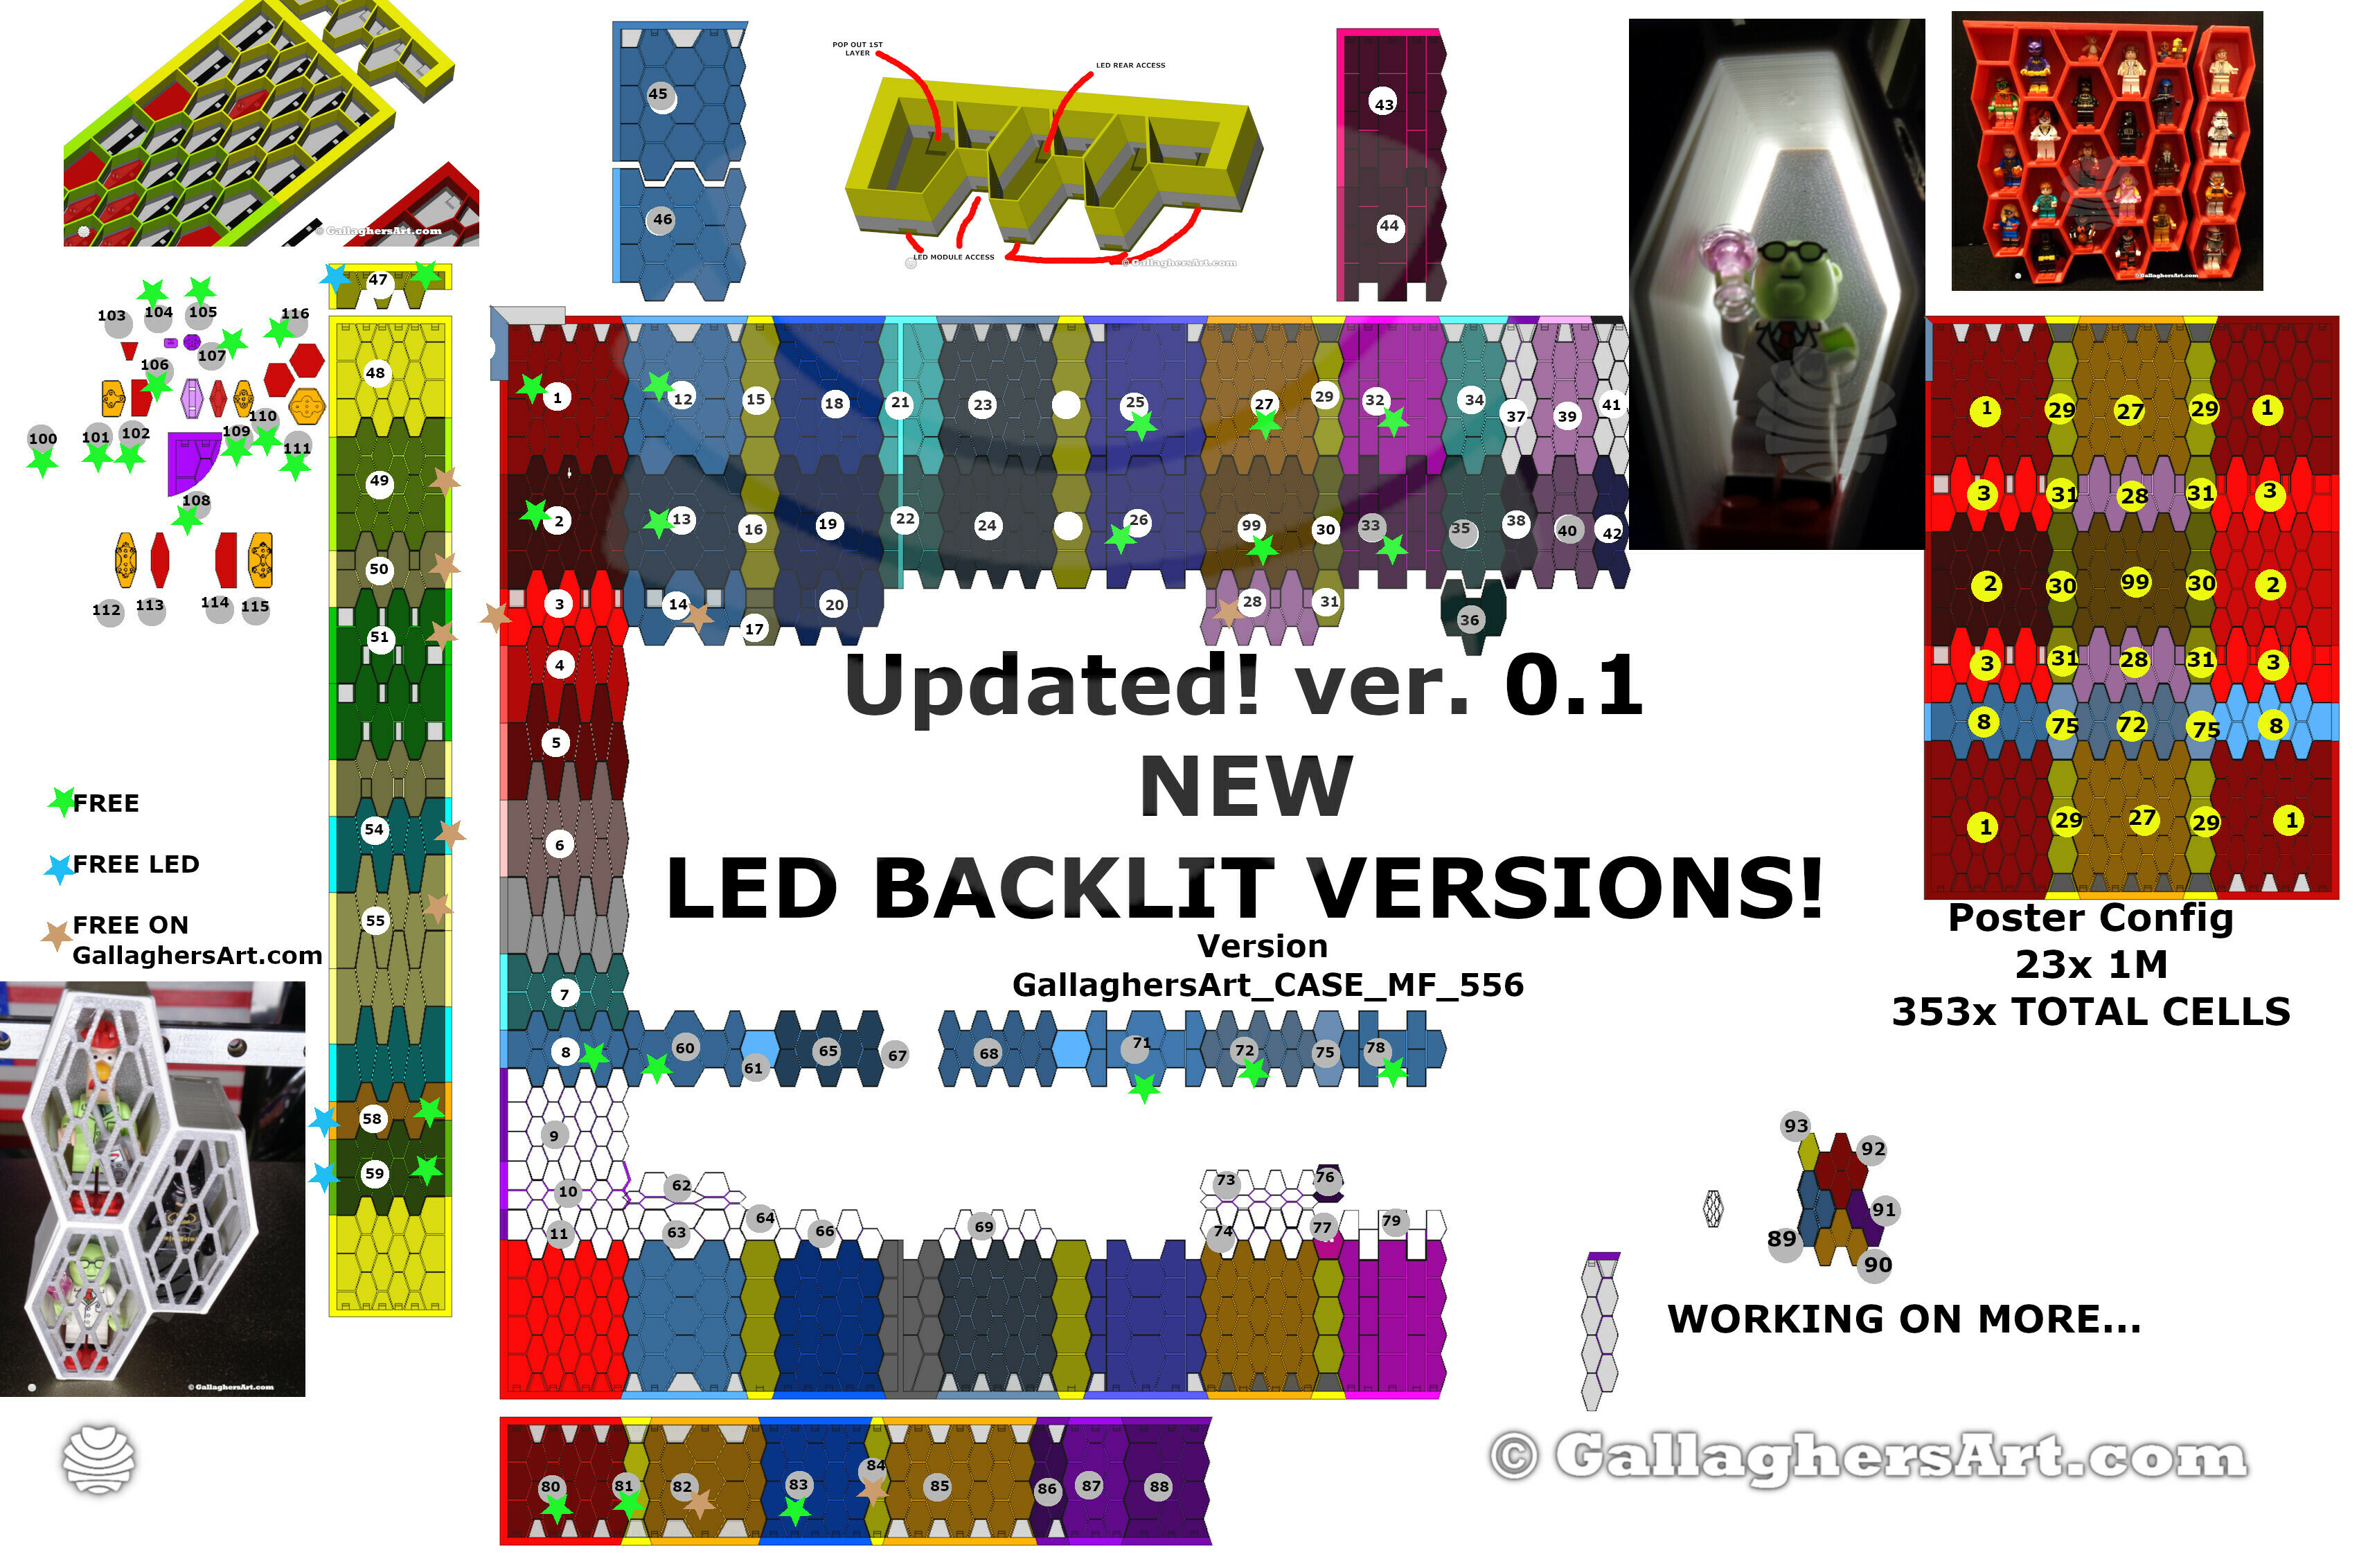
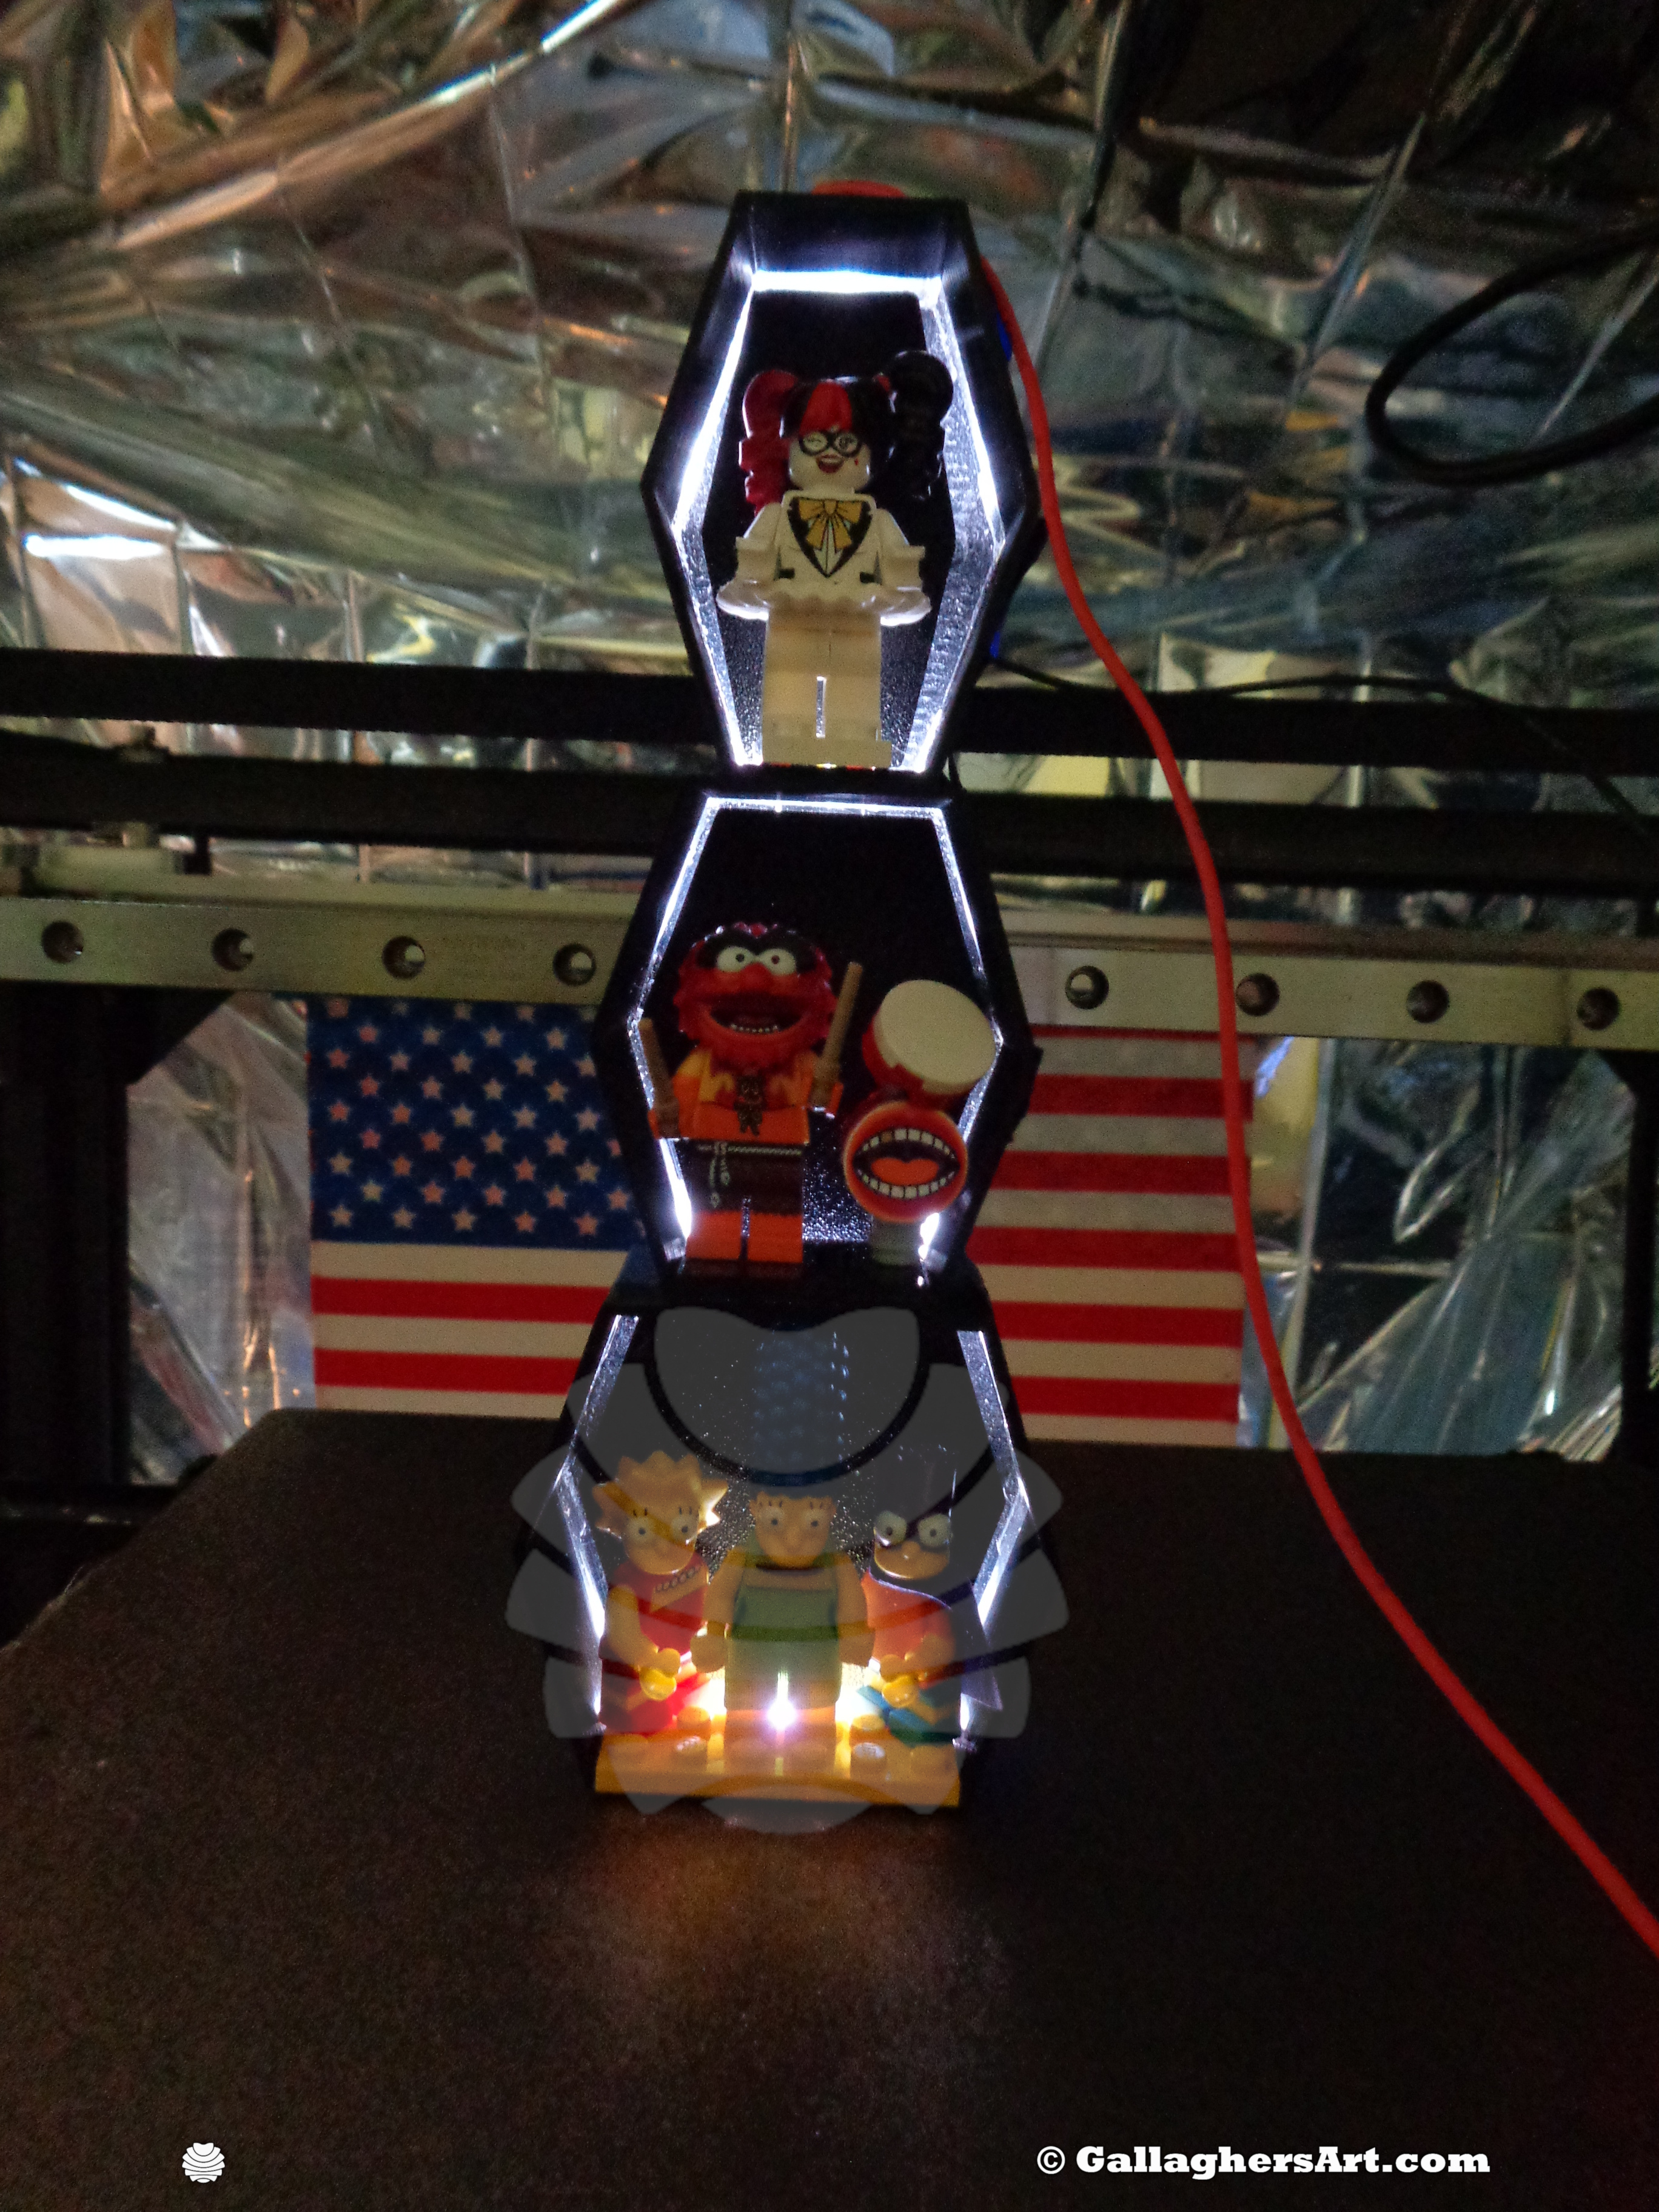
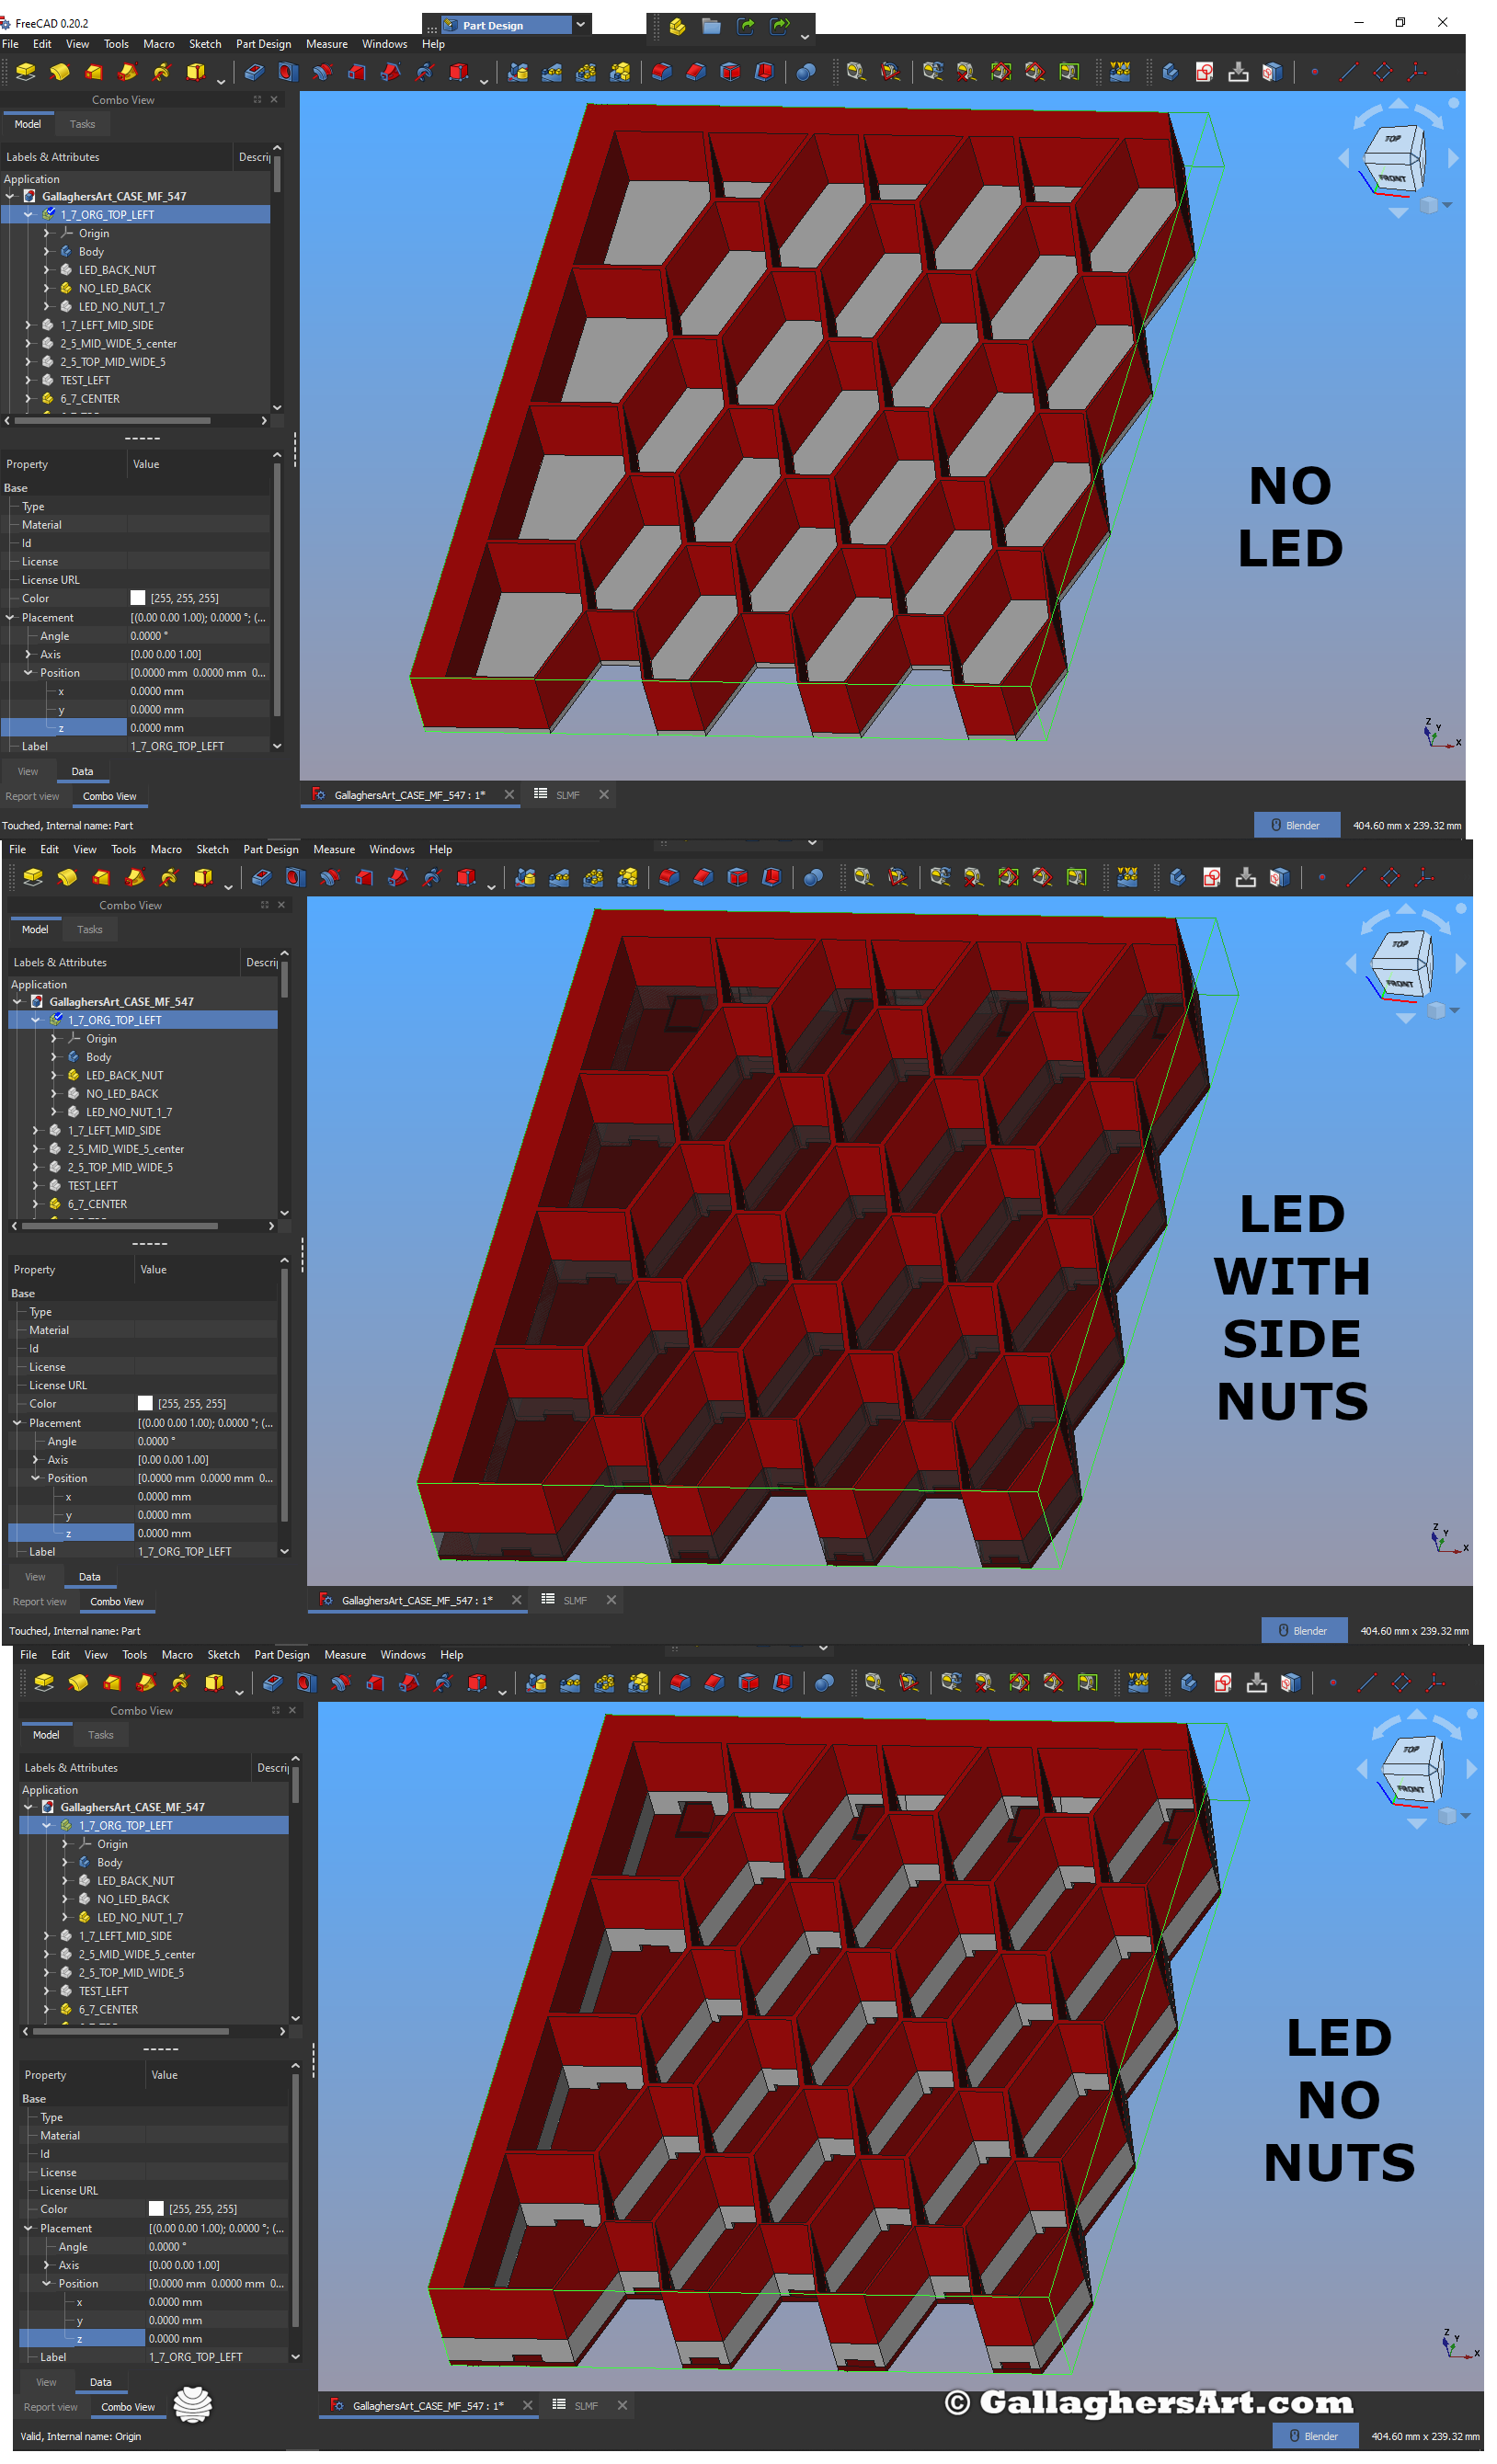
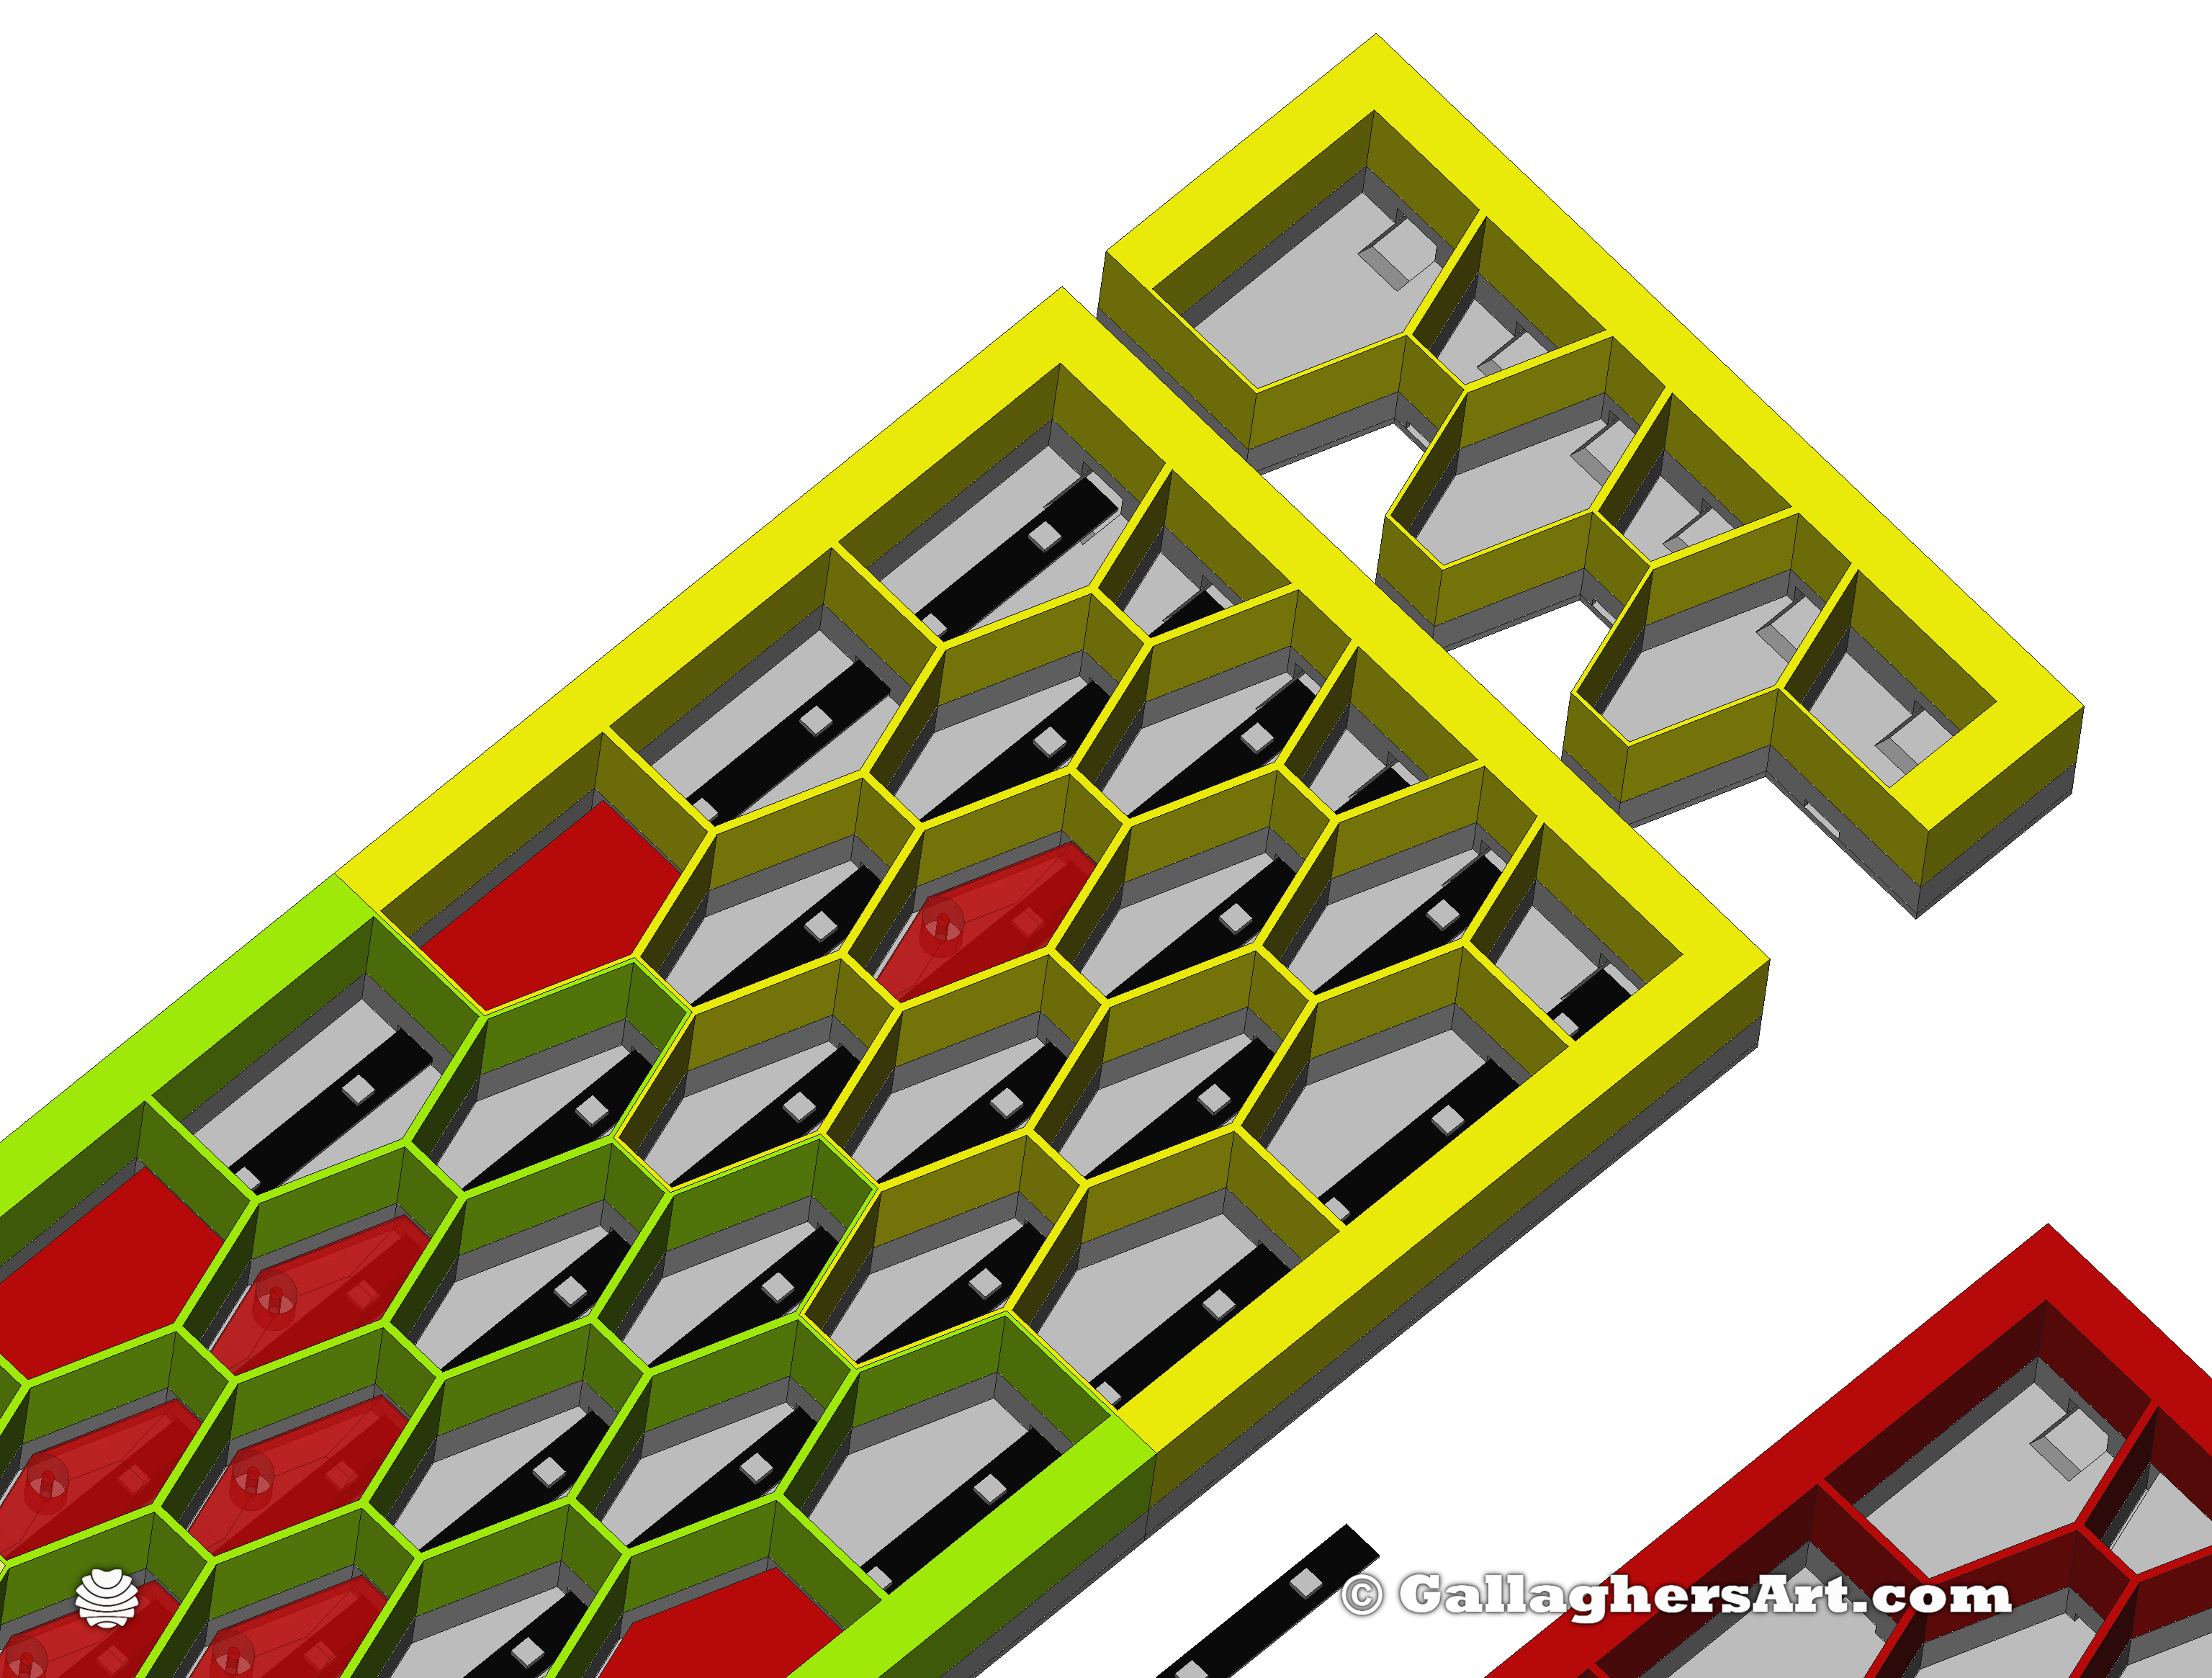
• Now with addressable RGB LED Back-lighting version, 74x Modules*.
• Side mounts for frames version, 10x Modules*.
• Non-LED version, 73x Modules*.
• Original Size non Non-LED version, 58x 3.2mm wall Modules, 59x 2mm wall Modules.*
Please Note*:
• On public free sites a limited assortment of STL’s will be available.
• Then more free modules plus the STEP corresponding files will be on my personal website. GallaghersArt.com Link
• Then a $1.99 Paid version gets you all modules in STL, STEP files, and source FreeCAD files to makes these your own personal versions. Done with a spreadsheet powered parametric CAD files. You don’t need to know full CAD to make changes then export to print. Paid Version Link $1.99
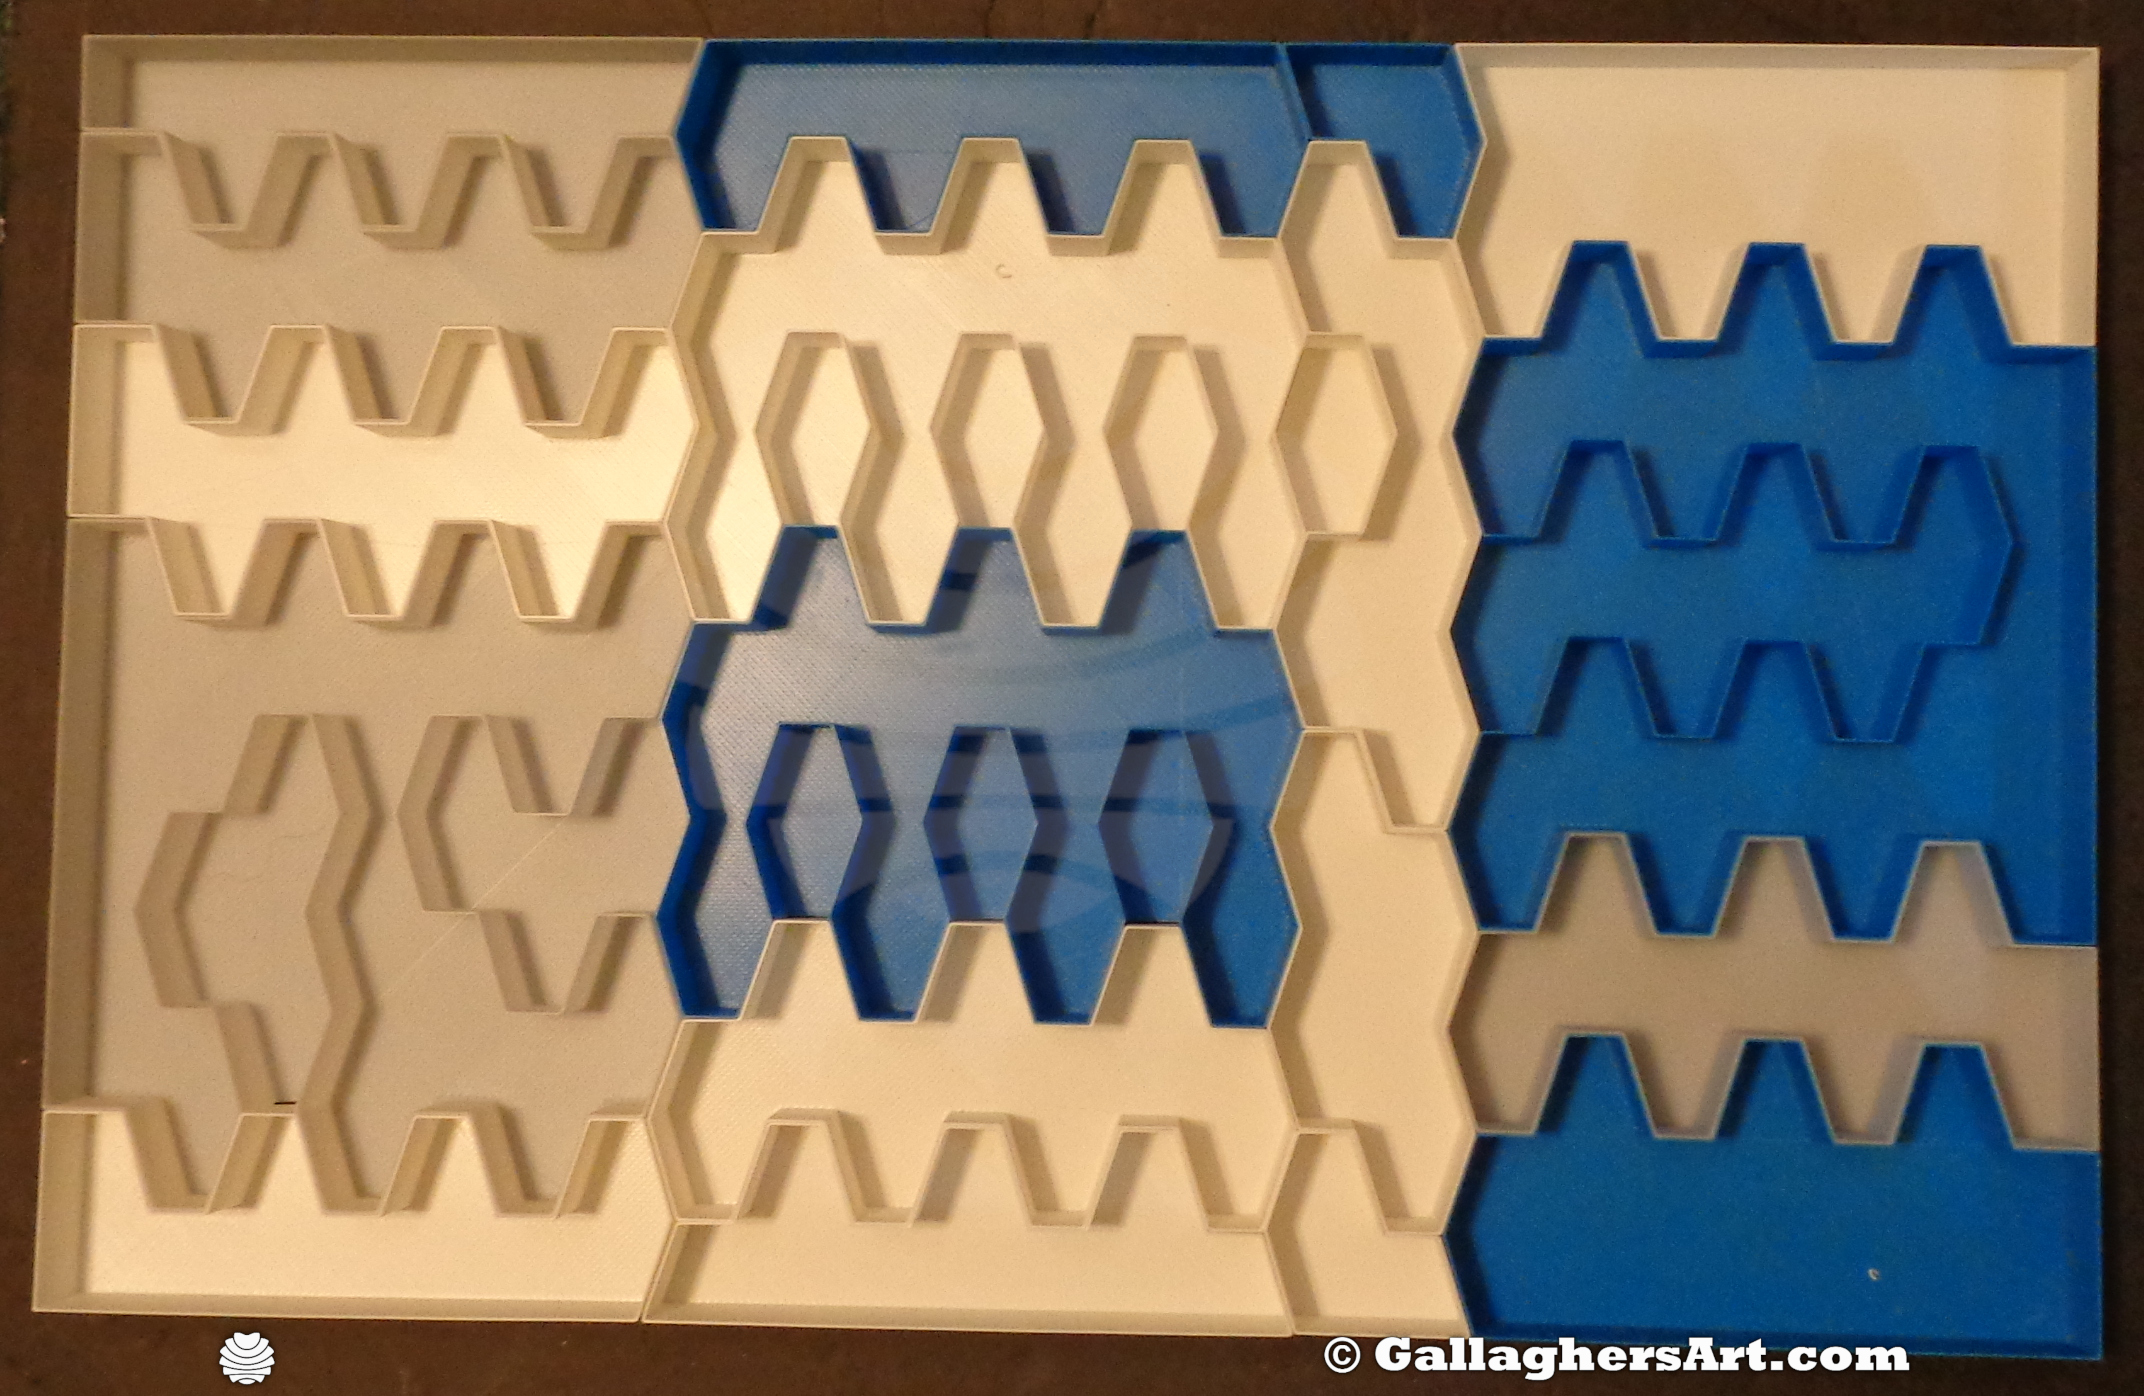
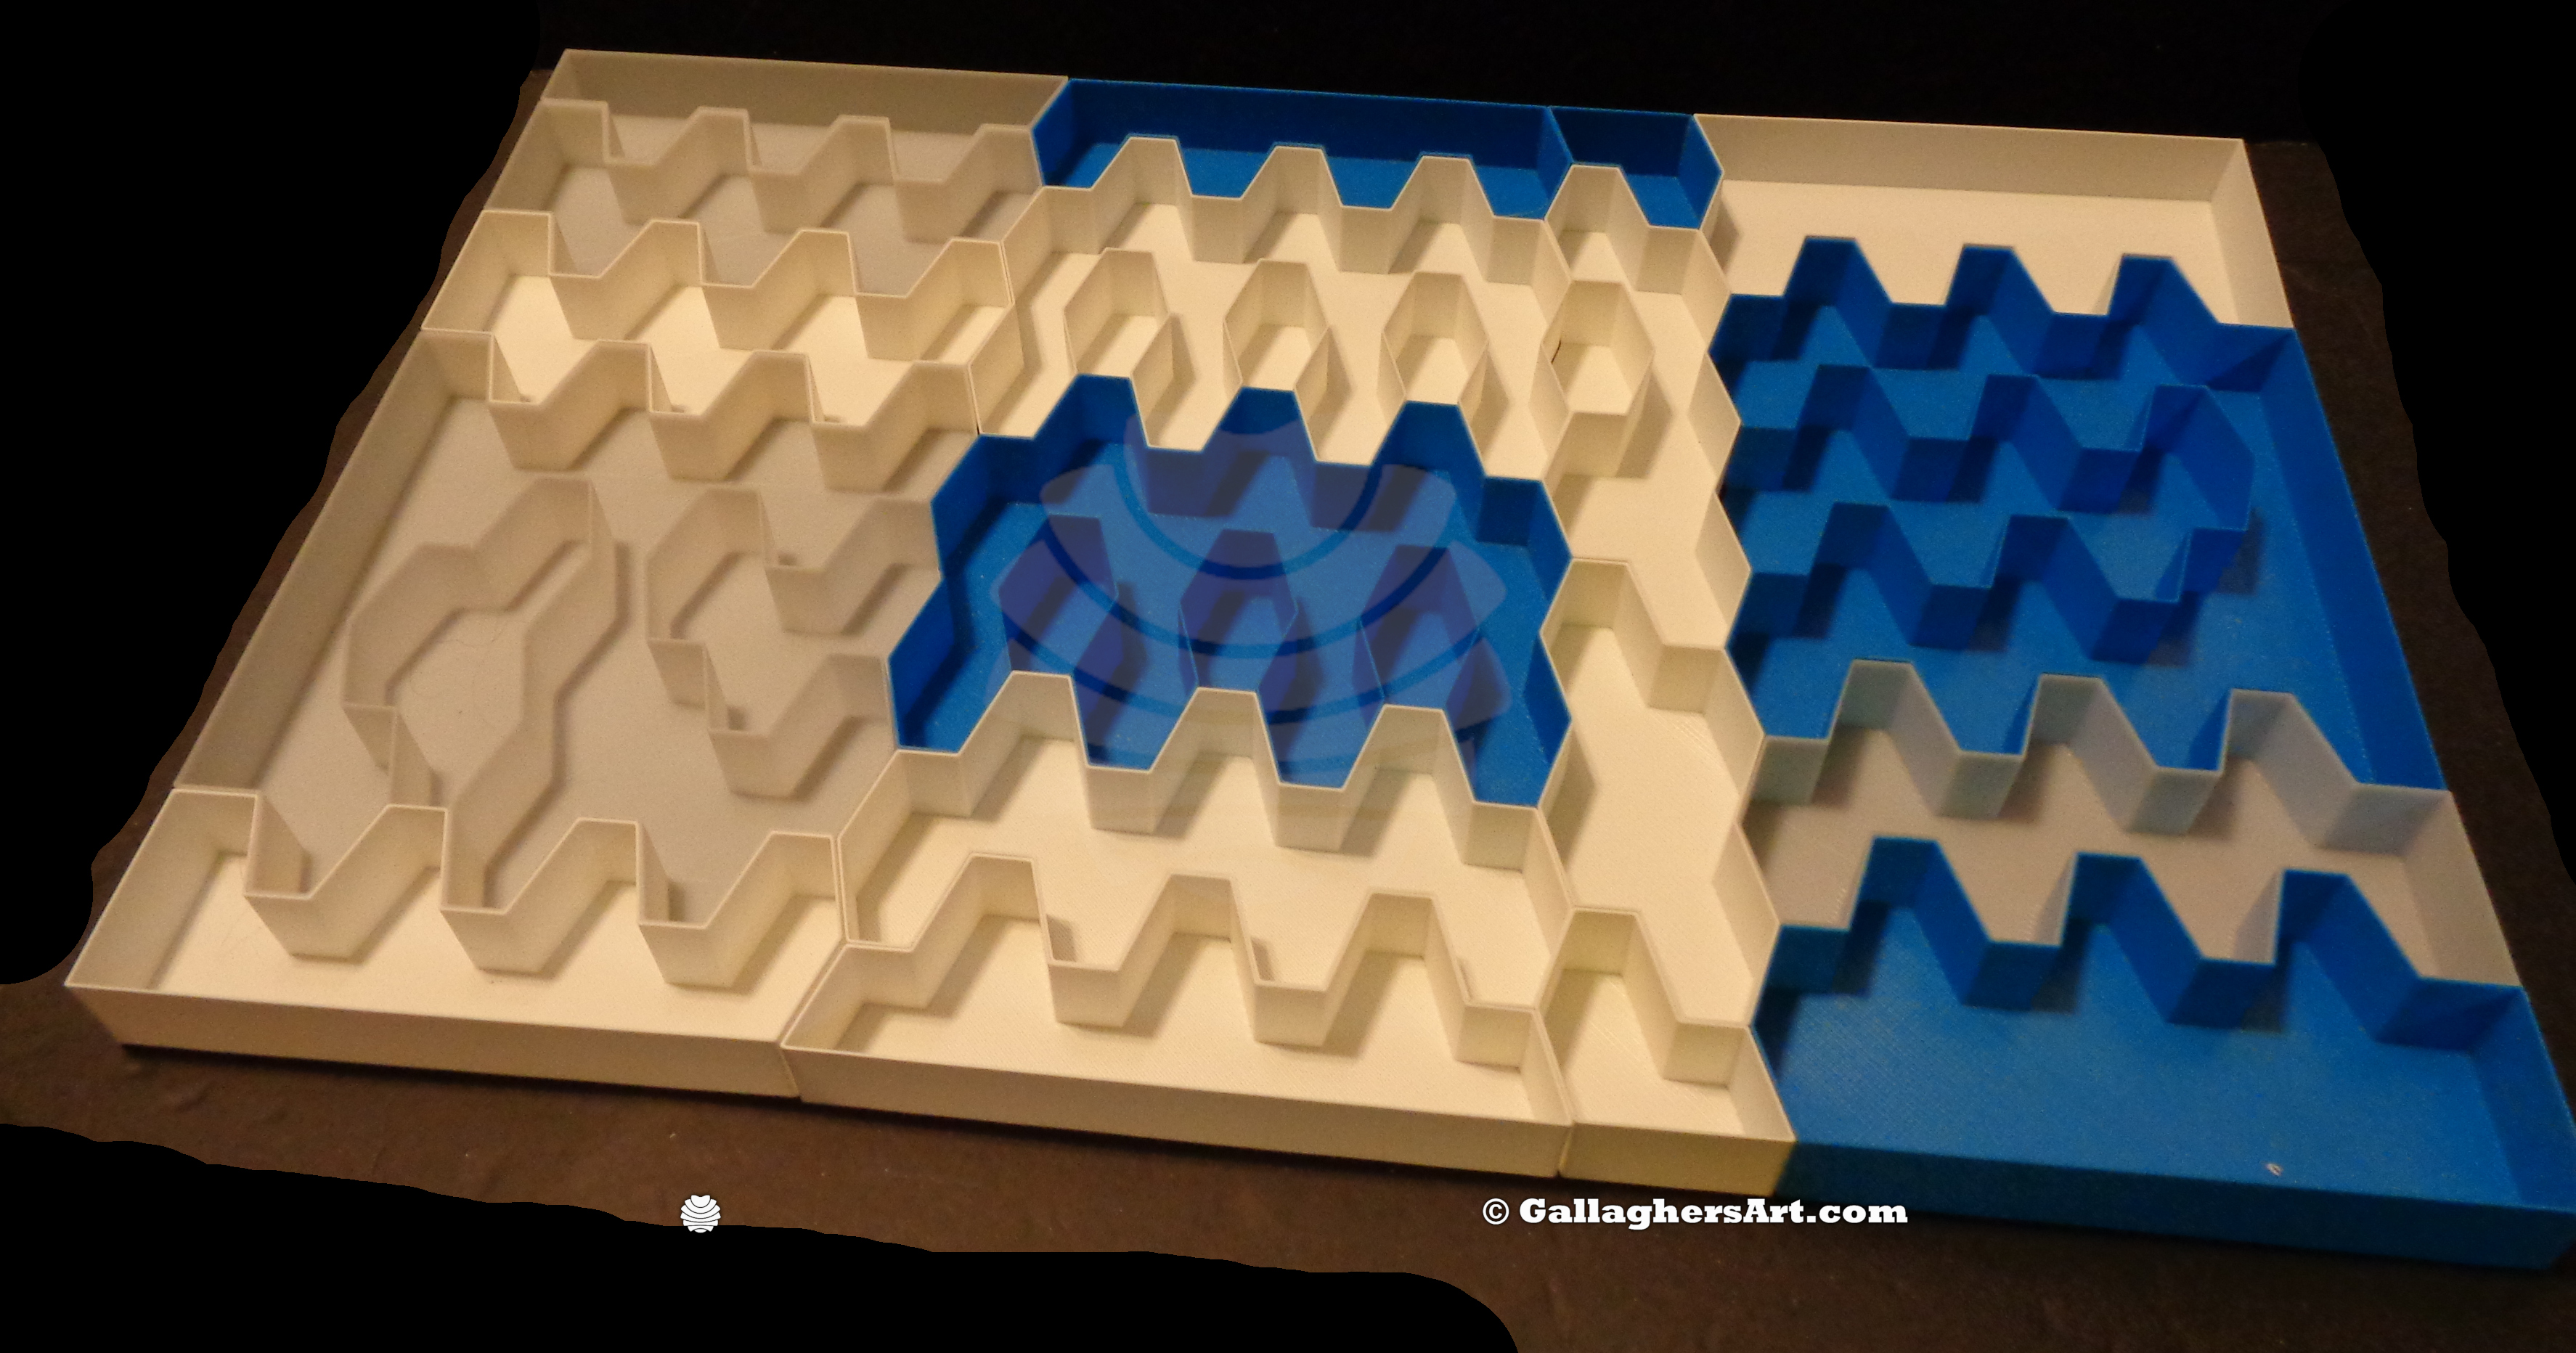
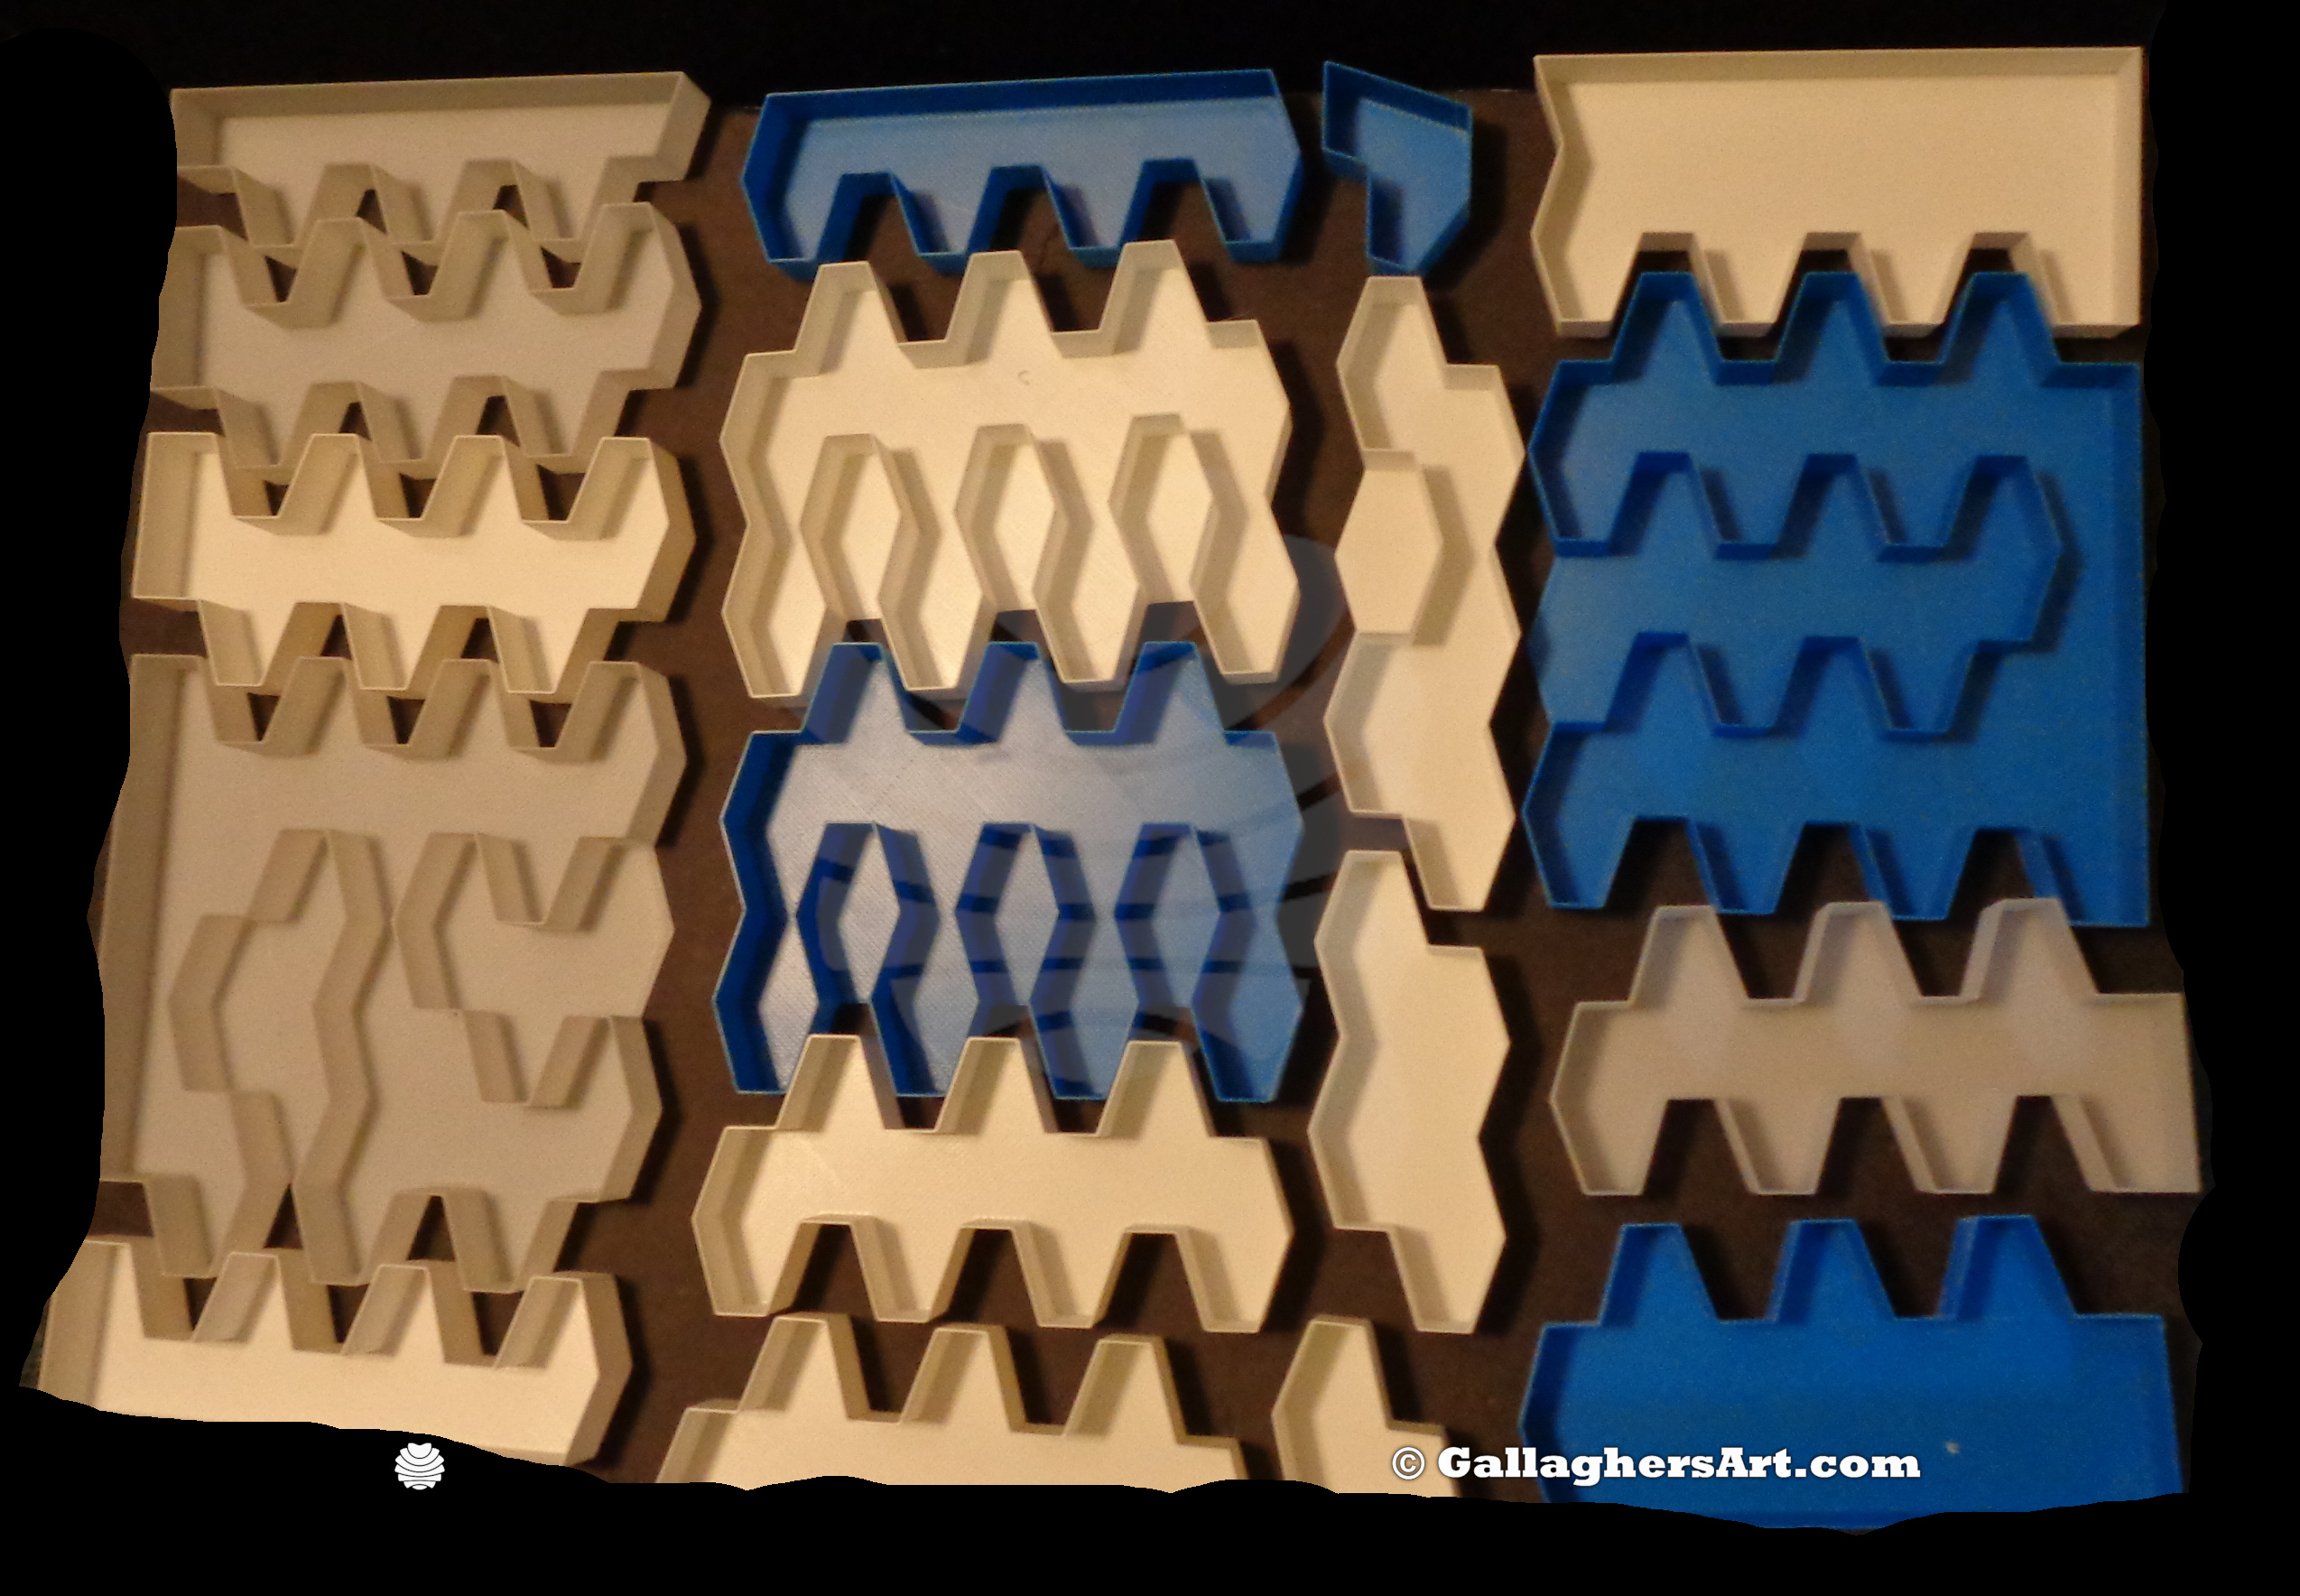
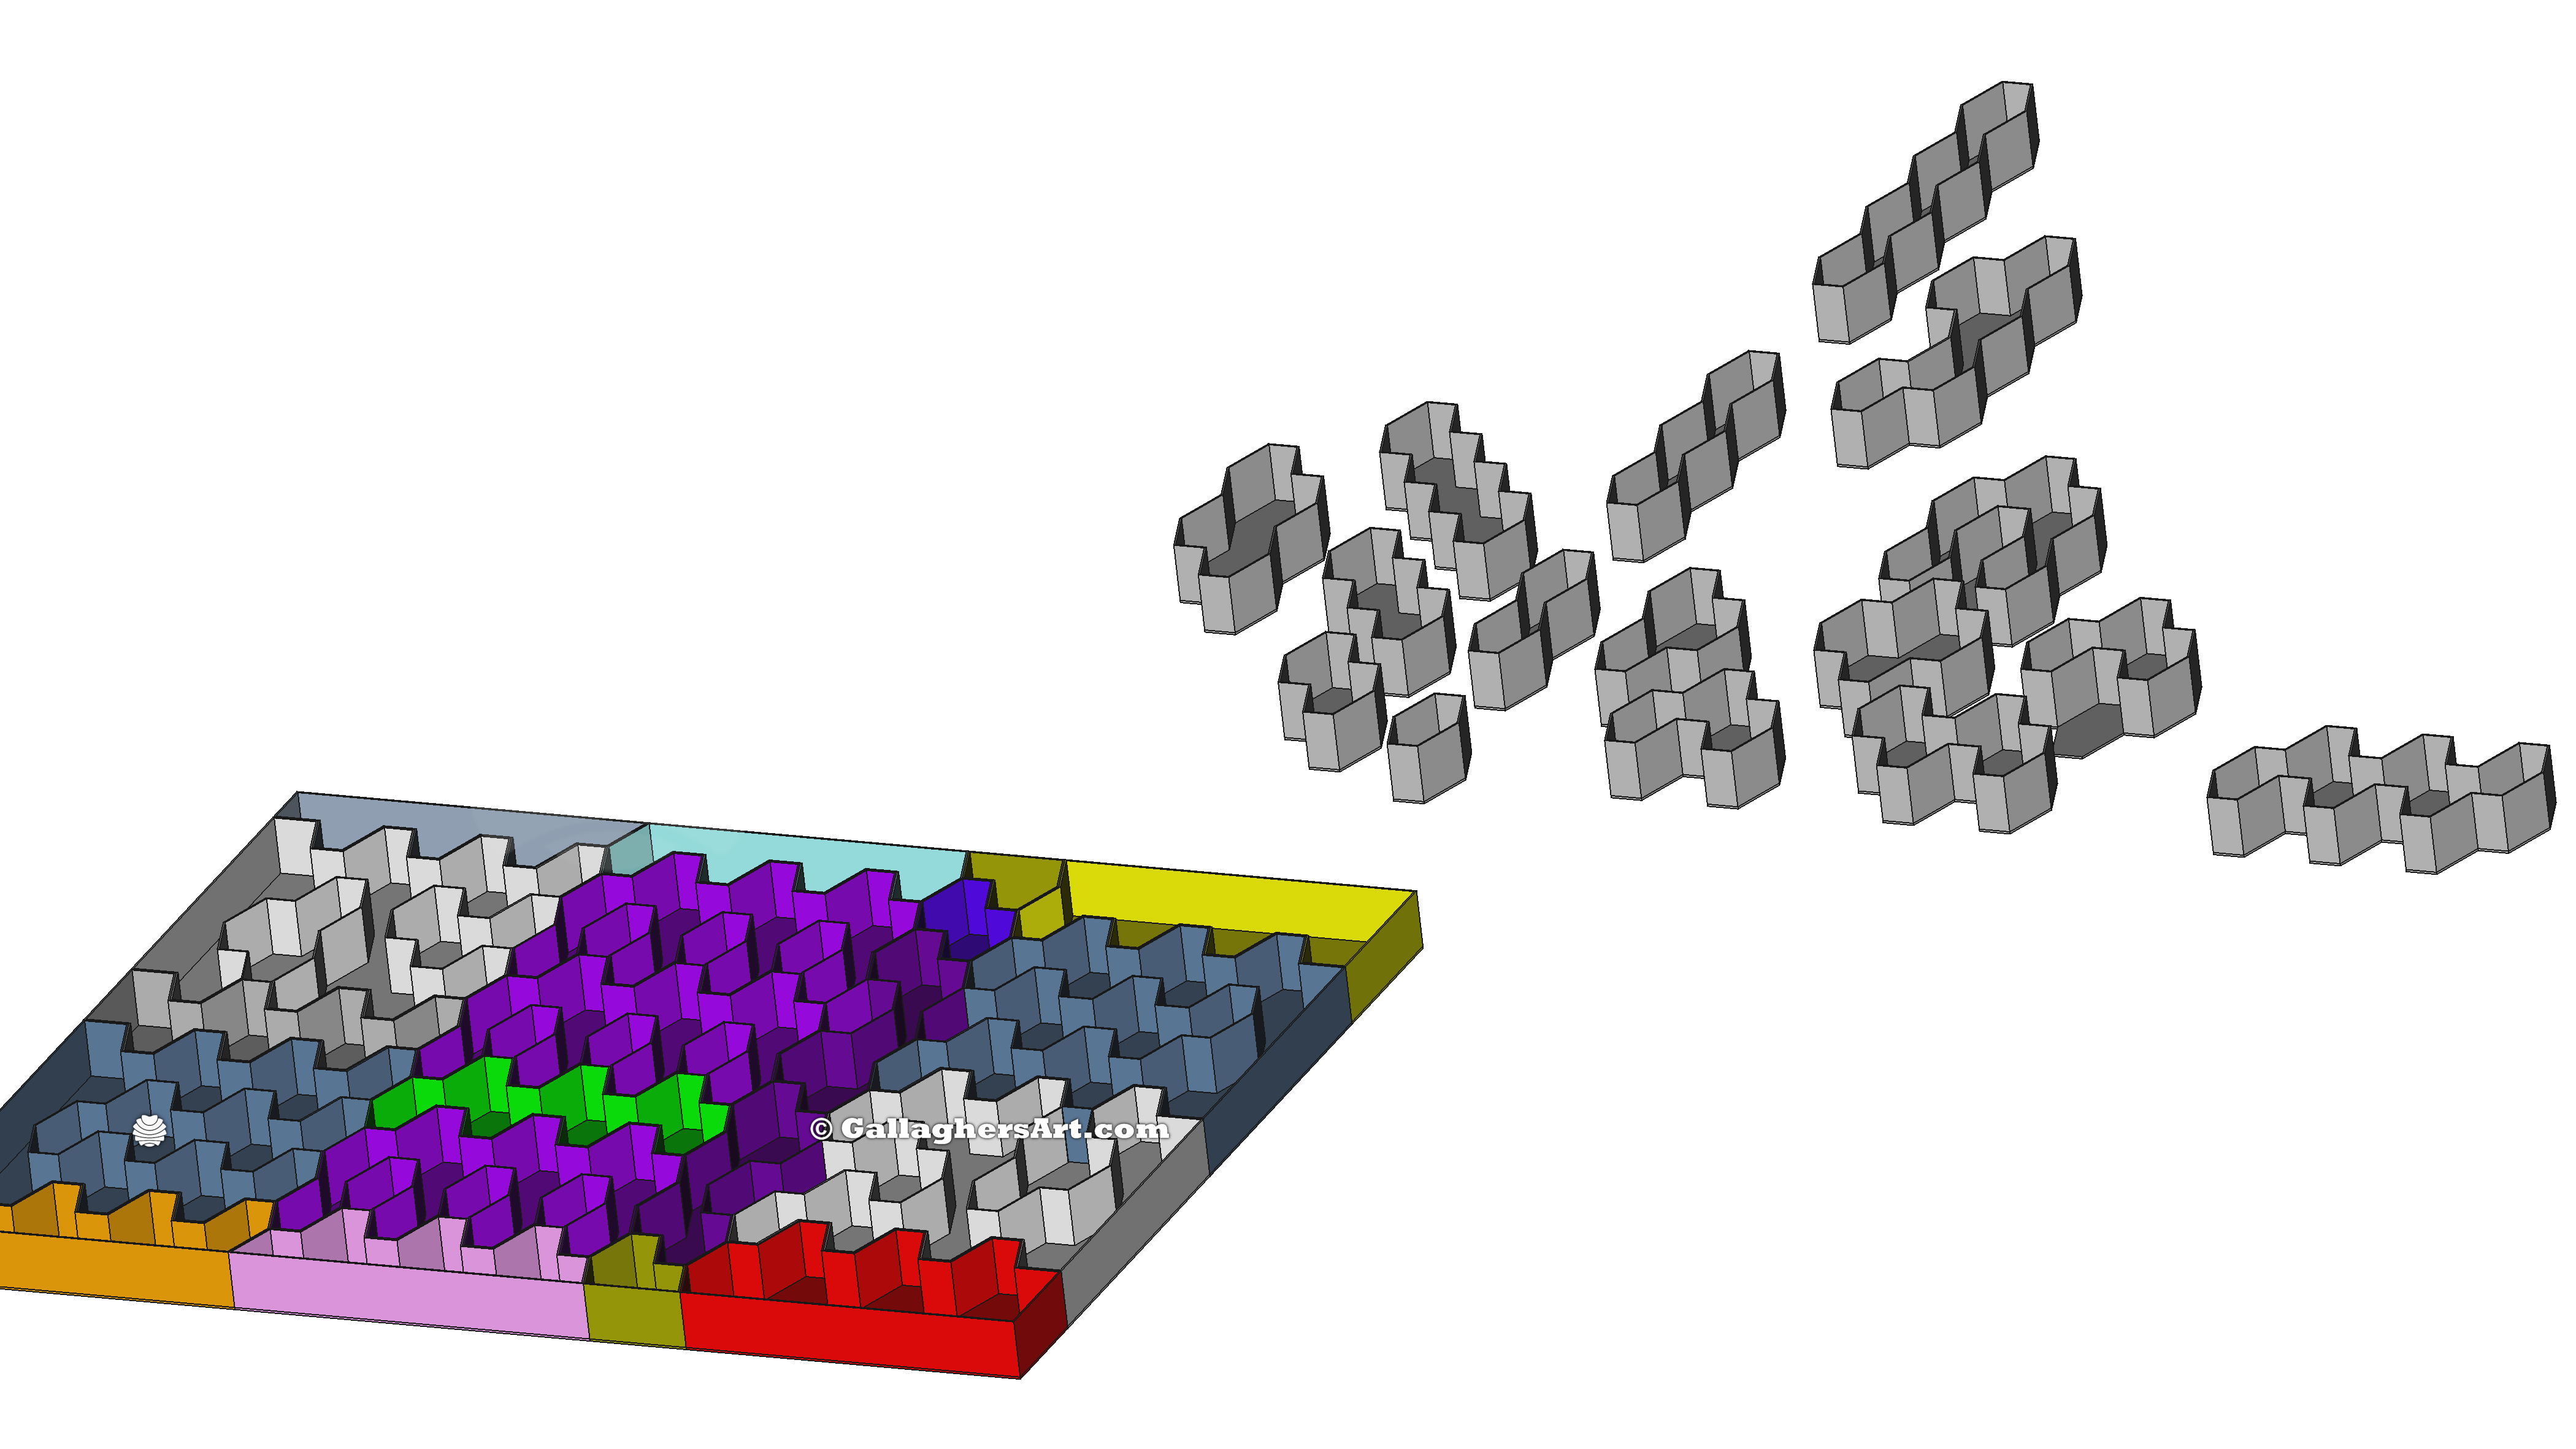
Please see image map on what modules are available where, Some 3D prints will need to be flipped or mirrored to make sets.
Please think about supporting me or buying the paid version as I need supplies and currently have no income. Even gifting a roll of filament will help me! Thanks!
With the paid version you can make these your own from:
• Changing sizes of cell’s, height, width (angle), depth, and more.
• Wall and frame thickness.
• Back / bottom thickness.
• Led back-lighting air cap.
• Depth of Cell, Depth of LED area.
• LED size. You can change cell height to match addressable LED lengths.
• and so much more, just look at some of the images.
The LED version right now is based off the 30 LED’s per Meter. This gives each cell 2 LED’s. They are also addressable. Have no clue how to program my Raspberry Pi to control the RGB strips, if you can and want to help please let me know. Right now looking at HyperBian.
The 1st layers are solid, so you will have to open any holes for access.
Also I have jigs that you can place in each cell and tap with center punch then drill the holes through the back. I found including these holes in the print made it less strong and looked bad, and longer print times. I like to the have the final layer (back of Cell) be vertical to how the module will end up hanging.
I may make a version of the RGB 144x LED’s per meter version, but would need materials. Also looking at the RGB COB versions.
Have a test new version that I may just add to all modules. Instead of a single piece of glass to cover them all, each cell has it own cover. Small laser cut plexy glass cell cover snaps into place. See picture with moc up hex grid covers (I 3D Printed, I don’t have glass, or laser cutter). Would be a good use for laser cut scraps.
Things I still have to do:
• code the Raspberry Pi to control the RGB addressable lights.
• 3DPrint more modules.
• Cover versions..?
• Mount my 1st wall section (1 meter tall vertical version).
• Make Source File no have errors when resizing (most OK now).
• Complete LED Back inserts for all LED modules.
• Complete LED JIGS for all modules.
• RGB standalone Controller.
Things I would like to do:
• Complete new Modules for all rows and columns of module map picture.
• More modules.
• Modules in Letter Shapes (A,B,C,,,,L,,O).
• Better instructions.
• Smaller Cell count Modules for larger Cells.
• RGB 144 LEDS per meter.
• RGB COB LED.
• Large Scene sized cells / modules, not just a single thing.
• You have any ideas? Let me know while I’m still working on this.
• Version that has a some what hidden LED above each item. Would be a wiring nightmare but could be done.
Basic Instructions:
• I have printed in ABS and PLA, just use your settings.
• Modules walls work good at 2mm. No thinner.
• If mounting to frame sides then make the modules solid.
• Sanding, cutting, and removing 1st layer sacrificial areas will need work.
Installation Order (LED): I make no guarantee this is everything...
• Print all modules, make fit together.
• Cut back wood board to size.
• Pic at least 1 cell in each module to drill a hole in its center to screw module to back board.
• Attach all modules temporary in place with these screws.
• Punch alignment locations with correct JIG per cell.
• Drill with 3mm all holes that LED backs will attach to, through modules and back board.
• Drill or mark LED entry / exit location that need removed.
• Remove modules, mark the main holes that modules attach to, maybe cover with tape.
• Drill all the holes made for the LED mounts to be larger than the 3mm bolts heads. LED backs only attach to Modules not back board.
• Drill all the entry / exit LED location with drill bit larger than the LED connector.
• Reinstall modules for final fit and verification. All modules should be as tight as possible, all drill holes should line up both the from the front and back.
• If all is good, then mount modules permanently. Tighten, More bolts, glue…
• Before installing LED, carefully slice some of the LED back tape off in a way so you have something to grab to pull tape off once in place and then press LED tape modules down.
• Take your time and carefully thread the LED strips through the modules cells.
• Attach wire and connectors to properly wire your display.
• Test All LED’s work correctly.
• Remove LED back tape and press sticky LED back onto the modules back.
• Some Versions of the LED backs can have a part to keep LED strip pressed against modules (will soon).
• Secure wire management permanently.
• Re-Test all LEDS, Check for hot spots (can indicate bad LED).
• Install LED backs with screws from the back.
• Verify all LED backs look good and vertical.
• Verify all bolts tight.
• Hot glue plates to bottom of cells.
• Install glass or cover glass's.
• Enjoy all your Collectible in a small space, Safe and secure.
Miscellaneous info:
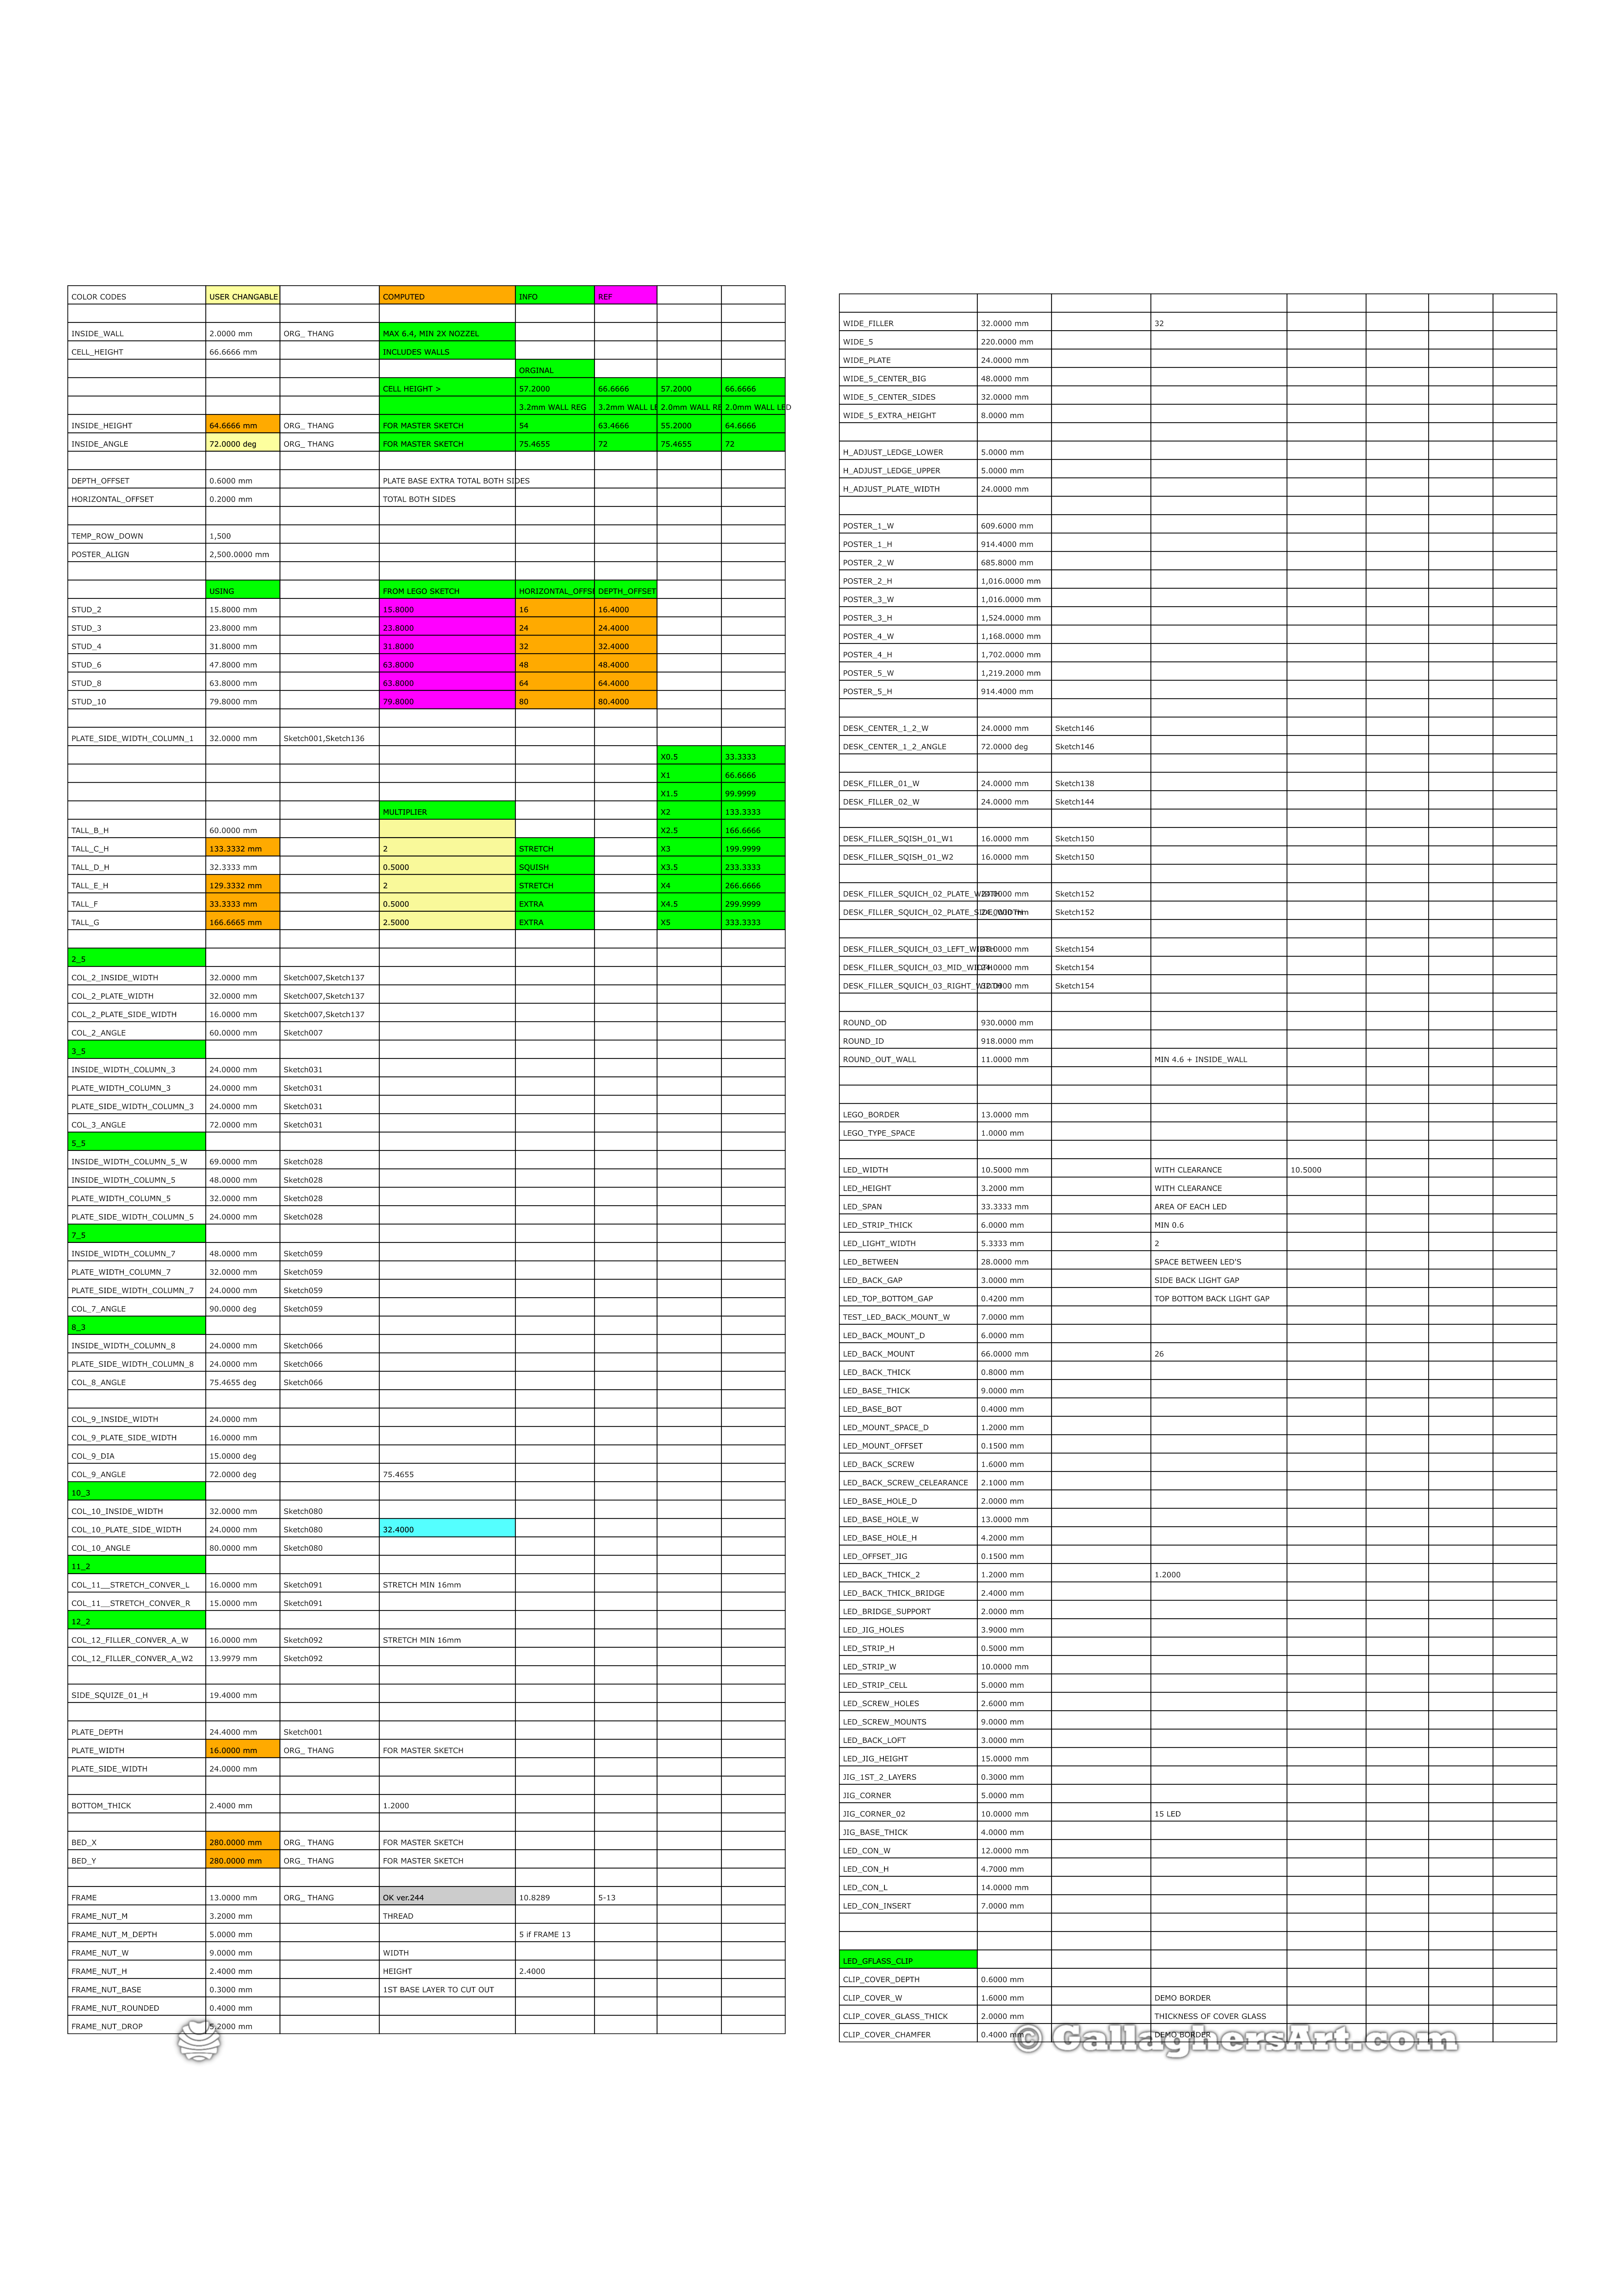
• Everything is controlled from the spreadsheet. The spreadsheet is in a separate FreeCAD file. This is so you can make changes without having FreeCAD lock up while it Recomputes each change in the spreadsheet. I also right click on main model and select “Skip Recomputes”. I just right click on just the things I’m working on and Recompute just those. From time to time I Recompute the whole file and that takes awhile. Once you made changes in the Spreadsheet just Recompute object for hit F5 to refresh all.
• If you make different versions create a separate folder and copy the 2 FreeCAD files in to it. I would also rename main file after making changes. As some changes break the UNDO option. In those cases manually undo most recent spreadsheet changes and save as version b, then close. Then open last good version. This is why my files name has 555+- in the files name. I would also manually copy the spreadsheet file to make copies over time. DO NOT change spreadsheet files name.
• The diameter of my center punch is XXX
• Currently having the frame small will break the NUT LED versions. If your not using these then no worriers other configurations for each module still work.
• I included an image on how to export the different Versions. Show how the option you want are not hidden. Then select main module (it should look as you want it) then got to export. Default export is low res. If you change resolution to your file it will make it slow down even more: Go To Preferences > Part/Part Design > shape view, max dev. = 1 > 0.1, max ang. = 30 > 1. Bodies and sketches can also have these changes just for that object. There is also a preference for how STEP are exported.
• I prefer to print the LED Backs on powder PEI as it gives the backs of the cells a nice look.
• I also added extra magnets &metal weight to the top of my flex sheet once the 3D print was high enough. This helped keep the sheet on the bed.
• Mind the locations for your Z seams before you print, to minimize cleanup, or keep things looking good.
• Print test modules first so you know things fit, some may need extra sanding or after care. I prefer to have to sand verses being printed too small.
• I have various offsets for printer slop that can be charged in the Spread Sheet. (DEPTH_OFFSET and HORIZONTAL_OFFSET are for the area the 2x3 or larger plastic plate would be placed), (LED_TOP_BOTTOM_GAP is an extra gap for the LED backs), (LED_MOUNT_OFFSET & LED_OFFSET_JIG is the offset for all sides of the JIGS so they can fit tightly in each cell to get good punch location for drill holes), (CLIP_COVER_OFFSET is for the laser cur glass covers).
Parts:
• M3 Square nuts.
• M3 bolts.
• Bolts to attached modules to back board.
• Zip ties.
• 18awg 2x power wire and 4x same type, used on connector's.
• 30 LEDs per meter RGB addressable. 12v.
• Hot glue gun.
• Fine jewelry files.
• Fine Sand Paper, and hard flat surface.
• 12v LED capable power supply.
• RGB LED 12-24v Controller.
• Hand tools; Allen for M3 bolts and those that match your other bolts / nuts.
• M3 3mm drill bit to open backs of LED modules so you can attached LED backs.
• M2.4, 2.4mm (m3 tap) drill bit to open up the backs of the LED backs, place tape on bit so to not go too far. Best to use drill press.
• De-burr tool
• (Cover version only) Mini suction cups to pull off already inserted glass cover per cell.
• Glue? You decide.
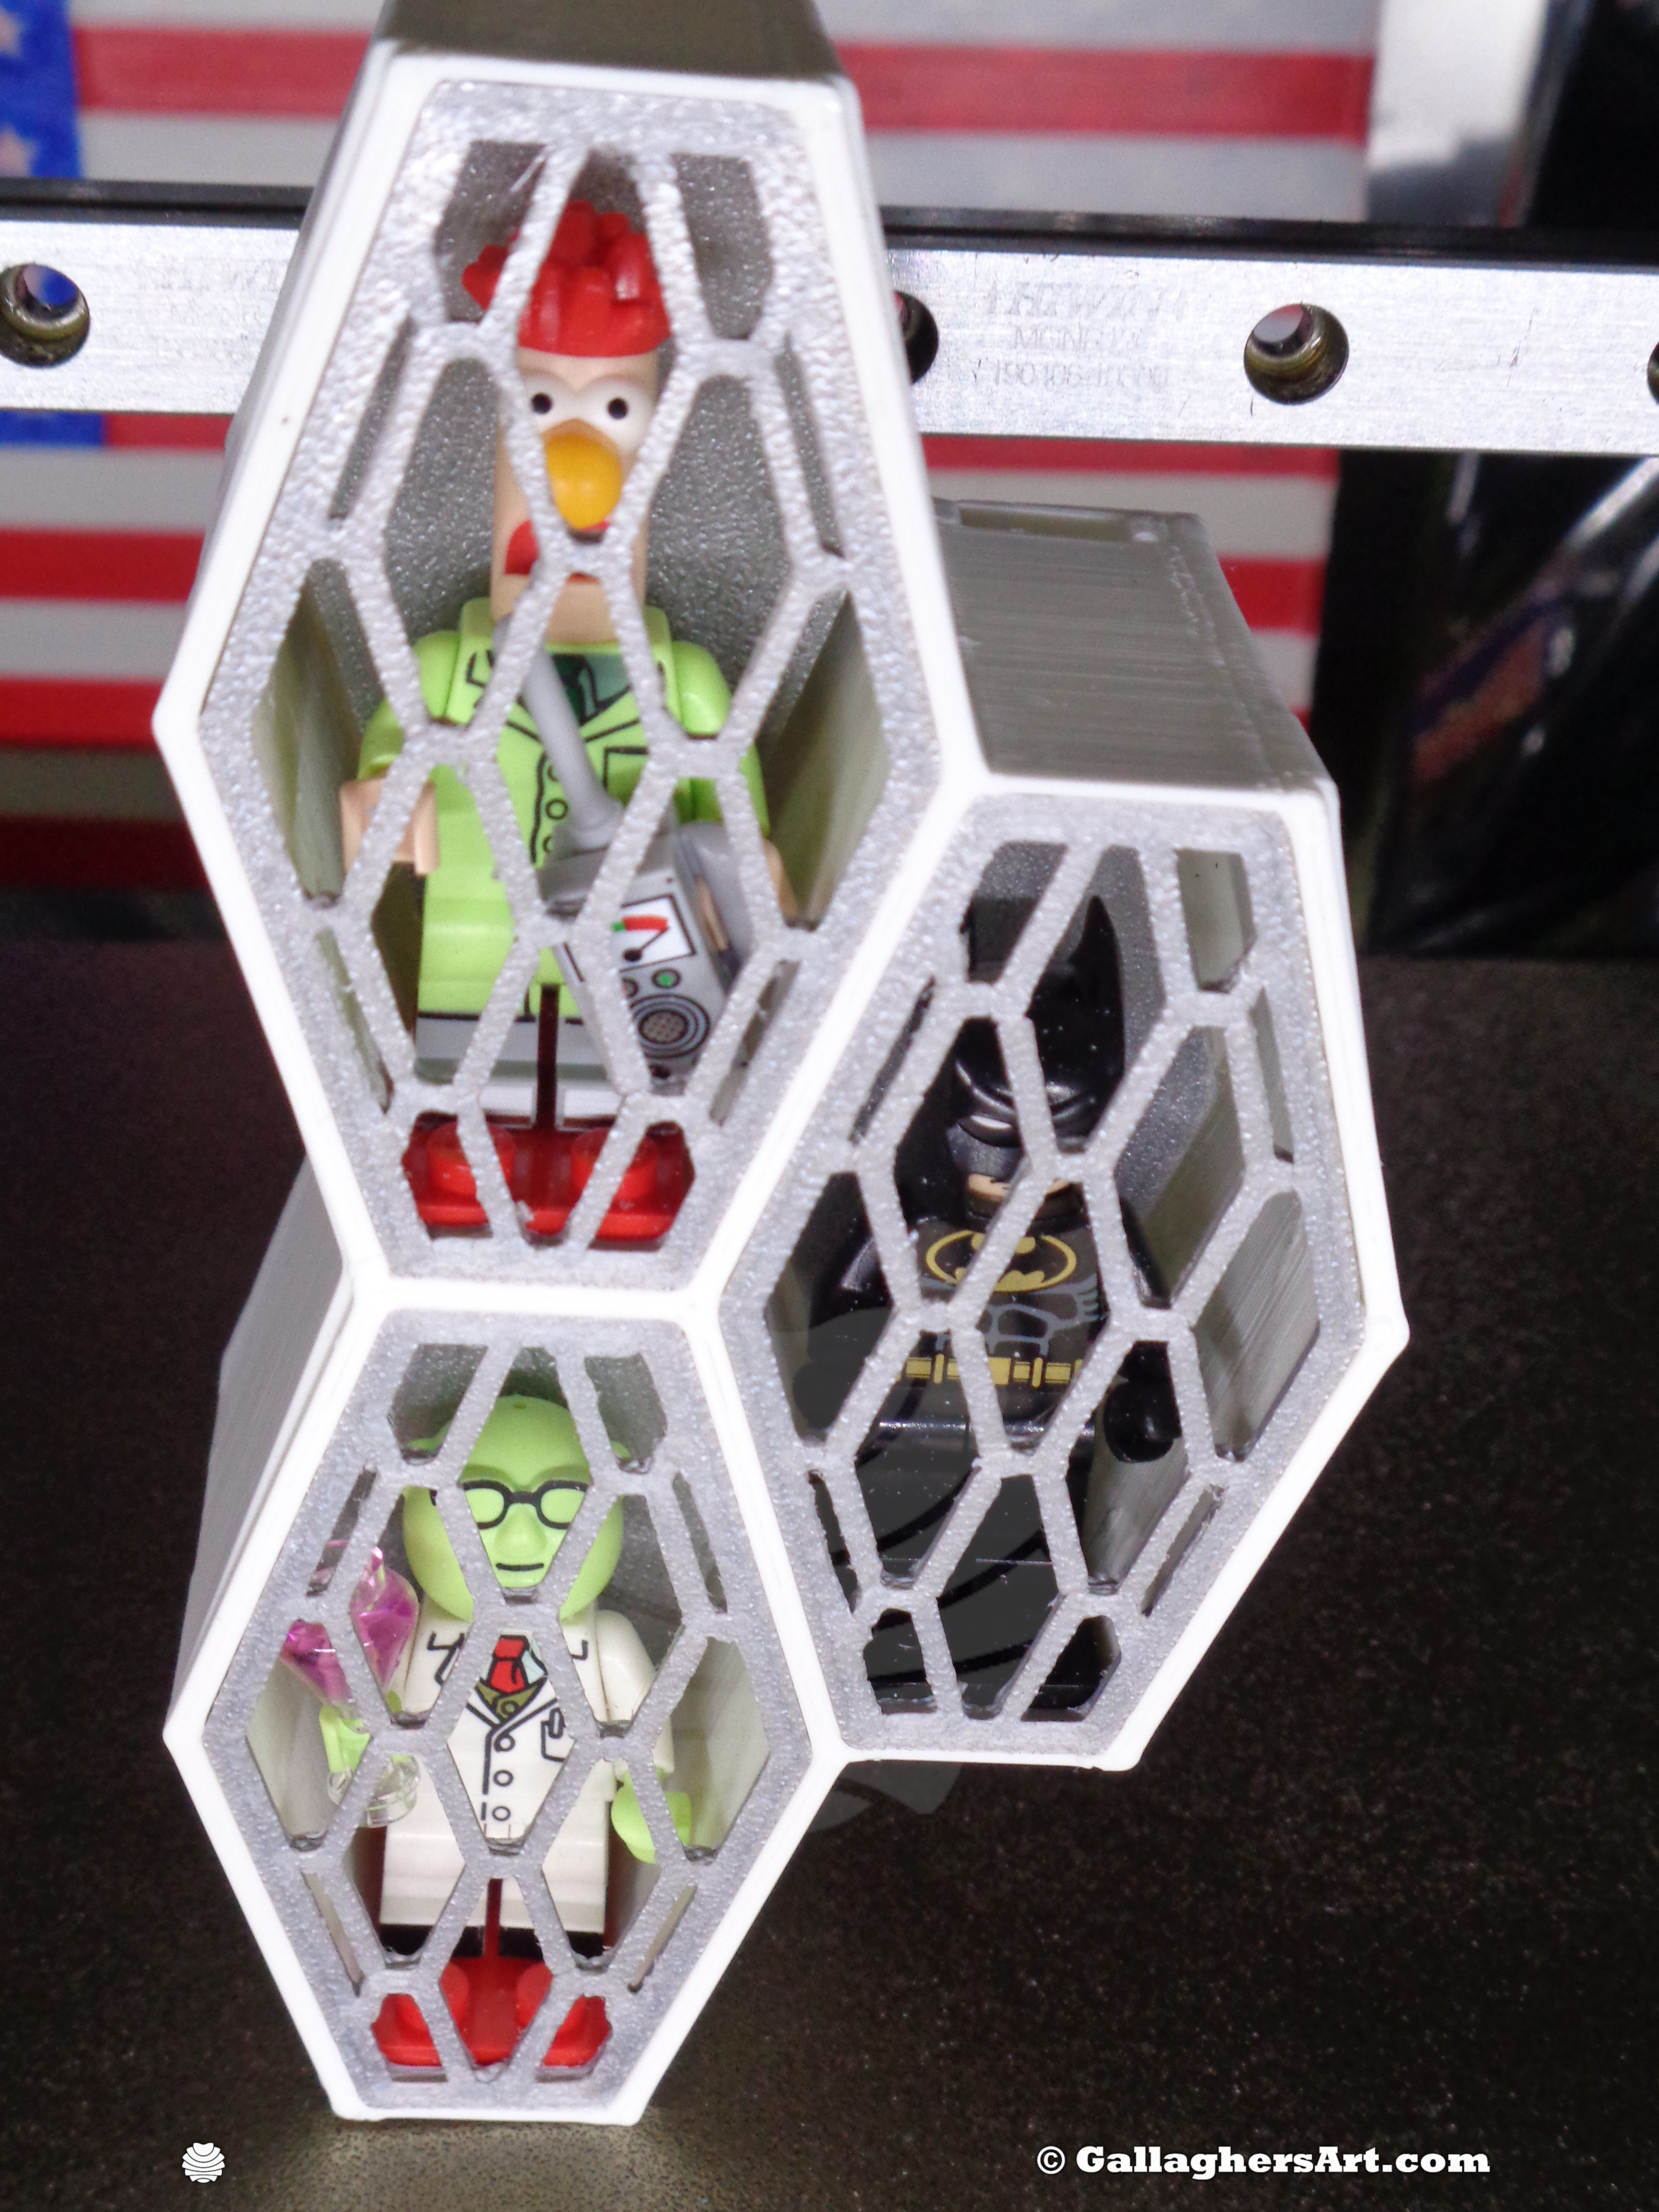
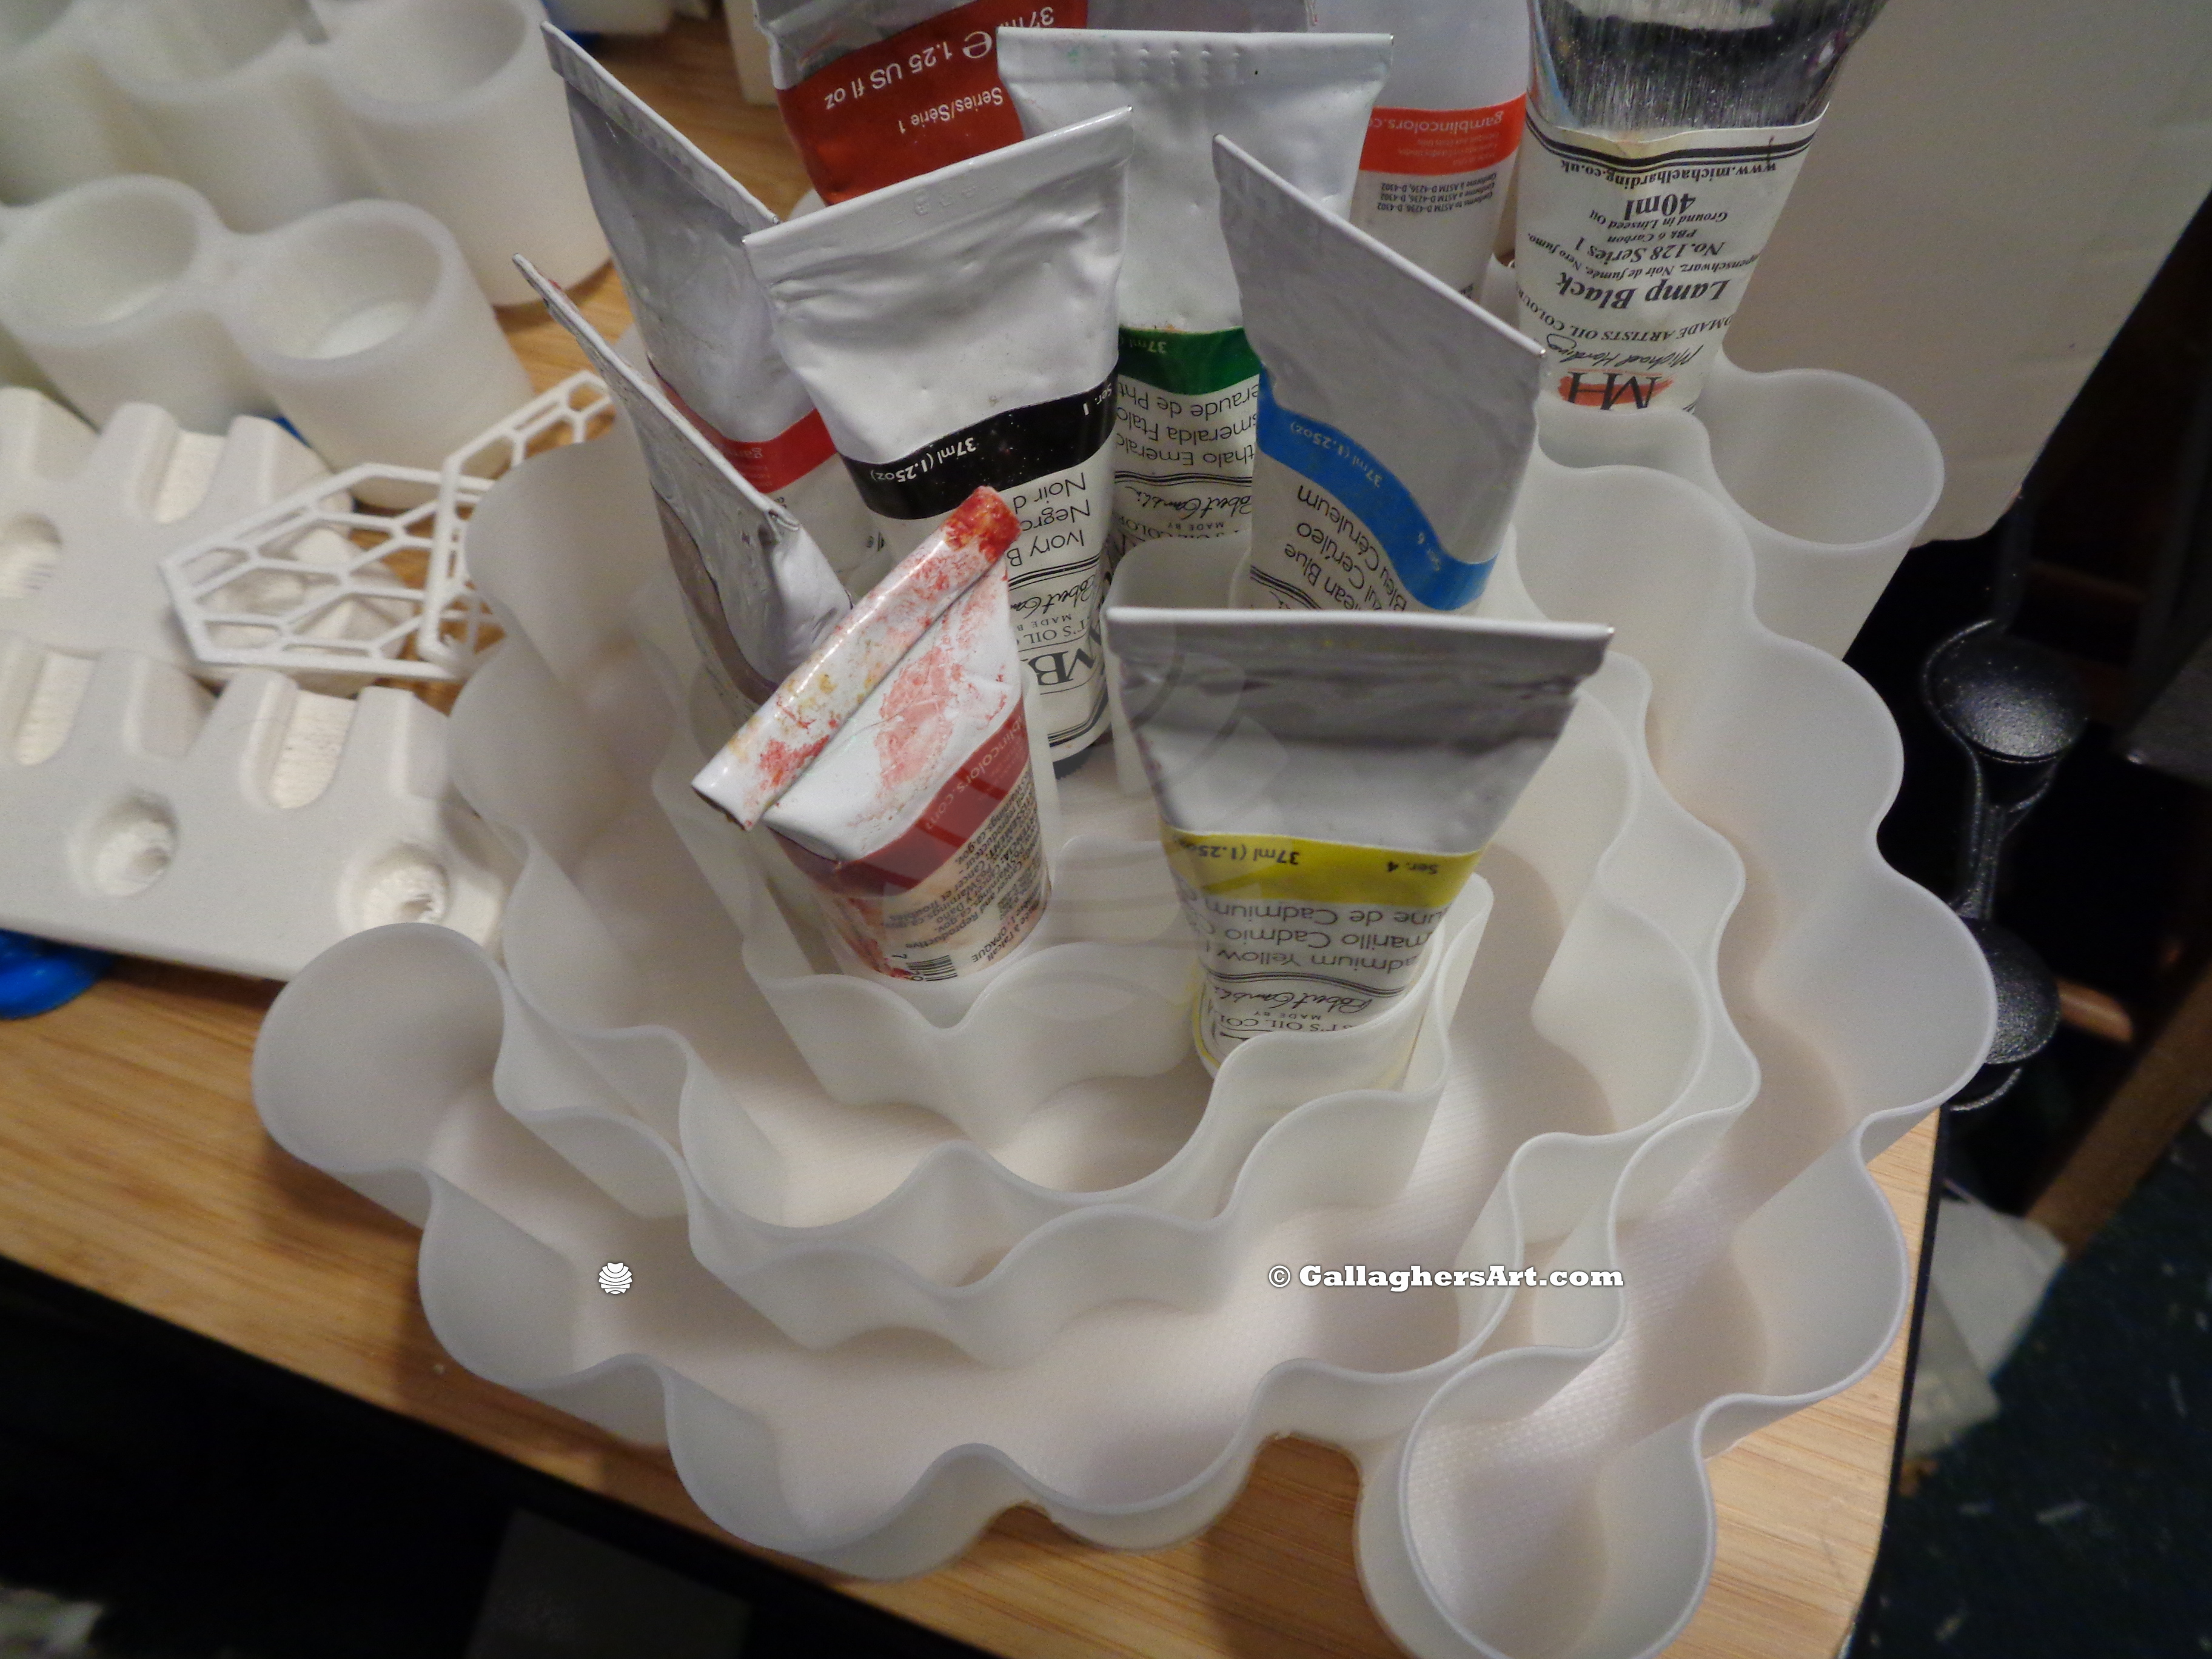
Vase Display Modules Version
This is a version of my collectible display modules that is 3D printed in Vase mode. Limited STL’s are available here and STL’s and STEP’s (more modules) files are available on my website main page for all my display modules. https://gallaghersart.com/page/display_for_your_collectibles_2023
The 1st few layers are1.2mm, seems the thinnest to make it. The Vase wall is 1mm thick.
The depth of each cell is 4 Plastic brick studs or 32mm. (32+1.2 = 33.2 total 3D print height)
The total height for the 1st version of this vase mode per cell is 62.5mm.
The core source (FreeCAD) files can be obtained by supporting my work for just $1.99. With the source files you can modify all aspects of the displays with just modifying the spreadsheet. Easy peasy… for the most part. Chamfer and such have to be manually redone each time the core size changes. (FreeCAD limitations at this time).
To complete a display some parts may need to me mirrored or flipped.
I use acetone and a 3D printing Pen to Weld the parts together.
I printed in ABS, vase mode.
Enjoy!
`mike
:format(webp)/https://fbi.cults3d.com/uploaders/27199038/illustration-file/d5522477-161c-4bd4-9f65-626471ddcd6e/mf_556_map.jpg)


/https://preview3d-images.cults3d.com/fq9mnwah6z00w7nyiii3lfw021s8)
/https://preview3d-images.cults3d.com/tm049giu93uknpn1sqa4oxn5wipp)
/https://preview3d-images.cults3d.com/66qe3b0hbfn901kaw172csn0lckn)
/https://preview3d-images.cults3d.com/yc6tngh88jusx6fmx9k0oldtzxjg)
/https://preview3d-images.cults3d.com/26bop5ti0v3lcui4smqw6w42ea0w)
/https://preview3d-images.cults3d.com/rv0ye1cyf9bedy60wnxry507h835)
/https://preview3d-images.cults3d.com/9kakydgjq3417l0c3m70d133nyzq)
/https://preview3d-images.cults3d.com/kw293r0hbpn70cpzubzjzxkuhm2t)
/https://preview3d-images.cults3d.com/t6t760szow2hpjd0qxsfvsegh4y2)
/https://preview3d-images.cults3d.com/5tl4tyw2gkry8zfgkfwd5og1q775)
/https://preview3d-images.cults3d.com/ewgmhzj8knd2eewkotktr9u1i25z)
/https://preview3d-images.cults3d.com/a59aug9w4lns88p15gvzgryotg5s)
/https://preview3d-images.cults3d.com/hserar6zkufzz2i8z9dexa0s3y1j)
/https://preview3d-images.cults3d.com/o19k2o675xf1o2gsdj31ifgxbhm8)
/https://preview3d-images.cults3d.com/4r9z14mtz2zf87zehomps2lathbb)


