Skip to content

Zoom Fan Adapters for Laser Exhaust System - OMTech, Glowforge, Gweike, Muse

Advertising
Advertising
?
Creation quality: 0.0/5 (0 votes)
Evaluation of members on the printability, utility, level of detail, etc.

  • 2.3k views
  • 1 download

License
3D design format
STL Folder details Close
  • 4in Fan Outlet v5.stl
  • 6in Fan Inlet v4.stl

Learn more about the formats

Publication date 2023-02-21 at 19:58
Design number 1078446

WalkInThePark

3D printer file info

3D model description

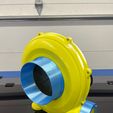
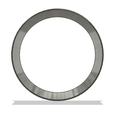
These parts allow a ZOOM W2L (https://amzn.to/3ZfkeI0) or ZOOM W4L (https://amzn.to/3XUV9kP) blower fan to work as the laser exhaust fan for a laser cutter.

No 3D printer? No problem! I can have this tray printed and shipped to you. Here's the link to purchase this part already printed: https://www.ebay.com/itm/385432955677

This design uses 2 printed parts and all the original hardware (screws) from the Zoom fan; no additional hardware/screws required. I used these parts on my OMTech laser, but they can be used for any laser cutter / engraving machine that has a 6in exhaust port.

In my experience, the Zoom fan was awesome, and was far superior to the alternative AC Infinity Cloudline fan. The Zoom fan, originally made to inflate bounce houses, moves so much more air than the AC Infinity inline fan does. These adapters allow the Zoom fan to be quickly adapted to use as a laser exhaust fan.

Supply List:
-printer filament
-Torx head screwdriver
-Philips head screwdriver
-Drill (optional)
-Drill bit (optional)

Printed Parts:
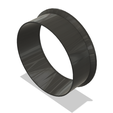
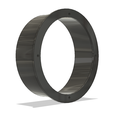
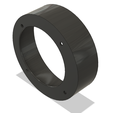
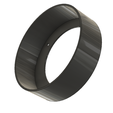
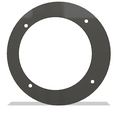
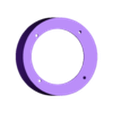
1 x 6in Fan Inlet
1 x 4in Fan Outlet

Instructions:
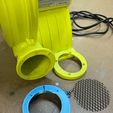
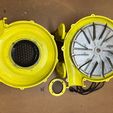
1. Remove the fan's ~4in outlet cover with a torx screwdriver; set the yellow cover and black grate aside for now.
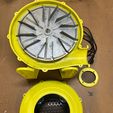
2. Remove the screws, surrounding the fan's inlet, that join the 2 halves of the injection molded fan body together
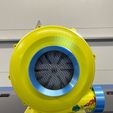
3. Remove the yellow inlet cover by removing the 4 screws touching the black grate using a phillips head screwdriver.
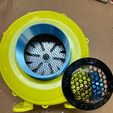
4. Replace the yellow inlet cover with the printed 6in adapter part. Be sure to replace the black grate back as it was originally, and re-insert and tighten the screws.
5. Rejoin, replace, and tighten the screws, surrounding the fan's inlet, that join the 2 halves of the injection molded fan body together
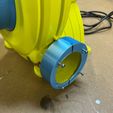
6. Replace the original 4in yellow outlet cover (that you removed in step 1) with the printed 4in adapter part. Mark hole locations with a sharpie on the printed part and drill; do NOT drill the yellow fan body. Be sure to replace the black grate back as it was originally, and re-insert and tighten the screws from the front of the new 4in adapter.
7. Connect ductwork from the laser machine to the fan.
8. Use adjustable pipe clamps to hold the ductwork to the fan. DO NOT OVERTIGHTEN. The clamps should be snug, not super tight.
9. Enjoy your new setup!

Note: Zoom blower fans links above are affiliate links

3D printing settings

Print instructions:
-Material: PLA, PETG, ABS, ASA, etc.
-Layer height: 0.20mm or larger
-Walls: 3
-Infill: 100%
-Plate Adhesion: Brim (optional)
-No Supports
-Native Units: mm

Advertising


Issue with this design? Report a problem.

Would you like to support Cults?

You like Cults and you want to help us continue the adventure independently? Please note that we are a small team of 3 people, therefore it is very simple to support us to maintain the activity and create future developments. Here are 4 solutions accessible to all:

  • ADVERTISING: Disable your banner blocker (AdBlock, …) and click on our banner ads.

  • AFFILIATION: Make your purchases online by clicking on our affiliate links here Amazon.

  • DONATE: If you want, you can make a donation via Ko-Fi πŸ’œ.

  • WORD OF MOUTH: Invite your friends to come, discover the platform and the magnificent 3D files shared by the community!


Sharing and downloading on Cults3D guarantees that designs remain in makers community hands! And not in the hands of the 3D printing or software giants who own the competing platforms and exploit the designs for their own commercial interests.

Cults3D is an independent, self-financed site that is not accountable to any investor or brand. Almost all of the site's revenues are paid back to the platform's makers. The content published on the site serves only the interests of its authors and not those of 3D printer brands who also wish to control the 3D modeling market.

100% secure payment by credit card, PayPal, Apple Pay, Google Pay, etc.
View all payment options.