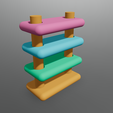
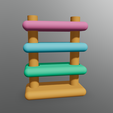
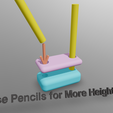
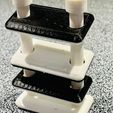
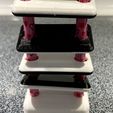
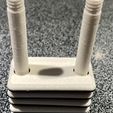
In this exciting toy, you can demonstrate how magnets can create a levitation effect when similar poles are aligned toward one another (e.g., north-north). You'll need to purchase small rectangular neodymium magnets (rectangular, 0.8 x 0.4 x 0.2 inches, such as those sold at https://amzn.to/3Y1C1BW (qty: 10), https://amzn.to/3HdYNje (qty: 16), or https://amzn.to/3RbUPfI (qty: 30), which are printed right into the toy itself, reducing any safety concerns with the use of these magnets. Once safely embedded within the toy, they're less likely to be lost or broken or to pinch little fingers. It is strongly suggested that adults handle the magnets, as they can be dangerous for small hands (and mouths).
Please note that the links here are Amazon Affiliate links that provide me with a small commission for each sale at no cost to you. You're welcome to order any rectangular magnets of the same dimension (0.8x0.4x0.2 inches) if you'd prefer not to use the links. But the small commission on sales is appreciated.
For ToyBox users, I've provided GCODE files for your use. All are in the "Toybox GCODE Files.zip" file. Just unzip it, then upload the gcode itself directly to the printer (as you would an STL file). The printer will then automatically print based on the instructions contained in that file.
The following instructions are specific to the Toybox printer only:
When printing each piece of this toy, the printer will pause printing at a specific point (described below) and enter a "holding pattern". At that point, the print head moves to the rear of the printer, then travels back-and-forth a few times before resuming printing. One final motion from back-to-FRONT is a cue that printing is about to resume; but don't worry: this holding pattern gives you about a full minute to insert the magnet, which is plenty of time. Just carefully place the magnet in the hole at the front of the printer.
Set a timer for the following so you know when to return to your printer to insert the magnets:
Base - 15:00
Monocolor Float - 15:30
Round Pencil Base - 30:30
For the Bicolor Float, pay attention to two separate timers: 9:15 & 6:15. The first print pause (to change filament color) occurs at 9:15 into printing. The print job will stop, the printer will eject the current filament, and you'll have about a minute to insert the next color. Hold it GENTLY in place; you don't need to push hard. Once printing resumes, the printer will automatically reload the filament and continue printing. (If you’d like to see this color change in action, try printing the Bicolor Yin & Yang toy, also here on Toybox…I’ve provided a little more description of the whole process there.)
Once printing has resumed, set a SECOND timer for 6:15 will tell you when it’s time to insert the magnet.
One final thought on the bicolor print: consider aligning the magnets in such a way that they indicate the polarity of the magnet. For example, red may indicate north and white may indicate south. (But note that I've found it unnecessary to identify which pole is actually "north". More simply, it's just useful to be consistent in your color-coding so children can visually distinguish between the two poles of the magnet.)

/https://fbi.cults3d.com/uploaders/20616670/illustration-file/01bdee61-328f-42c7-8658-3e6b65ae3ef3/render1.png)
