I have seen several Star Trek TNG communicator badges on here, some more accurate than others. I really loved the setup by LoudMaker, which I remixed, here. His version seems to be the most screen-accurate. Once you sand and finish and paint them, it looks perfect. However, I was looking for a setup that is slightly less screen-accurate, but more durable, as I wear this on my lanyard at work every day. In the past I have had the nicely finished and painted ones, but of course the paint rubs off very quickly, and the piece looks pretty shabby very fast.
So I took the files from LoudMaker and made some adjustments. I wanted to be able to print the black, silver, and gold bits separately, using those color filaments, to avoid having to paint this. I have not come across anyone who made a setup with the separate black and silver parts for the badge, although LoudMaker did give it a nice try, that I unfortunately couldn't get to work.
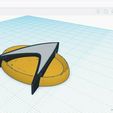
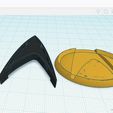
I took his design, and kept the external dimensions. Since I wasn't going to sand/paint this, I combined the oval and the ring (the gold parts) that he had separate for ease of sanding, and made them into a single part, for ease of printing. I made the delta (black piece) deeper in thickness to allow for a separate inset face piece (silver), and made it a flat bottom with a corresponding cutout in the oval (gold). In order to do this, I also removed the cutouts for the magnets, because I intended to glue on a pin back anyway. There is probably enough room to put some shallow magnet cutouts back in, though, if you want to modify it further.
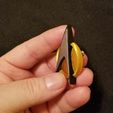
After printing and carefully removing any support structures, the pieces will fit together very nicely, and almost snap into place and stay there with friction. I wouldn't trust that to hold together without a few dabs of glue, though. The first one of these I printed, the silver piece stuck out just the slightest bit above flush with the black, probably due to the glue behind it. I made a second silver piece that is 0.1mm thinner, and when I printed a second one and used it, and glued it in, the silver was slightly recessed below the black trim. In either case, it was still very close to flush, and has a nice fit, but you can choose which one you want. Unfortunately, once it is popped into place, it's nearly impossible to get the silver part back out.
Your mileage may vary, as they say, depending on your machine, but mine printed it at a layer height of 0.12mm with very nice fit. Also, as a quick note, I really don't know what I am doing with 3D CAD stuff, I managed to figure out enough things in Tinkercad to make all of this work. But there are quite a few artifacts and stuff in these objects, so someone who really knows what they're doing would probably call this crude, and could maybe smooth things out and clean up the .stl files somewhat. In any case, I found these to print excellently and I think the results in the pictures speak for themselves. Just saying, don't criticize me too harshly, as this is really my first time remixing and messing around with 3D CAD software, and I really don't know what I'm doing, lol.
If you're looking for a nice 3-piece separate color print of the Star Trek TNG badge, especially if you want to just print it in the right colors and leave it as is without refinishing, this makes a really nice looking badge. Hope you enjoy! Thanks!

/https://fbi.cults3d.com/uploaders/27215719/illustration-file/523f6f3a-db6f-4b51-83d5-c00fb4ebc40d/Delta_Face_Silver-Thin_Profile.png)
