NEW VERSION 3.1 - More clearance for CR-Touch and other adjustments.
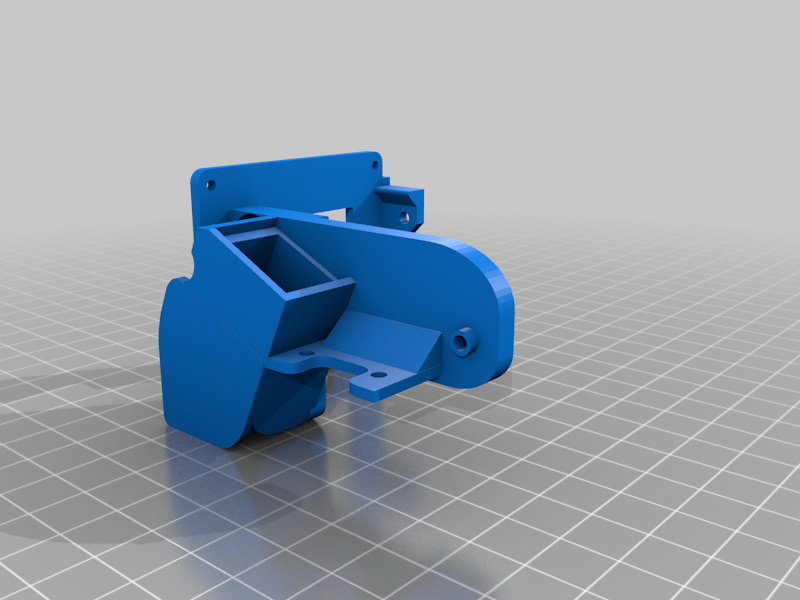
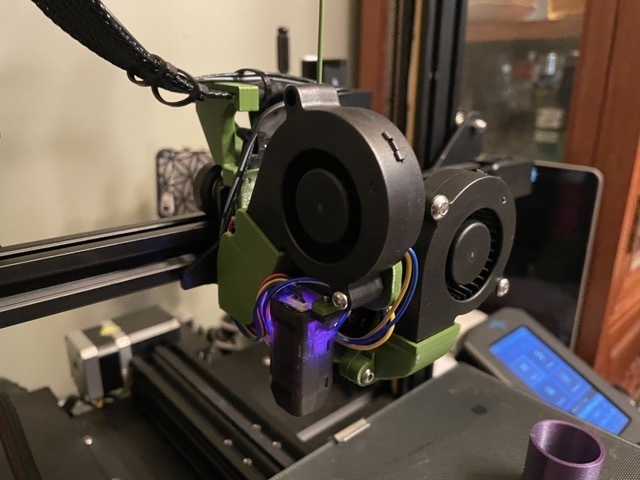
5015 fan upgrade mount for Ender Sprite Extruder Pro using stock screws.
There are a few similar designs to this, but I took a little bit of the best aspects of each and combined them for an ideal solution for me. I restarted from scratch and designed this model from those other inspirations.
This version allows a 5015 fan to be installed without interference to the left or right gantry positions. I placed the fan above the slightly relocated CR Touch mount, which gives more coverage of the Y-axis (On my Ender 3 V2 the probe offset is x:-32 and Y:-30). I did not want to relocate the CR-Touch to the other side of the gantry like other designs because the stock cable is too short to relocate there. I also set out to make this bracket lighter than the replaced parts to compensate for the heavier fan (stock fan=8.5 gm vs 5015=25 gm - an approx 12 gm difference).
The print will accept stock screws for the CR-touch and the short stock countersunk stock fan screws to hold it to the extruder. You may use one M3-16mm screw for the fan, but I also designed it, so you don't have to use a screw with the built-in stanchion set in the screw mount (this will save you another 0.8 grams). The other fan hole doesn't need a screw and support to save on weight.
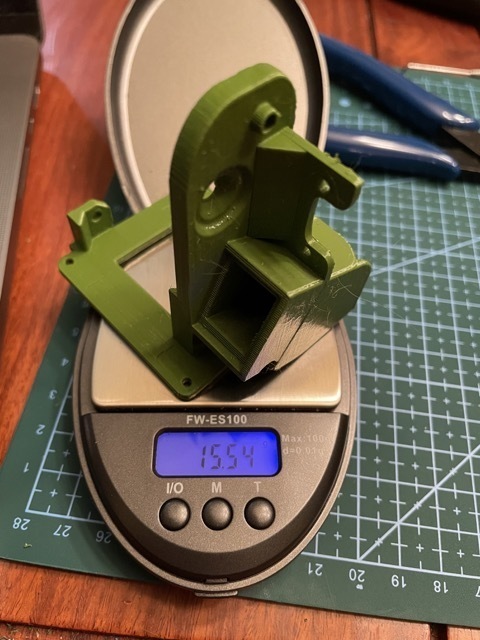
This design weighed 15.5 grams and is 3.5 grams less than the two replaced parts (not including the stock fan).
PRINT INSTRUCTIONS
Print on a well-calibrated printer with dried PETG.
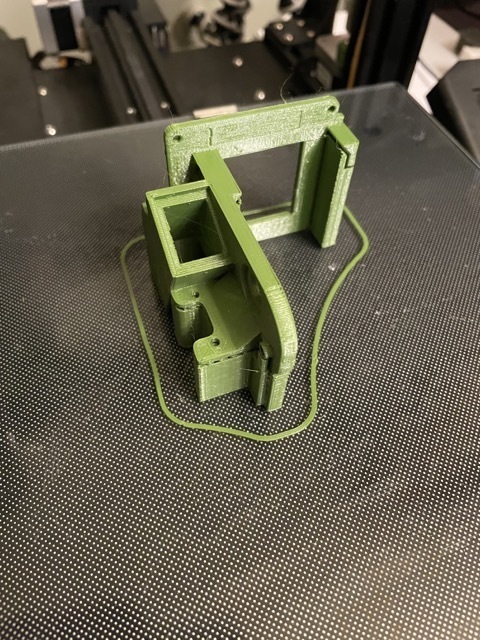
PLA or PLA+ is not ideal for this print, as you need a little flex for your screws (the holes will crack unless you drill out the holes and put in receiving nuts which I allowed room for that). Print with supports - touching plate setting on and as shown in the images.
0.2mm Height
10% Gyroid Infill
2 walls, tops and bottom
I printed this at 225C with a bed of 80C, but this will depend on your filament (I use M3D.com PETG)
The print is quite strong with the 10% Gyroid, so you shouldn't need to go any thicker. The weight-saving reduction void in the backplate may need intervention where you could increase the fan speed to 100%, or you can change your support settings to everywhere, which is much harder to remove. I changed my fan speed close to the bottom of that overhang and then turned it off after it had created a strong bridge. Bear in mind my parts fan is also upgraded to a 5015 fan which gives me far more airflow and better bridging, which gave me a perfect print.
Removal of supports requires snips and some patience. Don't rush it, and take your time. With a calibrated printer, they came out pretty easy for me, with a few snips and plyers needed on the bottom. Pre-thread the screws for an easier installation.
INSTALLATION INSTRUCTIONS
This might vary if you have done mods already.
Start by removing filaments and cables. Cool down the print head after filament removal.
Remove the four retaining screws on the right-hand side of the extruder that holds it on the gantry. Set aside screws.
Remove the CR-Touch, and set it aside.
Remove the three screws that hold the original ABS plastic bracket to the extruder. It will be two short ones (one is above the CR-Touch, and the other is close to the right and backmost part of the extruder) and one long one located at the back/motherboard side of the extruder.
Detach all the JST connectors off the motherboard carefully, including the hotend ones. Be particularly cautious around the thermoster cable as it is very delicate. Remove the two screws holding the ribbon cable bracket; then motherboard should come free from all of that. The original backboard and fan cover will all come off as well. Set it aside.
Remove two small screws on the original stock fan, which should free it, then remove the three (or four) screws from the fan diverter shroud. Everything should come off and leave you with only the extruder and motor block (If you need to clean/service your extruder, this would be a good time to access this, but you need to remove the hotend while it is hot before you get to this point).
With the new fan mounting shroud, add the CR-Touch first. Pre-thread the holes will make it easier to screw in.
Add the motherboard and the original ribbon cable retaining clip with its two screws, and use two of the original diverter screws. Mate with extruder with a slight angle to avoid the extruder tension arm, then put in one screw in the counter sunk hole on the left side of the extruder, and a single screw on the right side.
Install the 5015 fan (I bought a Creality one that is 25gm). You will put the fan at a slight angle to avoid the screw stanchion, and it should sit in there snugly and pop right into there. You may add an M3-16mm screw to keep it secure, but that is optional.
The last steps are to reconnect all the cables; there is a channel for most of the cables to fit snuggly and neatly. Put the whole assembly back into the gantry tool holder, and add the four original screws. Reattach your ribbon cable and filament.
Redo your tramming, mesh levelling, z-offset and calibration and happy printing with your quieter and more powerful fan.
:format(webp)/https://fbi.cults3d.com/uploaders/24302856/illustration-file/10806b5a-79df-4fea-92ea-a51c04e7a0af/12be9208-d75f-4679-9f61-77e753227374.png)

/https://preview3d-images.cults3d.com/1v5ymgfqt7k17dcser6anu05ewfm)
/https://preview3d-images.cults3d.com/x1f9302bj3yk1uten7iecpgncs8e)


