Skip to content

VSR CLICK TDC

Advertising
Advertising
?
Creation quality: 5.0/5 (1 vote)
Evaluation of members on the printability, utility, level of detail, etc.

  • 1.3k views
  • 5 likes
  • 7 downloads

License
3D design format
3MF Folder details Close
  • CLICK BODY.3mf
  • CLICK DIAL.3mf
  • TDC BASE.3mf

Learn more about the formats

Publication date 2023-01-24 at 19:54
Design number 1027531

3D printer file info

3D model description

Hello everyone, I brought here a design of a tdc with click, for that you need to follow some guidelines.

*2 pen springs
*2 bb
*Super glue

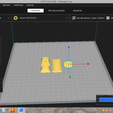
Print all parts as shown in the guide image (remembering that 0.2 0.4 nozzles offer better resolution)

After printing, paste the TDC BASE pieces with the TDC BODY piece (glue the finished piece aligned on the body of your weapon)

for the TDC dial, after printing, measure the screw you will need, and place it through the standard threaded hole m4 X 0.7

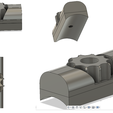
To make the click device, just take the springs and glue them with Super Glue to the BB, measure the desired length and cut the excess, after that, just insert it into the holes in the base of the TDC (as shown in the photo)

To unite the two pieces, just thread the screw (tdc dial) through the body of the tdc glued to the gun, there will be a moment when it will be necessary to push the spring with the bb into the device so that then everything is ready, for that I advise the use of tweezers.

Olá pessoal, trouxe aqui um design de um tdc com click, pra isso precisa seguir algumas orientaçoes.

*2 molas de caneta
*2 bb
*super cola

Imprima todas as partes comforme imagem de orientação ( lebrando que bicos 0.2 0.4 oferecem melhor resolução)

Apos impresso, cole as peças TDC BASE com a peça TDC BODY ( cole a peça pronto alinhada no corpo da sua arma)

para o TDC dial, após impresso, meça o parafuso que vai precisar, e coloque pelo furo com rosca padrao m4 X 0.7

Para fazer o dispositivo de click apenas pegue as molas e cole com Super Glue na BB, meça o comprimento desejado e corte o excesso, apos isso é so inserir nos furos da base do TDC ( conforme foto)

Para unir as duas peças, basta rosquea o parafuso(tdc dial) pelo corpo do tdc colado na arma, tera um momento que sera necessario empurrar a mola com a bb pra dentro do dispositivo para que ai sim tudo fique pronto, pra isso aconselho o uso de pinças.

3D printing settings

Nozzle .2 or .4 ( 0.2 nozzle will give a better quality )
Material ( pla, abs or petg )
Speed 20-55 mm/s
layer high < .2 ( for better resolution, use a minor layer high as you can )
no supports need
100% infill

just follow the images on it

Tags

Advertising


Issue with this design? Report a problem.

Would you like to support Cults?

You like Cults and you want to help us continue the adventure independently? Please note that we are a small team of 3 people, therefore it is very simple to support us to maintain the activity and create future developments. Here are 4 solutions accessible to all:

  • ADVERTISING: Disable your banner blocker (AdBlock, …) and click on our banner ads.

  • AFFILIATION: Make your purchases online by clicking on our affiliate links here Amazon.

  • DONATE: If you want, you can make a donation via Ko-Fi 💜.

  • WORD OF MOUTH: Invite your friends to come, discover the platform and the magnificent 3D files shared by the community!


Sharing and downloading on Cults3D guarantees that designs remain in makers community hands! And not in the hands of the 3D printing or software giants who own the competing platforms and exploit the designs for their own commercial interests.

Cults3D is an independent, self-financed site that is not accountable to any investor or brand. Almost all of the site's revenues are paid back to the platform's makers. The content published on the site serves only the interests of its authors and not those of 3D printer brands who also wish to control the 3D modeling market.
100% secure payment by credit card, PayPal, Apple Pay, Google Pay, etc.
View all payment options.