Skip to content

SwitchCube Sleeve (Mayflash Controller Adapter)

Advertising
Advertising
?
Creation quality: 0.0/5 (0 votes)
Evaluation of members on the printability, utility, level of detail, etc.

  • 1.9k views
  • 6 likes
  • 1 download
  • 1 collection

License
3D design format
STL Folder details Close
  • GCSwitchDockV4-OLED.stl
  • GCSwitchDockV4.stl
  • GCSwitchDockV4Backplate.stl
  • GCSwitchDockV4Faceplate.stl
  • GCSwitchDockV4USB.stl

Learn more about the formats

Publication date 2023-03-03 at 13:40
Design number 1095656

3D printer file info

3D model description

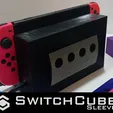
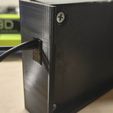
Introducing the SwitchCube Sleeve, now powered by Mayflash!

NOTICE: THIS IS NOT COMPATIBLE WITH SWITCH LITE. DOCK IS REQUIRED!!

Use up to 4 GameCube controllers (WaveBird compatible) on your Nintendo Switch!

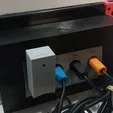
This adapter houses a standard dual USB (one for data, one for vibration feedback) GameCube adapter...but in a much more functional, and customizable (message me!) fashion. This unit slides over the front of the Switch Dock very securely.

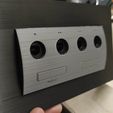
Front faceplate is a near exact replica of an original GC console faceplate, minus working memory slots (no GameCube consoles were harmed in the making of this product).

I would suggest leaving a pair of JoyCons attached to have Home button access.

NOTE: There are two different bodies available, v4 and v4-OLED. The faceplate, backplate, and USB plug are universal to both though.


What you will need...
- Mayflash Gamecube adapter... https://www.amazon.com/dp/B00RSXRLUE
- 4x #8 3/4" wood screws
- 1x #8 1/2" wood screw
- Hot glue
- Normal glue
- Very small philips screwdriver (to fully disassemble Mayflash adapter from casing)


Assembly...
1) Disassemble Mayflash Adapter with small screwdriver. You won't need any of the casing.
(((CAUTION))) The ribbon cables WILL break if they are moved too much
2) Apply glue around the backside perimeter of the faceplate
2) Insert controller ports through the body from the inside out.
3) Insert the adapter into the faceplate at a tilt so that the ports slide into the bottom cutout area of the faceplate and then tilt the ports into the cutout completely for a flush fit, use firm but gentle force if needed.
4) Sit the faceplate against the body flush, then screw in the 1/2" screw to hold the faceplate on.
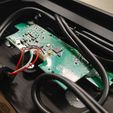
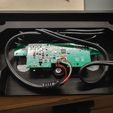
5) Sit the boards against each other, but with a little room so they don't touch and hot glue in place (see picture).
6) Insert USB plugs through side opening and slide the plug piece over the cables, then glue the piece into the body.
7) Route the cabling, most of it should fit into the pocket area of the body. NOTE: Be sure there is no cabling on top of the adapter boards
8) Place backplate on top and secure with the 3/4" wood screws.
9) Done!

Any questions, please ask.

3D printing settings

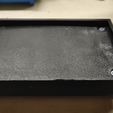
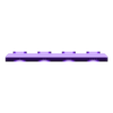
Pictures shows proper orientation, no supports needed. Can fit the body, backplate, and USB plug on the bed at same time.

30% infill, 0.2 layer height, skirt.

Advertising


Issue with this design? Report a problem.

Would you like to support Cults?

You like Cults and you want to help us continue the adventure independently? Please note that we are a small team of 3 people, therefore it is very simple to support us to maintain the activity and create future developments. Here are 4 solutions accessible to all:

  • ADVERTISING: Disable your banner blocker (AdBlock, …) and click on our banner ads.

  • AFFILIATION: Make your purchases online by clicking on our affiliate links here Amazon.

  • DONATE: If you want, you can make a donation via Ko-Fi πŸ’œ.

  • WORD OF MOUTH: Invite your friends to come, discover the platform and the magnificent 3D files shared by the community!


Sharing and downloading on Cults3D guarantees that designs remain in makers community hands! And not in the hands of the 3D printing or software giants who own the competing platforms and exploit the designs for their own commercial interests.

Cults3D is an independent, self-financed site that is not accountable to any investor or brand. Almost all of the site's revenues are paid back to the platform's makers. The content published on the site serves only the interests of its authors and not those of 3D printer brands who also wish to control the 3D modeling market.

100% secure payment by credit card, PayPal, Apple Pay, Google Pay, etc.
View all payment options.