Skip to content

Anet A8 Flexion Extruder Direct Extrusion Mount For Flexible Filaments Also Compatible with Similar Prusa I3 Clone Variants

Advertising
Advertising
?
Creation quality: 5.0/5 (1 vote)
Evaluation of members on the printability, utility, level of detail, etc.

  • 598 views
  • 5 downloads

License
3D design format
Folder details Close
  • Anet_A8_Flexion_Dragchain_Holder_V2.stl
  • Fan_Duct.SLDPRT
  • Fan_Duct.STL
  • Flexion_Extruder_Fan_Holder.SLDPRT
  • Flexion_Extruder_Fan_Holder.STL
  • Flexion_Mount.SLDPRT
  • Flexion_Mount.STL

Learn more about the formats

Publication date 2023-03-03 at 18:26
?
Published to Thingiverse on: 2018-07-24 at 03:03
Design number 1095956

3D printer file info

3D model description

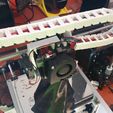
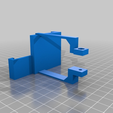
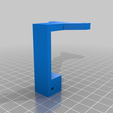
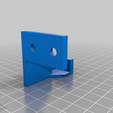
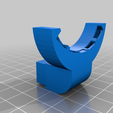
This extruder mount allows the Flexion flexible filament extruder by Diabase Engineering to be mounted in a direct drive configuration on the Anet A8 using minimal additional hardware. Solidworks files included for any modifications to dimensions or tolerances.

Additional Hardware Required:

For Extruder Mount:
3X M3 Nuts
1X M3x30 Bolt
2X M3x12 Bolt

For Extruder Fan Mount:
2X M3x12 Bolt

Assembly Directions:

  1. Remove all original extruder hardware leaving only the bracket on the Anet A8.

  2. Assemble the Flexion Extruder as shown with the flats of the heatbreak parallel to the motor shaft. This will allow the extruder to slot into the original Anet A8 bracket.

  3. Print the extruder mount and fan mount using the print directions below.

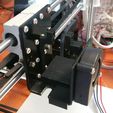
  4. Slide the extruder mount onto the Anet A8 bracket through the linear bearing bolt heads. This is somewhat of a tight fight and will require some force and tinkering.

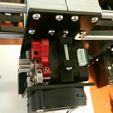
  5. With the extruder mounted onto the Anet A8 bracket as shown, slide the Flexion Extruder/Motor assembly into the mount and ensure it is seated all the way into the mount. If you are unable to slide in the extruder, check the position of the heat break flat and make sure it is parallel to the motor shaft.
    If there isn't enough clearance between the heater block and the metal bracket, reassemble the Flexion extruder with the nozzle tightened further into the heater block and the heat break loosened further up. This will move the heater block down and allow for more clearance.
    Removing the full cover original flexion silicone sock and either running the extruder without a silicone sock or using an alternative silicone sock such as the E3D silicone sock which does not cover the top of the heater block will allow for more clearance.

  6. Slot the extruder fan mount between the motor bracket opening on top.

  7. Insert a M3 nut into the motor bracket nut trap and put the M3x30 bolt through the motor bracket holes and the fan mount holes and tighten to clamp on the motor and fan holder to the extruder mount.

  8. Insert M3 nuts into the nut trap on the rear-bottom of the extruder mount and use the M3x12 bolts to secure the entire assembly onto the Anet A8 metal bracket.

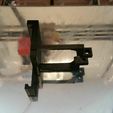
  9. Install dragchain holder if the standard Anet A8 dragchain is being used. The dragchain holder model doesn't have bottom mounting holes since the space is taken up by the extruder.

  10. Insert the fan duct into the 50mm blower and attach with hot melt adhesive if necessary.

Solidworks files are included and remixes are encouraged.

Advertising


Issue with this design? Report a problem.

Would you like to support Cults?

You like Cults and you want to help us continue the adventure independently? Please note that we are a small team of 3 people, therefore it is very simple to support us to maintain the activity and create future developments. Here are 4 solutions accessible to all:

  • ADVERTISING: Disable your banner blocker (AdBlock, …) and click on our banner ads.

  • AFFILIATION: Make your purchases online by clicking on our affiliate links here Amazon.

  • DONATE: If you want, you can make a donation via Ko-Fi πŸ’œ.

  • WORD OF MOUTH: Invite your friends to come, discover the platform and the magnificent 3D files shared by the community!


Sharing and downloading on Cults3D guarantees that designs remain in makers community hands! And not in the hands of the 3D printing or software giants who own the competing platforms and exploit the designs for their own commercial interests.

Cults3D is an independent, self-financed site that is not accountable to any investor or brand. Almost all of the site's revenues are paid back to the platform's makers. The content published on the site serves only the interests of its authors and not those of 3D printer brands who also wish to control the 3D modeling market.

100% secure payment by credit card, PayPal, Apple Pay, Google Pay, etc.
View all payment options.