Skip to content

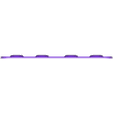
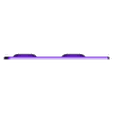
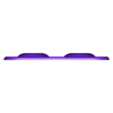
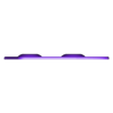
Goalie pads slider kit for Ball and Dek Hockey

Advertising
Advertising
?
Creation quality: 5.0/5 (1 vote)
Evaluation of members on the printability, utility, level of detail, etc.

  • 5k views
  • 7 likes
  • 40 downloads

License
3D design format
STL Folder details Close
  • AnchorPusherV2.STL
  • AncrageV2.STL
  • Pad 2X2.STL
  • Pad 2X2Slim.STL
  • Pad 4X1.STL
  • Pad 4X1Slim.STL
  • Pad Curved.STL
  • Pad CurvedV2.STL
  • Pad Simple.STL
  • Pad SimpleSlim.STL

Learn more about the formats

Last update 2024-01-02 at 21:19
Publication date 2023-03-08 at 00:43
Design number 1103667

Fredi125

3D printer file info

3D model description

Updates
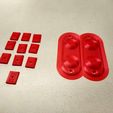
Following some feedback that the pads could be a bit slimmer, I made a "slim" version of most parts, I recommend using these for a better fit on most pads, as well as using less printing material. (See latest photo)

I added the remodeled Pad CurvedV2.stl (See last picture)
- Smaller overall size to fit most pads
- The distance between the buttons remain similar

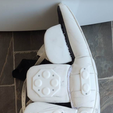
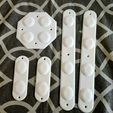
A friend asked me if I could make these for him and some of his friends, we went through a few iterations regarding dimensions, screw hole sizes, anchors and more, and I felt like the final product deserved to be put online.

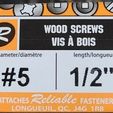
The screws we are using are shown in the images, they are Wood Screws diameter #5 and 1/2" length.

Installation instructions:
- Prepare an anchor for each screw hole (About 40 total)
- Make small incisions in the pad where you want the anchors to be inserted.
- Using the "Anchor pusher", push each anchor to the desired position.
- Once each anchor is at the desired position, put your slider on top and start screwing, making sure your screws align with each anchor's hole.
- Show them who's the boss!

I will be uploading updates and alternative parts to this creation as I gather more feedback or special requests!

3D printing settings

100% infill

I recommend 0.2mm layers and 0.48mm line width as this print is low detail and these settings will speed up the whole process.

I also recommend using a brim on every part except the anchors to make sure you end up with a flat bottom surface.

Use the "Mirror" option to print the second curved part.

I've had limited success with PETG, PLA is doing a great job so far according to the feedback I've had.

Advertising


Issue with this design? Report a problem.

Would you like to support Cults?

You like Cults and you want to help us continue the adventure independently? Please note that we are a small team of 3 people, therefore it is very simple to support us to maintain the activity and create future developments. Here are 4 solutions accessible to all:

  • ADVERTISING: Disable your banner blocker (AdBlock, …) and click on our banner ads.

  • AFFILIATION: Make your purchases online by clicking on our affiliate links here Amazon.

  • DONATE: If you want, you can make a donation via Ko-Fi πŸ’œ.

  • WORD OF MOUTH: Invite your friends to come, discover the platform and the magnificent 3D files shared by the community!


Sharing and downloading on Cults3D guarantees that designs remain in makers community hands! And not in the hands of the 3D printing or software giants who own the competing platforms and exploit the designs for their own commercial interests.

Cults3D is an independent, self-financed site that is not accountable to any investor or brand. Almost all of the site's revenues are paid back to the platform's makers. The content published on the site serves only the interests of its authors and not those of 3D printer brands who also wish to control the 3D modeling market.

100% secure payment by credit card, PayPal, Apple Pay, Google Pay, etc.
View all payment options.