Skip to content

Y-Carriage supported Linear rail upgrade for Geeetech printers

Advertising
Advertising
?
Creation quality: 0.0/5 (0 votes)
Evaluation of members on the printability, utility, level of detail, etc.

  • 499 views
  • 1 like
  • 4 downloads

License
3D design format
Folder details Close
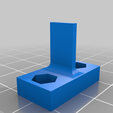
  • EndStop_Blade.stl
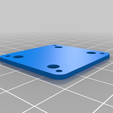
  • SBR_Hole_Template.stl
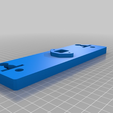
  • Y-Carriage_Front.stl
  • Y-Carriage_Rear.stl

Learn more about the formats

Publication date 2023-03-08 at 19:59
?
Published to Thingiverse on: 2016-07-18 at 11:01
Design number 1104823

swanny

3D printer file info

3D model description

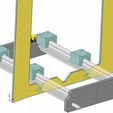
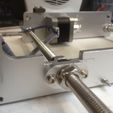
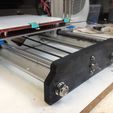
If you're reading this, it's probably because (like me) you're sick of constantly re-adjusting the bed height because the 8mm smooth rods flex easily. To make matters worse, the rods on my printer had a slight bend. Soooo, this upgrade replaces the Y-Carriage 8mm smooth rods on GeeeTech printers (and possibly others) with 12mm supported linear rails.

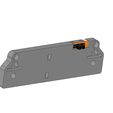
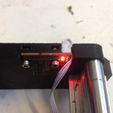
The re-designed y-carriage end supports are a direct replacement for the existing aluminium supports. The rear support also incorporates a built-in mount for an optical endstop sensor.
ย 
ย 

You will need:

  • 2 x SBR12-420mm Supported linear rails
  • 4 x SBR12UU Bearing blocks
  • 1 x Optical endstop sensor
  • 2 x M3 nuts and M3 x 10mm bolts. (To mount optical sensor)
  • 16 x M5 washers M5 x 10mm bolts. (To mount Aluminium bed)

All parts are available on eBay.
ย 
ย 

Instructions:

  • Unless you have access to another printer, I suggest you print the front & rear end carriage supports, drilling template and endstop blade before dismantling your printer.
  • Remove the existing front & rear Y-Carriage end supports and y_axis smooth rods.
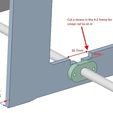
  • Cut 2 slots into the X-Z aluminium frame for the linear rails to sit in. (See photos and drawings for details).
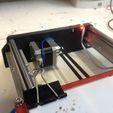
  • Re-assemble your printer using the new Y-carriage end supports and linear rails. (Don't forget to slide on the bearing blocks first).
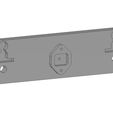
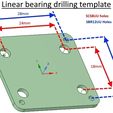
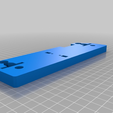
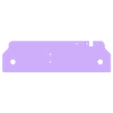
  • The mounting holes for the new bearings are spaced further apart. So you'll need to drill new mounting holes. Attach the drilling template to the aluminium bed using one of the old bearings. Mark and drill the location of the new holes. - Note...Due to their size and position, the new holes will overlap by a few mm.
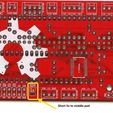
  • Install and connect the optical endstop. Unlike micro-switches, optical sensors require a 3rd wire to supply 5volts. If your printer uses the Sanguinololu board, you'll need to bridge out a link on the underside of the board. This connects the middle pin of the endstop connectors to the Sanguinololu 5v supply.
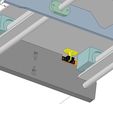
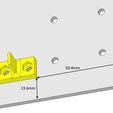
  • Attach the endstop blade to the underside of the aluminium bed. Note...The blade position shown in the drawings are indicative only. I recommend that you accurately position and mark your bed before drilling. Ensure you allow enough room for the bed to stop before the linear bearing hits the rear carriage support.
  • Re-attached y-axis stepper motor, tension pulley and drive belt ย  ย 

Repositioning the Orign

The longer Y-Axis travel means the bed position relative to the extruder will shift when the bed is homed to the limit switches. This mean when the extruder moves to the orign (ie G1 X0 Y0), the nozzle won't position over the front/left corner of the bed. To compensate for this, set the travel limits in configuration.h as follows:

// Travel limits after homing
#define X_MAX_POS 210
#define X_MIN_POS -10
#define Y_MAX_POS 210
#define Y_MIN_POS -35

Advertising


Issue with this design? Report a problem.

Would you like to support Cults?

You like Cults and you want to help us continue the adventure independently? Please note that we are a small team of 3 people, therefore it is very simple to support us to maintain the activity and create future developments. Here are 4 solutions accessible to all:

  • ADVERTISING: Disable your banner blocker (AdBlock, โ€ฆ) and click on our banner ads.

  • AFFILIATION: Make your purchases online by clicking on our affiliate links here Amazon.

  • DONATE: If you want, you can make a donation via Ko-Fi ๐Ÿ’œ.

  • WORD OF MOUTH: Invite your friends to come, discover the platform and the magnificent 3D files shared by the community!


Sharing and downloading on Cults3D guarantees that designs remain in makers community hands! And not in the hands of the 3D printing or software giants who own the competing platforms and exploit the designs for their own commercial interests.

Cults3D is an independent, self-financed site that is not accountable to any investor or brand. Almost all of the site's revenues are paid back to the platform's makers. The content published on the site serves only the interests of its authors and not those of 3D printer brands who also wish to control the 3D modeling market.

100% secure payment by credit card, PayPal, Apple Pay, Google Pay, etc.
View all payment options.