

Introduction: How to Create a "ridiculously.awesome" Casted Glass Reproduction of Your Favorite Movie Prop


I would like to start by saying that I loved the process of inventing and documenting the last major instructable that I wrote entitled How to Build an Equatorial Mount for Long Exposure Astrophotography. I wrote this for the "Make it Real Challenge" and by getting involved I met some new friends with similar interests and ambitions. I was also lucky enough to make it into the top 50 and then walked away with a 1st prize win and an awesome new 3D printer. (Congratulations to thorssoli for winning the "ridiculously.awesome" grand prize 3D printer.) Now that I've warmed up my keyboard I'm ready to take on the next challenge. I've decided to really flex my geek muscles to their maximum serviceable load. My goal is to create something, well, "ridiculously.awesome" and to document the process of creation in a way that keeps you, the reader, interested enough to read through the whole thing without crying. Not only should this instructable keep your attention, but it must also act as a guide that balances being concise while being sufficiently descriptive. The goal is to enable anyone with access to the necessary tools and skills to create something similar relying solely on this instructable. If this guide achieves these goals then I may just have a chance at bringing home another "ridiculously awesome" contest prize and possibly even begin earning enough geek points to earn the moniker "ridiculously.awesome".
This guide also performs the role of documenting my experimentation with different methods to achieve the vision I have for the end goal. This is the first time I've attempted any of these processes so you will get to see the ugly truth of the mistakes I make along the way. I will also share how I address these inevitable hazards that unexpectedly force a course correction.
So you've gotta be asking yourself by now, "what the heck is this guy gonna show me how to make?" Just like the title says I'm going to make a glass casting of one of my favorite movie props. No, not the monolith from 2001--that would be way too easy. For me the first thing that came to mind as a subject was Han Solo frozen in carbonite (GP (Geek Points) ++.) But why stop there? Let's up the ante and replace Han's famous grimace with my own scowling mug (GP++.) So... 'nuff talk let's start making!
Step 1: Anatomy of This Instructable

- Blah, Blah, Blah (Introduction, Safety and Tools and Materials)
- Creating the 3D Model
- Making the Mother Mold
- Making the Casting Mold
- Performing the Glass Casting
- Finishing Touches
- Read through the entire instructable before you begin any of the steps (I know it's unrealistic to expect that for a lot of us....)
- Prepare the necessary materials and tools beforehand and arrange them where you plan to work
- Decide if you plan to earn Geek Points by attempting the Geek Point Challenges for each section (more on that below)
- When possible make sure to complete any step you begin in one session. Stopping in the middle of a step will waste time and you may need to back track to remember where you were
- Plan your time to focus on the current stage without distractions. This instructable will take multiple days to complete
- Be safe2 (yes, that means extra safe)
- Breath
- Have fun
***GEEK POINT CHALLENGE*** [0.A]
Geek Point Challenges are extra steps for a given stage that require additional time, skill and/or computational fortitude. These steps are entirely optional and you can still complete the project without addressing the challenge. However, those who do not answer this honorable call will sacrifice the adoration earned by another who should so chose to take it upon them to claim a seat at the apogee of geekdom. If you are actually reading this congratulations are in order. You have earned your first Geek Point (GP) to get you on the board. GP++;
Step 2: The Safety Dance


We can leave your friends behind...
It's a little known fact that the members of Men Without Hats, the Canadian pseudo-punk band famous for this one-hit-wonder, were actually all fanatically obsessed with the safety of torch workers that produced Canada's prized Saskatchewan glass goblets--the backbone of the Canadian economy during the early 1980's. They brought awareness of the danger of wearing hats while operating mixed-gas torches to millions of Canadians who would have otherwise caught fire to their heads. The Safety Dance was their coup de grâce to the cavalier practice that married sensible fashion with artisanal enterprise thus saving countless Canadian craniums. To the misfortune of Men Without Hats, only weeks after their single topped the charts Celine Dion--heir to the Quebec Dion haberdashery fortune--stormed the world's airwaves. Her titanic presence completely shifted the Canadian economy away from Saskatchewan glass goblets towards the production of Celine Dion inspired men's ware and avant-garde pork products (yes, that would be Canadian bacon.) This entirely fabricated historical review illustrates the importance of safety when working with hazardous materials. How can you apply these lessons to being safe while performing the steps described in this instructable? By following these simple rules:
- Never stand in a bathtub filled with water while operating a toaster
- Always lift your feet if you are a passenger in a vehicle passing over a railroad crossing
- Never ever listen to Celine Dion while working with molten glass or your head may catch fire
- Molten glass and any foreign material in a high temperature kiln can give off toxic fumes. Make sure you properly ventilate your work area when operating the kiln to melt your glass
- The refractory components (structurally sound material at high temperatures) in the gypsum plaster and silica mold are harmful to your health if inhaled. You must use a respirator with sufficient rating to filter out any airborne particles when handling this material
- Broken glass is very sharp and may cut you if not handled properly (duh.) Wear heavy duty gloves and safety glasses when working with glass
- Heat transfers very slowly in a kiln and your cast glass masterpiece. Do not open the kiln and touch your cast object until completely cooled. Failure to do so could not only result in personal injury but also can potentially introduce sufficient stress to the cooling glass to cause cracking or shattering of the piece
This challenge entitled "Through the Melting Glass" will test your cunning in navigating the Internets. Click on the following link and continue following the directions provided after the link until you reach the finish line.
CLICK THIS LINK
If you got to this sentence before clicking more than three times CONGRATULATIONS! You just earned 10 GP! If not, well at least you got here eventually (wah wah.)
Step 3: Tools and Materials


Tools and Materials...
...for creating the 3D Model:
SketchBook Express (or comparable photo editing software)
Autodesk 123D
Meshmixer
HD Movie (with the movie prop you want to re-create)
Sand Paper or Diamond Emery Board (not nearly as expensive as it sounds)
Wire Cutters
1.75mm ABS Plastic Filament (or compatible material for 3D printer)
Measuring Cup
Cardboard Box (for pouring the casting mold)
Metal Pan
Gypsum Plaster
Silica Flour (#200)
Water
Heavy Duty Aluminum Foil
Kiln, Kiln Dams and Kiln Stands
Terra Cotta Pot
Kiln Wash or Kiln Paper
Compatible* Glass (I am using a single empty wine bottle as the casting material)
Diamond Emery Board
*Compatible glass refers to glass with the same or very similar coefficient of expansion and viscosity characteristics. If you use the glass from a single wine bottle, you'll be good to go. Use more than one wine bottle or glass from different sources and you could be setting yourself up for a "ridiculously.awesome" failure. Just imagine what may happen with two solids that expand at different rates at the same temperature are fused together....
So now that we've gotten past all of the blah, blah, blah if you are revved up to play the game then PRESS START!
***GEEK POINT CHALLENGE*** [0.C]
Do you remember playing Solo's Key for hours on end until your bladder was on the brink of spilling out? You shouldn't because I made it up--my_GP++. However, if you did dedicate an exorbitant amount of your youth to the title that inspired this photo-chop then you will certainly recall its name. Give yourself a GP power up (GP+=3.14159) if you invested your youth in solving infuriating puzzle games on the NES and tackled the challenge of this classic geek fetish.
Step 4: Stage 1: Creating the 3D Model
- Qualities to Seek for a Reproduction
- Capturing and Preparing the Key Frames
- Actually Creating the 3D Model
- Modifications and Clean Up
Attachments

Step 5: Creating the 3D Model: Qualities to Seek for a Reproduction

- static (does not change its shape over the time you plan to collect screen shots)
- displayed in HD (lower definition captures may yield a poor 3D model)
- shown at multiple angles
- not obstructed by other objects or characters
- well lit in the source material
- consistently lit in the sample captures
***GEEK POINT CHALLENGE*** [1.A]
Ok, this the first REAL GP Challenge. If you are feeling up to it you can take a sequence of pictures of yourself at different angles to create your own personal 3D model to integrate with the movie object you've chosen. I've decided to use my own grimacing face to replace that of our jaded hero. To do this right you will need to either hold your expression steady while lining up the shots (GP += 5), or build a multi-camera rig à la the Wachowskis' "The Matrix" (GP += 100!) I'm taking the cheap and easy route and employing the services of my wife to take the shots while I play to the camera. One more trick to get better pictures for processing in 123D is to use a small aperture (large F-stop) to keep everything in focus while you take your pictures.
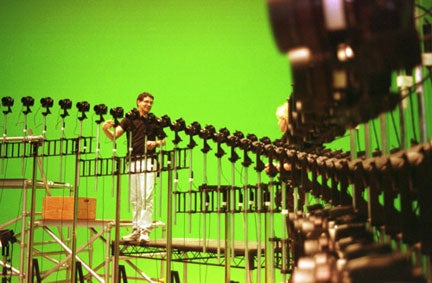
<chills>Yes, that is a ginormous array of digital cameras</chills>
Step 6: Creating the 3D Model: Capturing and Preparing the Key Frames

Once you have determined the movie object that you want to create a casted glass model of (I know, "ridiculously.awesome", right?) you will need to gather screen captures of the object. The 123D application uses pictures of an object taken from different angles and processes them to generate a 3D model of the object. We will be feeding our screen captures of the movie into this tool to generate a 3D model of it.
If you can play the content on a PC you can capture screen shots using the computer, but if this isn't an option (what's wrong with you, go buy a decent PC) you can use your camera to capture images on your TV.
The best way to take pictures of images on a TV is to pause the movie on the scenes you want to capture and then take the pictures at a slow shutter speed. 1/30 of a second or slower is recommended to avoid sampling the screen image faster than the rate that your TV can refresh the image. Different TVs and technologies refresh the image at different rates so you may have to experiment to figure out what works best to capture a good image.
Once you have captured around a dozen different screen shots that show the object at different angles save them to the computer that you will use to edit them.
Using your photo editor remove everything from the image that you captured except for the object that you want to convert into a 3D model. Be careful around the edges of the object not to leave too much or take too much away from the object. This will help to eliminate extra geometry from being generated by 123D Catch. Once you have completed doing this for all of the images save them and move on to the next step.
***GEEK POINT CHALLENGE*** [1.B]
Ok, this isn't a new challenge, just a reminder. If you decided to take pictures of yourself in order to build a 3D model to combine with your chosen movie object make sure you perform these steps on those photos too. Aw, what the heck... have a couple of GPs on me just for hanging in there. GP+=2;
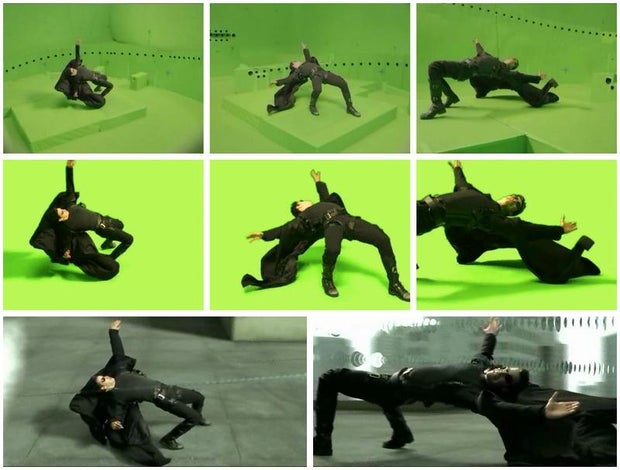
The following composite image shows most of the cleaned up key frames that my lovely assistant (read: lovely wife) took of me. These images were processed by 123DCatch to produce the 3D model of my face.
(It was very difficult to hold this pose while these shots were taken!)
Step 7: Creating the 3D Model: Actually Creating the 3D Model

After you have gathered and prepared your key frames you must upload them to the 123D service to transform them into a 3D model. As of the time of this writing there was a tab at the top of the instructables.com page that took you to this service. Otherwise you can simply go to http://123dcatch.com/ and sign up for an account.
Once you are logged in to your account you can download the 123Dcatch application to your PC. You can either do this and complete the installation, or launch their web application that runs in your browser. Either one should work, but I chose to use the web client. I'll wait here again until you are done installing the application, go on....
...OK, it looks like your back. If you chose to install the application go ahead and launch it now. Otherwise open the web application. When the application window appears you will see the option to "Create a New Capture" at the top left corner. Click on this item and you will be prompted to sign in to your account. A file-open dialogue box will appear once you have signed in prompting you to select the photos you wish to process. Select all of the photos you have cleaned up in the previous step and click "open" to link to your images to the application. You will now see a button on the upper left corner with a big green check mark. This is what you must press to create the project. If you didn't understand that a big green check meant go, well I just don't know what to say to you.... Go ahead, click it.
And now you wait...
...for an indeterminate period of time...
...to receive your 3D model...
...you should reflect upon your 3D transformation by practicing the Japanese art of meditative poetry...
***GEEK POINT CHALLENGE*** [1.C]
Knowledge of this form
will demonstrate your geekness
to Instructables
To earn this round of GPs you must have knowledge of the divine Eastern form of poetry that is both brief and somehow geeky. If you know the name for this form of meditative expression, good for you--GP+=2. Now for the real challenge: create your own poem following this structure and post it as a comment to this instructable. Doing so shall bring enlightenment to your soul and enrich your GP treasury by 15 points.
Step 8: Creating the 3D Model: a Fork in the Road

...So here is a video of the 3D model that resulted from my head shots. It isn't perfect, but will work for our purpose.
That came out very well, but this is where the brakes come to a screeching halt for this project. As if poor Han wasn't in enough pain already, this is the twisted model that was returned by 123DCatch. With only a few unique angles of his carbonite prison in the movies there just wasn't enough information to make a good model.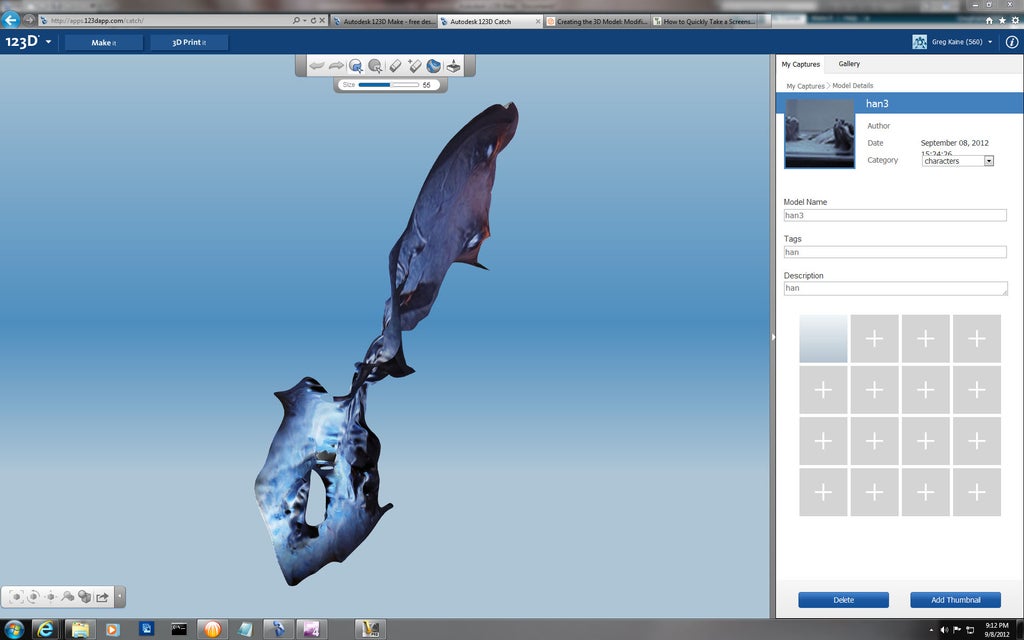
This is not the end of the road but merely a fork where a decision must be made. It is also time for an important lesson on two qualities that are paramount to a successful maker: resourcefulness and adaptability. Instead of crying, throwing shards of broken glass into the air and giving up (which would also induce tears) I've decided to source my 3D model of Han Solo from Thingiverse. User "gianteye" was kind enough to create and share this model making our original plans possible. Oh, but there is yet another quality important to a successful maker: perseverance (or more accurately described by our spouses as stubbornness.) I shall persevere with the original concept but will take one more swing at making a 3D model from a movie. The understudy for Hansicle is none othat than...
There are enough unique angles of Han's ghetto cruiser in the movies to get us a nice looking model from 123D. This is what I was able to generate from one scene at the end of Episode 5. I'm sure there's more that could be done; but I'm going to move forward with my original plan and clean up the model of my head as it was delivered by 123D Catch....
Step 9: Creating the 3D Model: Modifications and Clean Up

We now need to perform some clean up on the model(s) to make sure we can produce a good mother mold (printed 3D object). This will require you to first open the file in the 123D application. Go ahead and do that now, I'll wait until you are ready. Seriously, stop reading and open the file. I promise I won't go anywhere--its ok, go on...
(HINT: This is the part where you launch the 123D app and open the *.123d file that was generated by 123D Catch.)
...ok, finally. I should have taken a nap while I was waiting. Once you have your model opened in the 123D application you should perform a thorough inspection of it at all angles. Make sure that the model is a continuous surface without any holes. If there are any breaks in the surface you must "fill them in". The details for how to do this are beyond the scope of this instructable, but our buddy Bing or our guy Google could lend you a hand in finding guidance on this subject. Most likely you only have one side of detail on your model unless you were lucky enough that the movie you are using shows all sides of the object d'art. If this is the case you will need to close this off to create a solid object.
The next thing to prepare your model for printing is to create a flat surface that will be the base of the printed object. Meshmixer is a very useful tool for this purpose and a well written and illustrated tutorial is available describing how to clean up the model. Depending on the 3D printer that you use and the shape of your object you may need to create additional support structures. In my project I chose to build up the 3D print from the backside of the carbonite slab. This makes the most sense for my model since all of the important details are on the other side. I will also be using an "open face" mold to create the glass object. This method will result in a smooth surface on the back of the glass object.
The last basic operation to perform is deleting all of the superfluous geometry that 123D decided to create. Once you've done this you should have a clean model that can be used to print your mother mold. You may need to do some final touch ups on the model geometry if anything came out funky. This can be done either with Meshmixer or 123D.
***GEEK POINT CHALLENGE*** [1.D]
For a few extra bonus GPs you can add additional geometry to your model. One example would be to add a decorative base, or perhaps place the object upon the top of an Ionian pillar. Doing this will earn you another 5 GPs. Knowing what an Ionian pillar is without looking it up earns you 10 more.
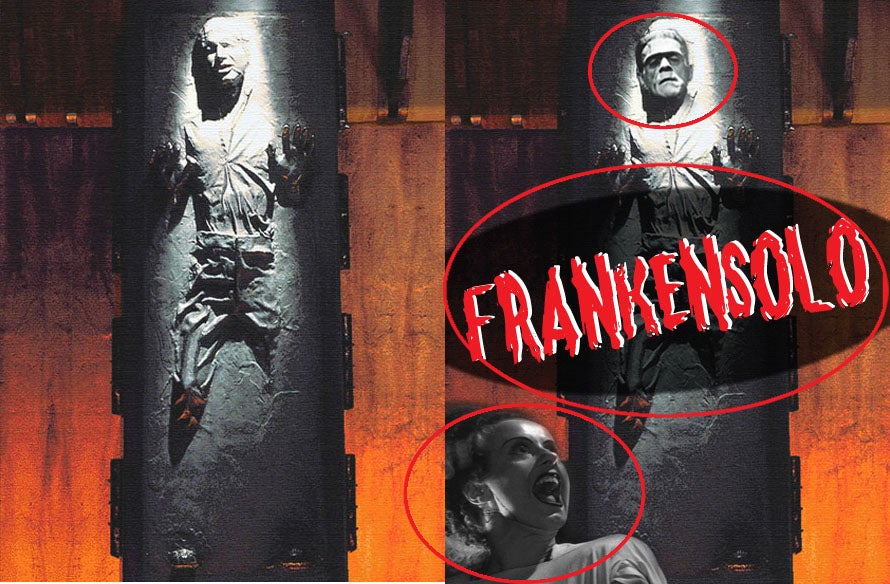
Step 10: Creating the 3D Model: FrankenSolo

***GEEK POINT CHALLENGE*** [1.E]
This GPC is for those who took it upon themselves to create a monstrous form that merges the movie object with their own mini-me. If you are not among the chosen few than move along, loiter no longer upon this step. Otherwise, now is the time to perform the same clean-up process on your model. You will also need to merge the two objects to form a single solid composition. This step describes one method of doing this. If you've taken on this challenge and complete this transformation you've earned another 10 GP. (If you started this challenge but decided it was too hard then shame on you, SHAME ON YOU. And you lose 15 GPs.)
Since I choose the high road I now have to stitch my head onto the model of Han Solo frozen in carbonite in order to create the final 3D model that will define the mother mold. (That was one of the strangest sentences I've ever written.) I used the 123D App program from Autodesk to perform the following steps.
First launch the application and log in to your account (create an account and install the application if you have not already done this.)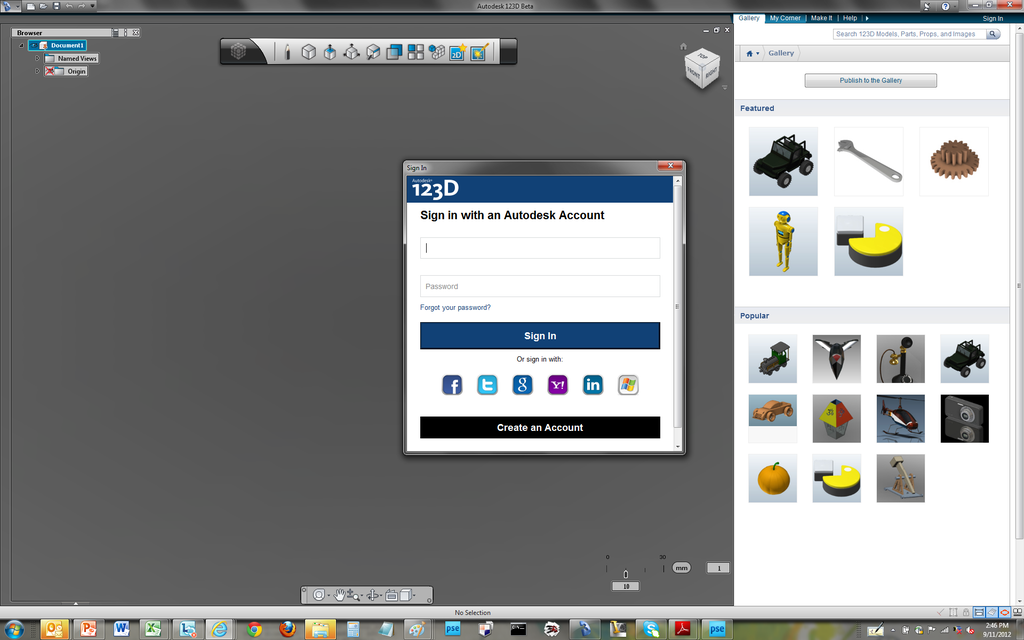
Import the STL model of Han Solo in carbonite that we downloaded previously from Thinigverse.com. 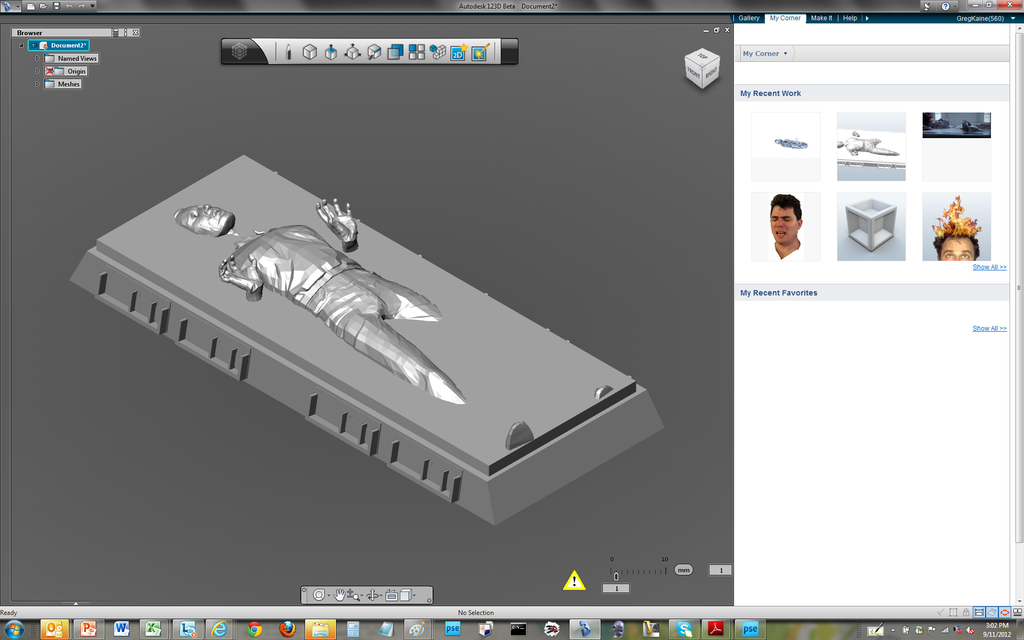
Next click on the "My Corner" tab in the upper left-hand corner of the application and load the model you created to combine with the first one. Do not check the model for water tightness when it prompts for this.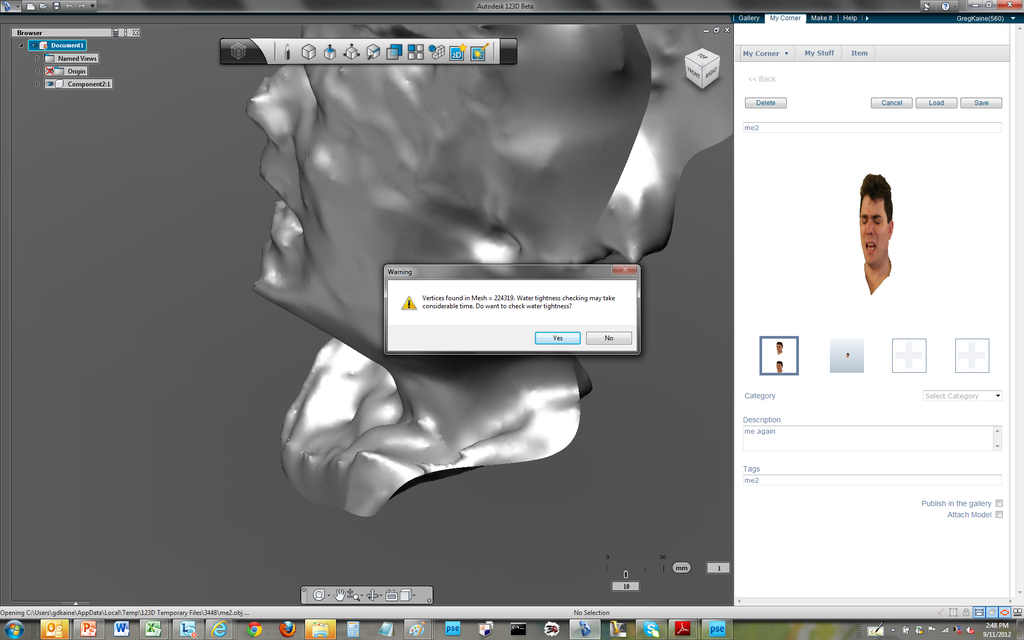
Now you will need to rotate, scale and move your models to align them so that they are overlapping in the way you want the 3D printed mother mold to appear. This is a little tricky and may take some time to complete. Be sure that you are not creating any gaps or discontinuities in the model.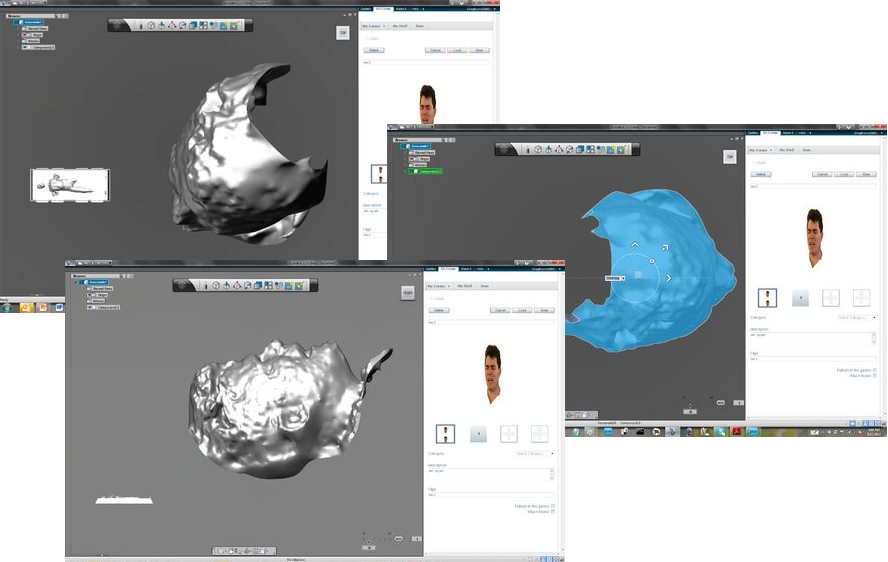
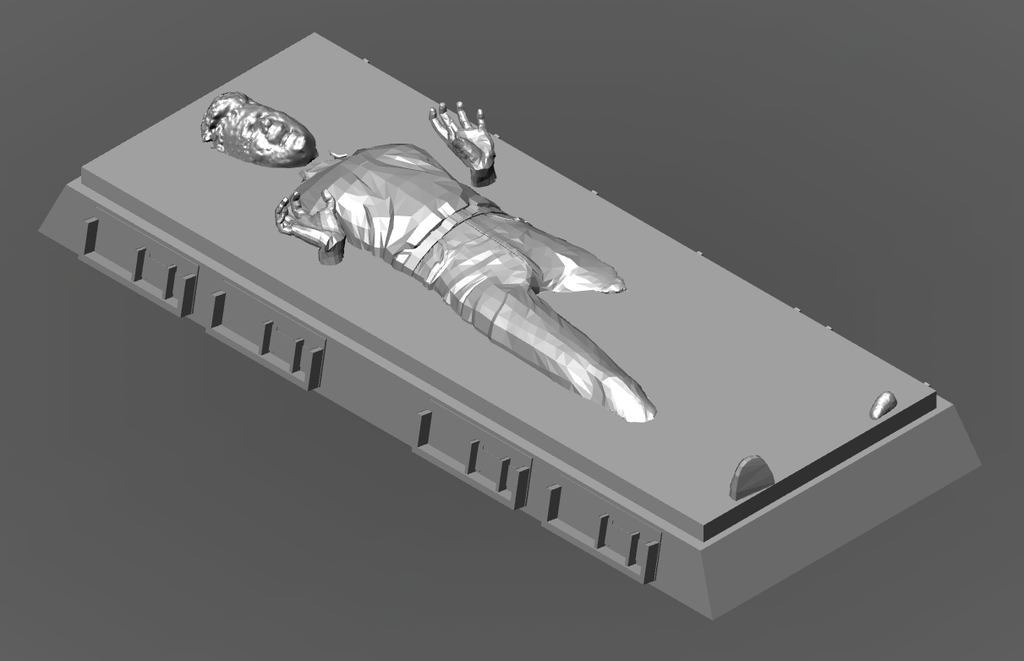
You can see here in the final illustration how I lined up the model of my head to replace that of Han Solo's.
Step 11: Stage 2: Making the Mother Mold
- Preparing for Launch (preparation)
- Launch! (printing the 3D object)
- Cleanliness is Godliness (cleaning up the mother mold)
Attachments
Step 12: Making the Mother Mold: Preparing for Launch

If you did not follow the previous step to add yourself to the model you will need to export you 123D model as an STL model. STL stands for Standard Tessellation Language and describes the surface layer details for a 3D object. This is a common file type used for 3D printers and CNC machines.
- Launch the Autodesk 123D application
- Click on the "My Corner" tab
- Log in to your Autodesk account
- Load the model as a new project
- Save the model as an STL file
- Make sure that you have sufficient material on the filament spool before you print your object.
- Turn on the 3D printer and allow it to warm up for a sufficient period of time
- Perform a dry run of the print, if possible, with your 3D printer
Step 13: Making the Mother Mold: Launch!

Since my new 3D printer hadn't yet arrived and I needed it to print the mother mold I was in a pinch. There was a convenient option available nearby: I made it at TechShop (www.techshop.ws) in San Jose. They have an UP! as well as a Maker Bot and a friendly fellow maker by the name of John was kind enough to show me the ropes on this machine and donated some of his time to my cause.
If you are using an UP! 3D printer you first need to import the STL model into the UP! software. Your model will look something like this after you import the file.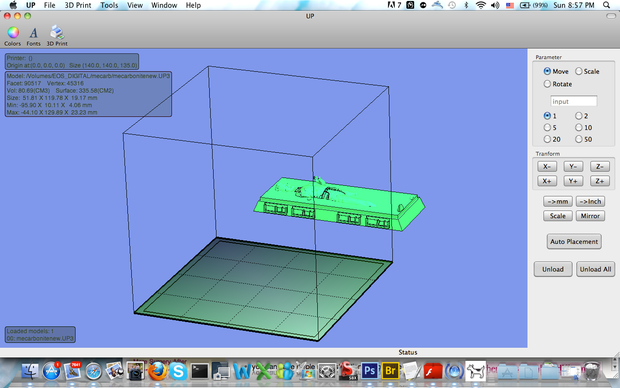
Click on the "Auto Placement" button to place the object in the center of the printing plate.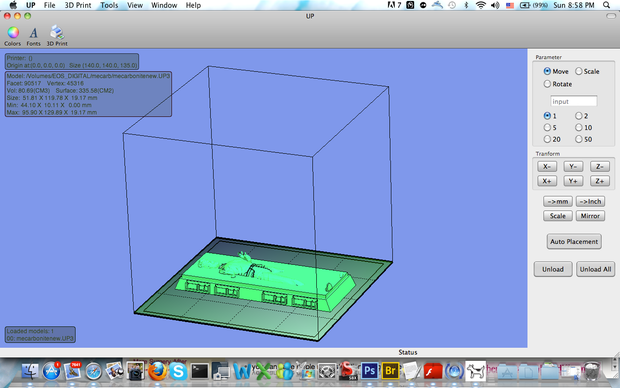
You may need to shrink the model a little to make room for a raft if you choose to construct one for your model.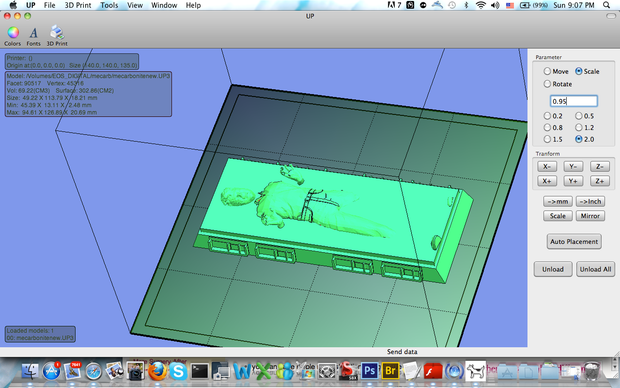
You can see in the following image the additional rafting geometry on the extrusion plate around the model. This additional material will help the model to resist warping and create a platform for the model to be built upon.
Since your project geometry will be different than mine I won't prescribe specific parameters for printing the model. But given the shape and details of my object I chose to fill the model with a more porous internal structure and defined support structures for features that exceeded 40 degrees from the extrusion plate. This will help features like the hands to stay in place while the ABS material hardens.
Once you are all set to kick off the 3D print job you can slam your hand down on that big red button and begin the 3D print process. My model was ~6" x ~1.5" and took around 1.5hours to print out completely.
This is 1.5 hours of print time compressed down to one minute--enjoy.
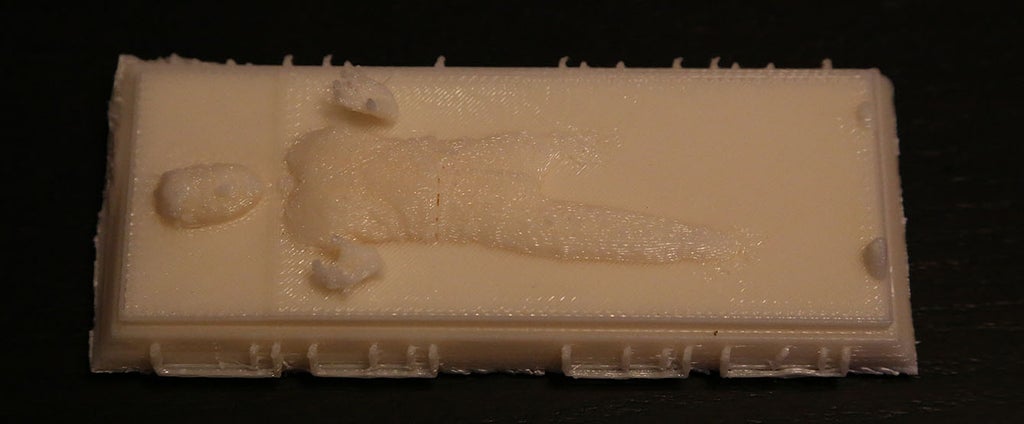
And here is the mother mold model after the completed job.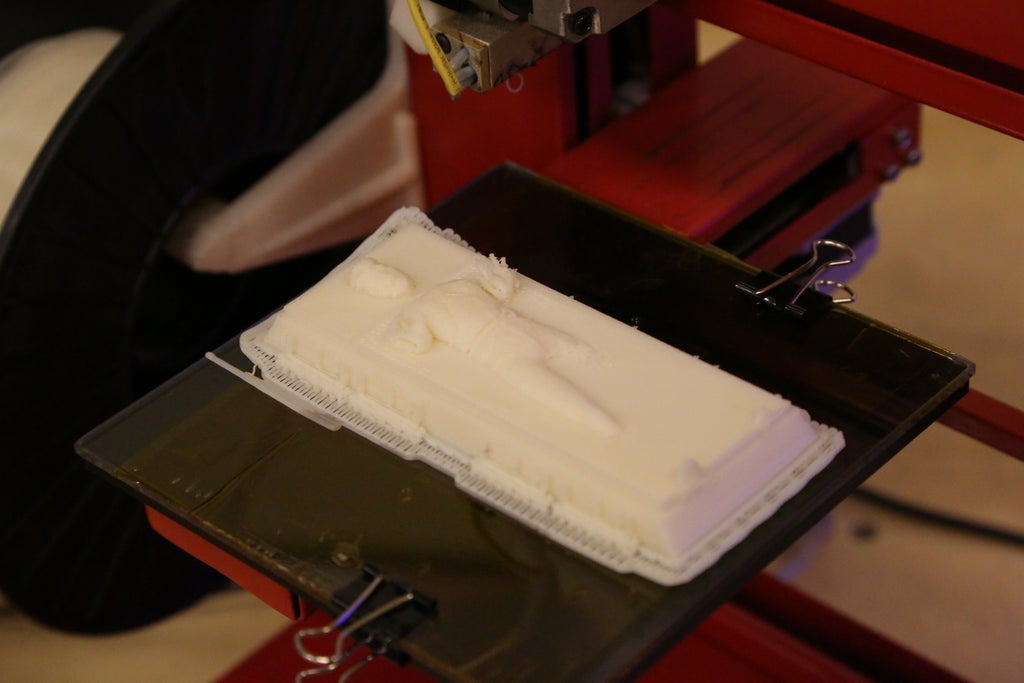
While the print job is proceeding you may notice some warping at the edges of your model. There are a number of methods to help mitigate this phenomenon and I suggest you scour the Internets to find a method that works for your hardware and model. The next step describes the actions I took to clean up the printed model.
***GEEK POINT CHALLENGE*** [2.A]
How cool would it be to not only have a casted glass model of your movie prop but also a glow-in-the-dark mother mold. Well you can, and it will also earn you 5 geek points if you take this path. You can find glow-in-the-dark ABS filament for 3D extrusion printers on Amazon and other retailers on line.
Step 14: Making the Mother Mold: Cleanliness Is Godliness

- Use a pair of wire cutters to trim off the rafting material around the base of the 3D printed model
- Use fine sandpaper (200 grit or finer) and lightly sand the regions of the mother mold where you want to smooth out the surface texture
- For geometrically complex regions (face, hands, Ionian pillar capitals, etc...) you should use a small diamond emery board to work around these features
- Apply light, not heavy pressure to remove just a little of the surface at a time
- To correct for warped geometry I sanded down the warped regions until I was satisfied
- Keep a damp cloth handy to wipe off the resulting dust as you go. Try to keep the model clean as you proceed
- Do this outside or someplace you don't mind getting messy
- When you have completed smoothing the surface of the mother mold to your satisfaction you should scrub it lightly with soft bristle brush. This will help to remove any excess ABS dust and keep it from mixing with the plaster solution
Step 15: Stage 3: Making the Casting Mold
- Preparing to Make a Good Impression
- Making the Casting Mold: Let's Get Plastered
- The Cure (properly drying the plaster mold)
Attachments
Step 16: Making the Casting Mold: Preparing to Make a Good Impression

-
Make sure you have all of your material and equipment ready and near by
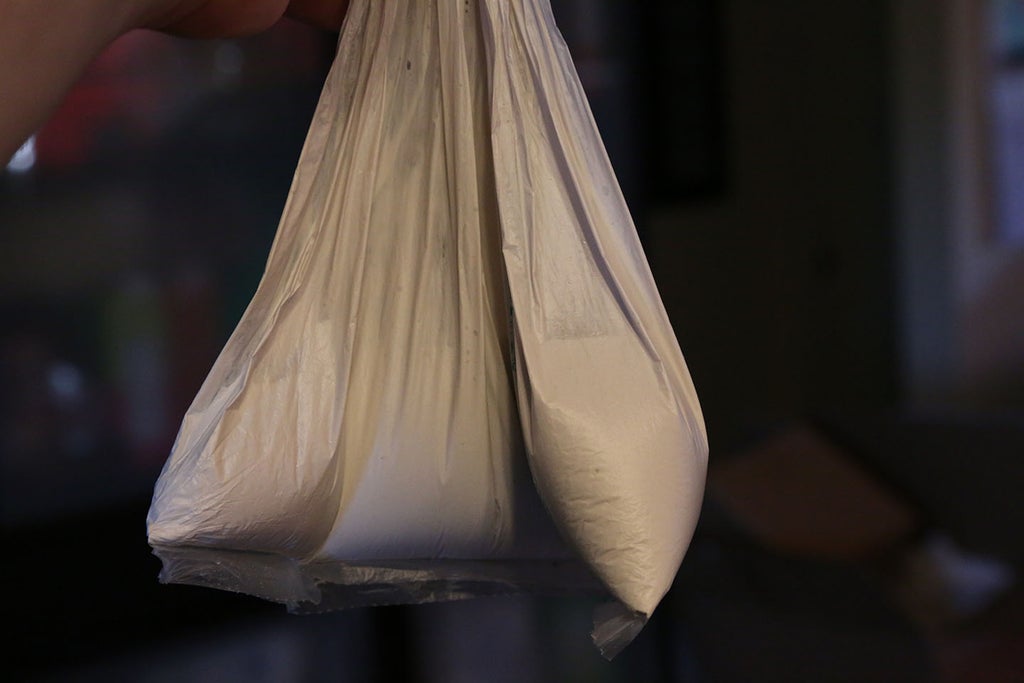
- Plastic bag (without any holes) at least twice the volume of your plaster mixture. (I used a thin bag used in grocery stores for holding fresh produce.)
- Measuring cup for measuring out the dry and wet ingredients
- Cardboard box for receiving the wet plaster and mother mold
- The mother mold all nice and sparkly clean
- A timer or clock within view to keep track of time while the plaster mixture is slacking (or proceeding with its chemical reaction.)
- Setup your tools and materials in a place you don't mind getting dirty or messy. I like to lay down a tarp or old newspaper to make clean up easier
- Buy a middle-of-the-road bottle of champagne and some flowers--the mother mold will just love them
- Pneumonoultramicroscopicsilicovolcanoconiosis (more commonly known as silicosis) is not only the longest word to ever appear in an English dictionary but is also a terrible, terrible lung disease related to the inhalation of microscopic crystalline silica dust. Have and equip your respirator before you begin mixing the dry ingredients. Don't take any chances by skipping this important safety precaution.
***GEEK POINT CHALLENGE*** [3.A]
For an even more complex shape with features on all sides you will need to perform a "lost wax" casting. This process involves the use of an expendable mother mold that is melted away once the casting mold has been completed. To accomplish this using a 3D printed mother mold you will need to use a printable material like PLA that can be melted out of the plaster cast you will be forming. The lost wax method was adopted from a technique for forming precious metals and is commonly used to produce jewelry with complex features and details. The preparation will be the same as described above, however you must ensure that you have plenty of room on all sides for the wet plaster to create a sufficient shell around your mother mold. As this is a GPC I will not go into details on this process but leave it to your dexterous fingers to tickle the wisdom of the Internet from your keyboard. You'll earn an extra 25 GPs for pulling off this advanced technique.
***GEEK POINT CHALLENGE*** [3.B]
To earn a few more points you'll need to flex the Broca's area of your cerebral mass. Your challenge is to memorize the meaning and pronunciation of the word pneumonoultramicroscopicsilicovolcanoconiosis. But to complete this challenge and earn 15 GPs you'll need to use this word in a sentence while in casual conversation at work. To earn these points the term must be used in proper context. You can double the points you'll earn for this if you are able to sneak this in without them asking you what the hell you just said. Triple your points earned if you make their head explode (by trying to understand what you just said, not through the application of dynamite or other explosives.)
Step 17: Making the Casting Mold: Let's Get Plastered

(No this is not a close up of a red neck's trailer hitch.)
While you are waiting on the slacking plaster mix you should prepare the cardboard box that will receive your mold. If you plan to throw away the box you can skip this step. However if you want to reuse the cardboard container for a future mold you should line the box with a semi-durable paper or other thin material. I cut up some strips of packing paper that worked great to preserve the box.
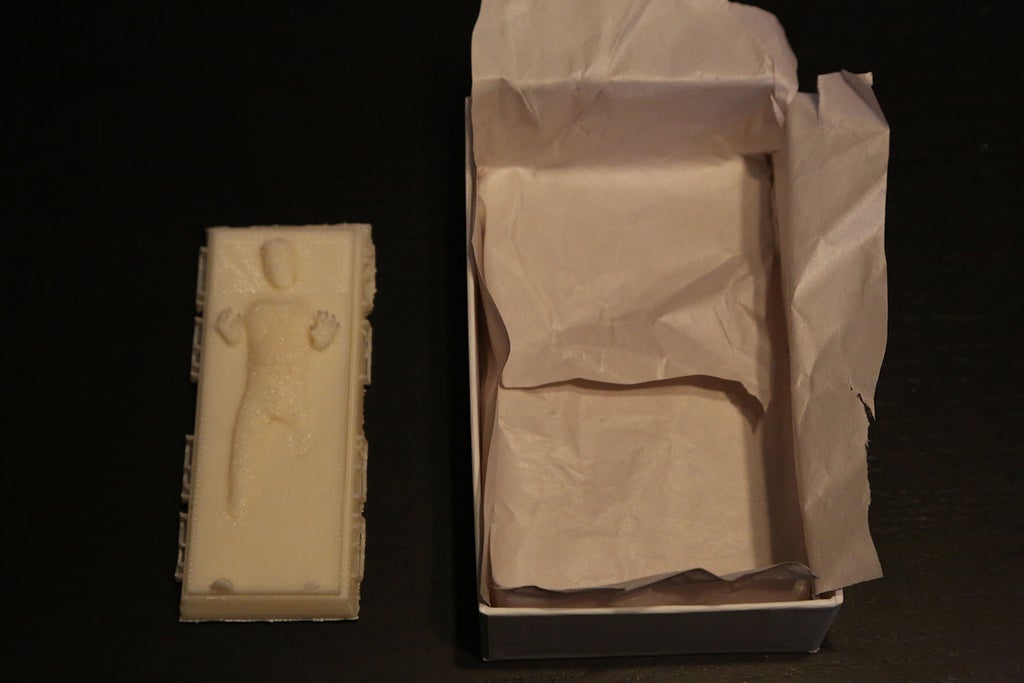
Next you should place your mother mold top-side-down into the box. Make sure you have at least an inch of space around the mother mold along the perimeter.
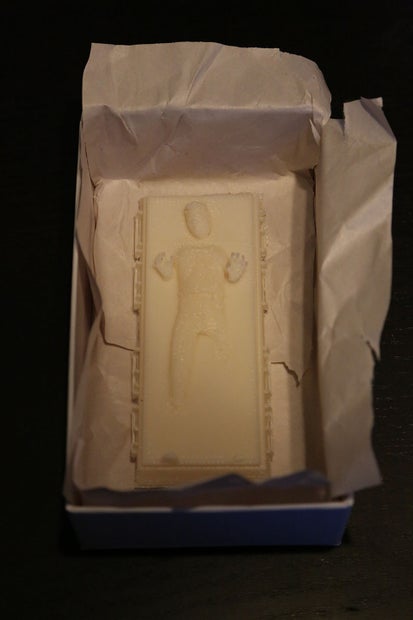
Once the plaster mix has slacked you can cut off the tip of the bag and slowly pour the plaster mix around the edges of your mother mold. Do not pour the mixture directly on to your mold. This process makes it much easier to control the flow and will minimize the production of bubbles in the plaster mold. Gently tap the sides of the box to work up any big air bubbles.
***GEEK POINT CHALLENGE*** [3.C]
This next GPC is a test of your cultural acumen. You can earn GPs by identifying the origin of each element in the "ridiculously.awesome" photo-chop above.
- [worth 1 GP] What is the name of the drawn character?
- [worth 2 GPs] What is the significance of the bottle he is holding?
- [worth 3 GPs] What is the name of the craft that is hovering mysteriously behind his head?
- [worth 4 GPs] What movie is this hot tub scene from?
-
[BONUS QUESTION] What is the name for the size of the champagne bottle being held by the jovial chubby man?
- (hint 1: it is the largest standard sized champagne bottle)
- (hint 2: the mysterious craft hovering in the background has the same name)
Step 18: Making the Casting Mold: the Cure

Now comes the fun part. You will have to wait a number of days to allow the plaster casting mold to cure, or dry and strengthen. If you not do allow the mold to fully dry it may break during the casting process spilling gobs of molten glass onto the floor of your kiln. This is not a good thing.
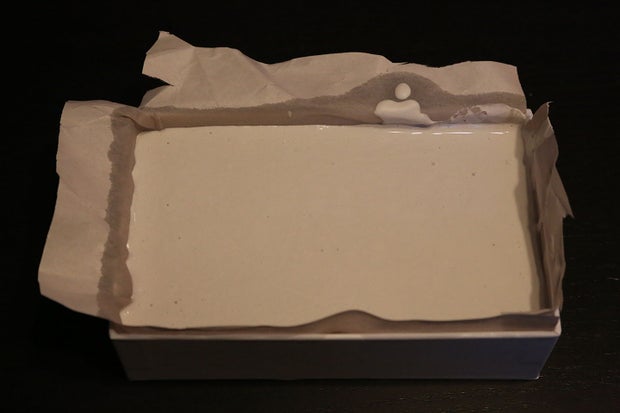
Approximately one hour after pouring the plaster mixture it should be solid and a little warm. Carefully remove the plaster mold from the card board box (or destroy the box if you don't plan on reusing it.) If you lined the box with paper you should carefully peel it from the mold. Don't worry if there are pieces stuck to the plaster--they will burn off in the kiln later. Now place the mold in a dry area with circulating air. You should leave it there for at least a day before moving on. The larger your mold, the longer you will need to wait. Given the size of my mother mold I waited a day before moving forward.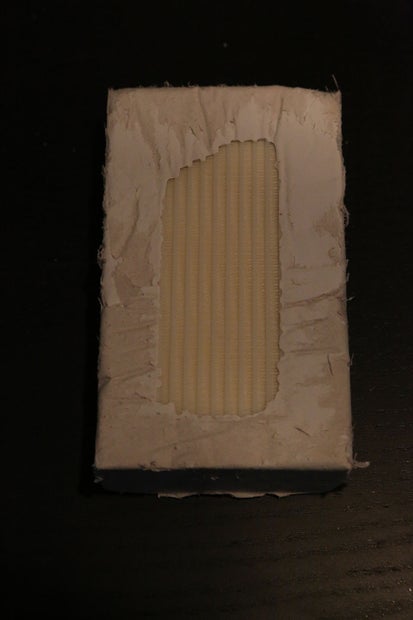
Here we have the air-dried plaster mold with the ABS mother mold firmly held in place.
After letting the plaster mold air-dry, you need to carefully remove the mother mold from the plaster mold. To do this you will first need to carve away any extra plaster and then warm up the ABS material to make it pliable. Using a sharp tool carefully cut away at the plaster around the edges of your mold. Here is what mine looked like after this process.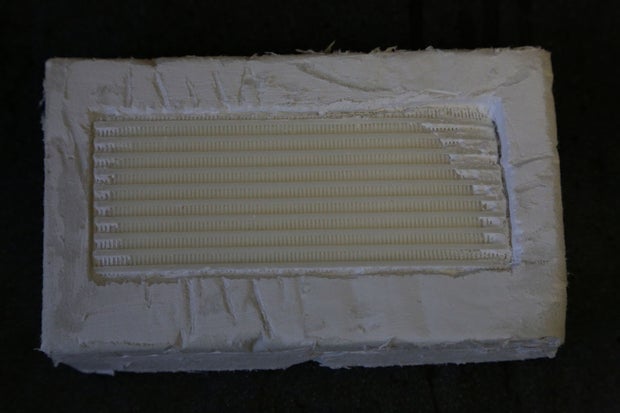
Now place the mold face up over a pan lined with heavy duty foil. Place the pan in the oven and set the temperature to 225 degrees. Allow the mold to soak at this temperature and then repeat this at 325 degrees. The soak time will depend on the size of your model. As for mine, I soaked for 30 minutes at each temperature. At this temperature the ABS model should be very soft. If it is not, increase the temperature slightly but do not exceed 350 degrees.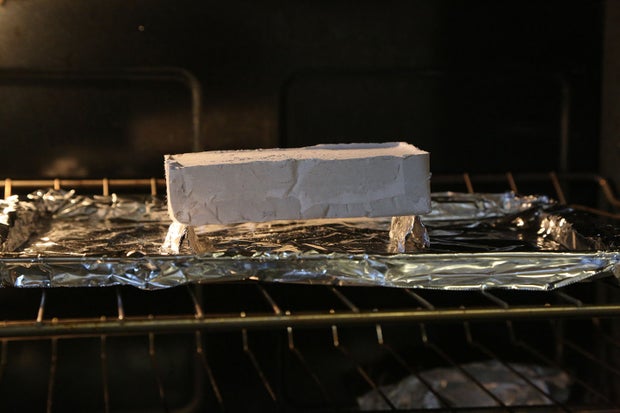
Mmmm. There's no scent quite like fresh baked Han Solo.
Make sure you use a hot glove to handle the mold as it will be hot (duh.) Then, using a pair of tweezers you can begin extracting the mother mold from the plaster mold. If your mother mold breaks apart, don't worry about it. You can always repair it or print another one. If you need to, use tweezers to remove fine pieces that are otherwise stuck. This may take you some time, especially if you have a more detailed model. If you are unable to remove some of the pieces, don't worry, the next step will take care of this. When you have removed the mother mold turn off the oven and allow the part to slowly cool to room temperature inside the oven. After it has cooled remove it and proceed.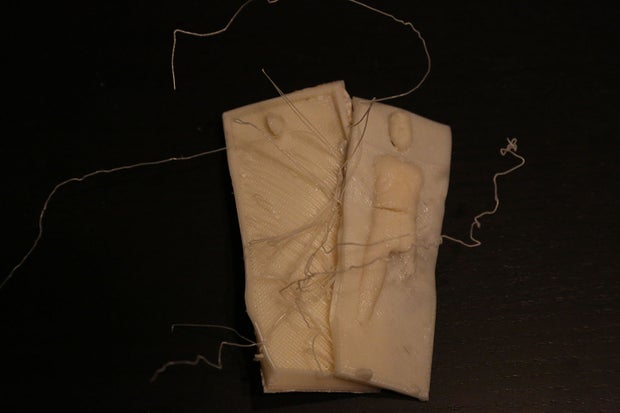
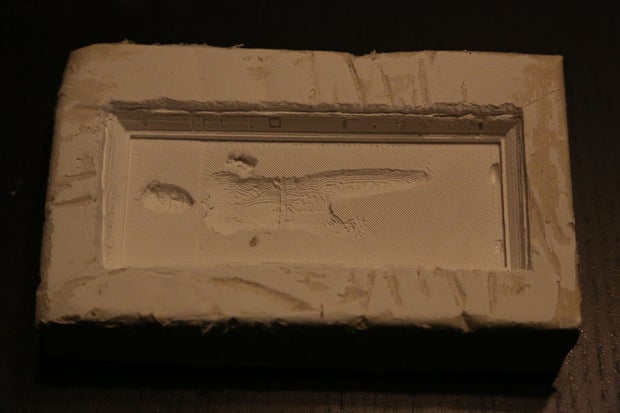
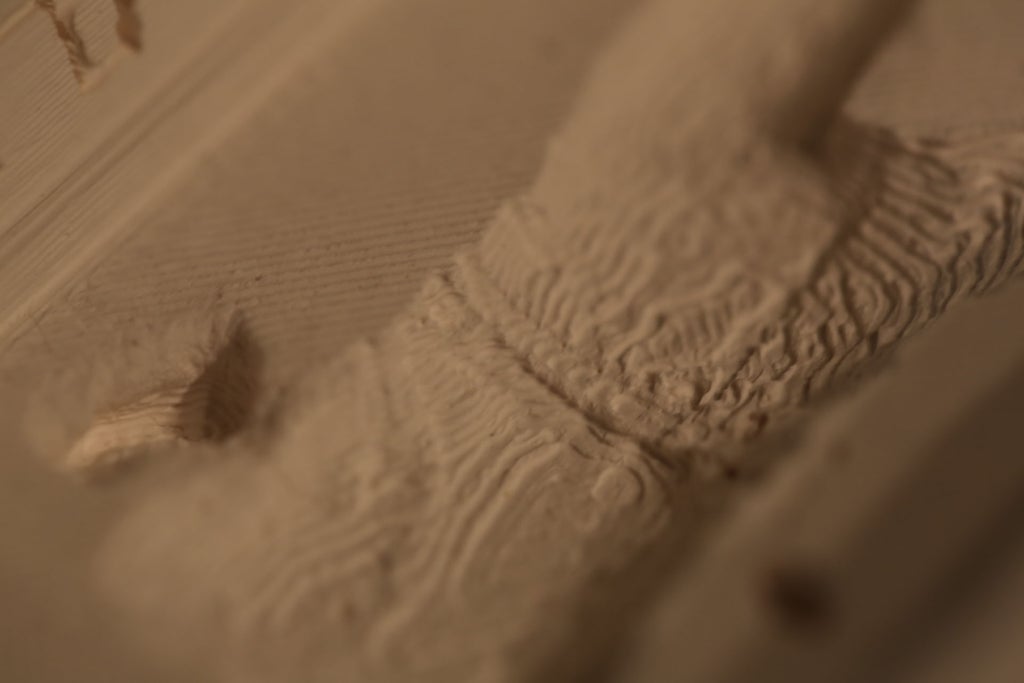
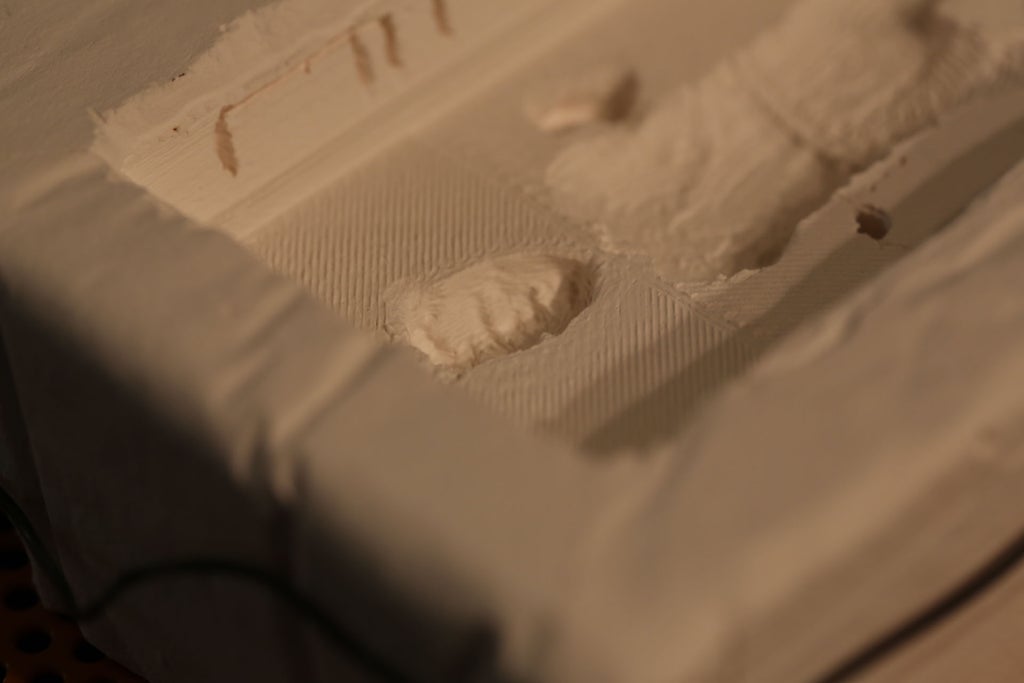
Here we have the extracted mother mold and the final plaster mold. I was very impressed with the level of detail that the plaster retained.
The final step here is to slowly heat the plaster mold up to 1200 in your kiln. You should heat the kiln at a rate of about 300 degrees per hour. Then allow the mold to soak at 1200 degrees for around 30 minutes. You can then bring the temperature down to 950 degrees at a rate of 300 degrees per hour. Finally turn off your kiln and allow the mold to slowly cool to room temperature. Any remaining bits of ABS will burn off in this process, but it is ESSENTIAL to have STRONG, EFFECTIVE VENTILATION to remove the TOXIC FUMES generated by this action. Do not leave any significant amounts of ABS in your plaster mold in order to minimize the volume of toxic fumes that will be produced.
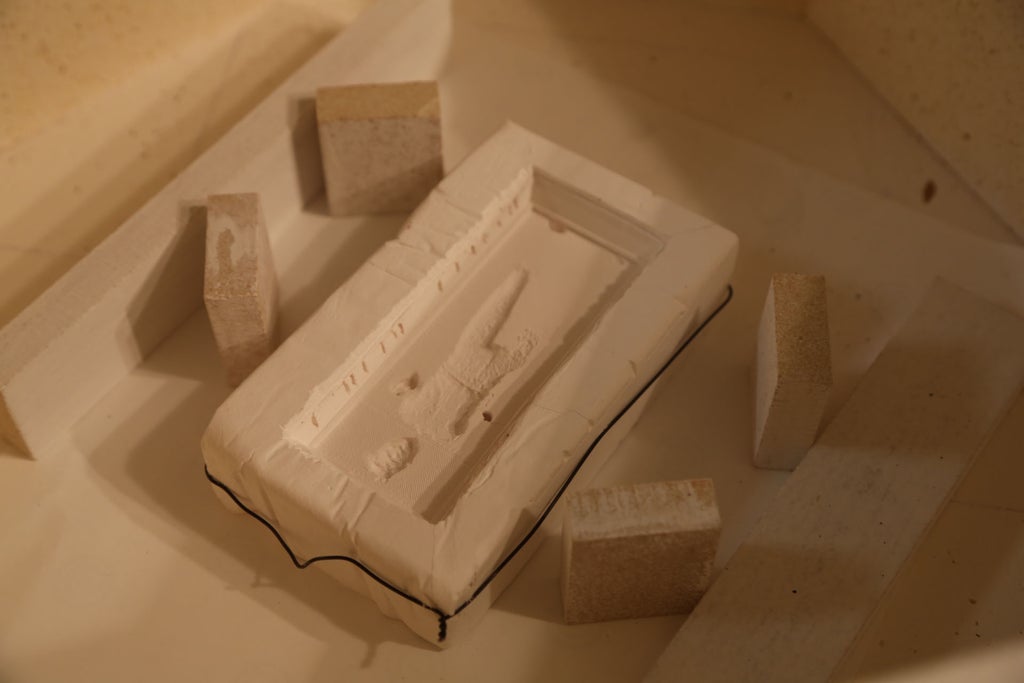
You will now have a finished plaster mold that is ready to receive the molten glass material! It is normal for cracks to appear in the plaster mold. Don't worry about these cracks unless you find that the mold is breaking into separate pieces. My piece came out of this process with a complete crack at the feet side of the mold. Just to be safe I surrounded the plaster mold with steel wire to hold the mold in position.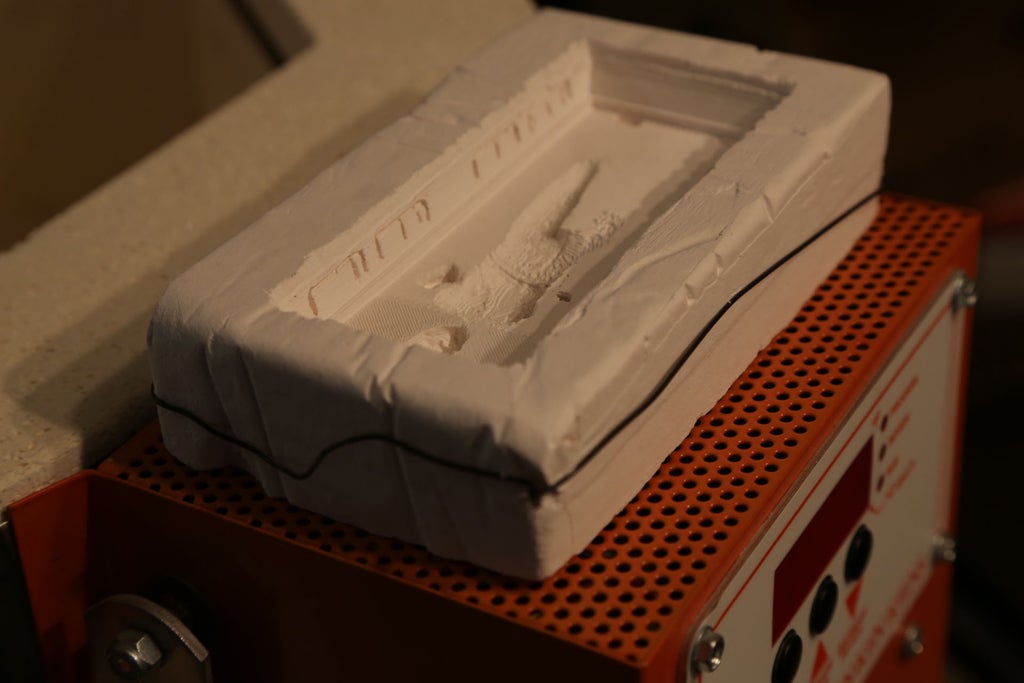
Step 19: Stage 4: Performing the Glass Casting
- Breaking Bottles
- Glowing Molten Glass of Doom
- Slowly Cooling the Casted Object
Attachments
Step 20: Performing the Casting: Breaking Bottles

Begin by gathering your materials and tools for this step. You will need:
- A hammer
- An empty wine bottle (dark colored glass preferred)
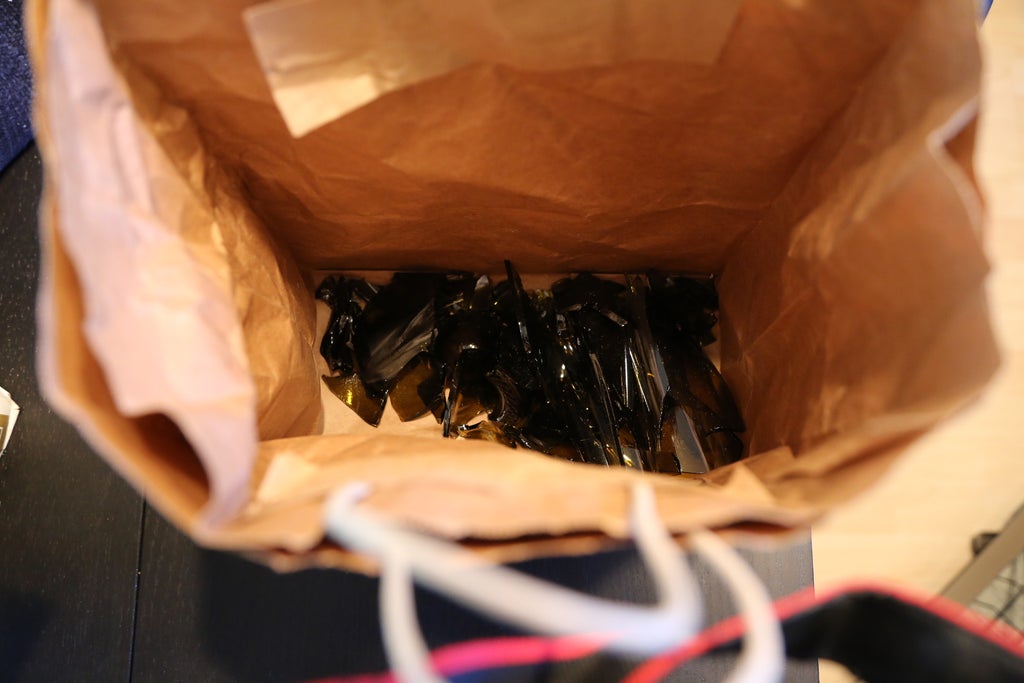
- A heavy duty bag to contain the bottle and broken glass
- SAFETY GLASSES
- HEAVY DUTY GLOVES
- A terracotta pot to hold the broken glass
If you need instructions on what to do with all of these things once you've gathered them, I'm afraid this may not be the web site for you. Otherwise, make sure you setup in an area you don't mind getting messy. Load up the glass in the heavy duty bag, adorn your high fashion safety glasses and heavy duty gloves and start whacking away.
You will want to break the glass into pieces that are small enough to fit into the terracotta pot you will use for the kiln melt. Don't make them so small that they all fall out of the hole before they melt.
Once you have released your inner demons upon the fragile innocence of the wine bottle you can transfer the glass pieces into the terracotta pot. You are now ready to begin the melting process.
After:
Step 21: Performing the Casting: Glowing Molten Glass of Doom

First make sure the kiln shelf has been properly prepared with kiln wash or other material to prevent the molten glass from sticking to the surface. I used kiln paper for this.
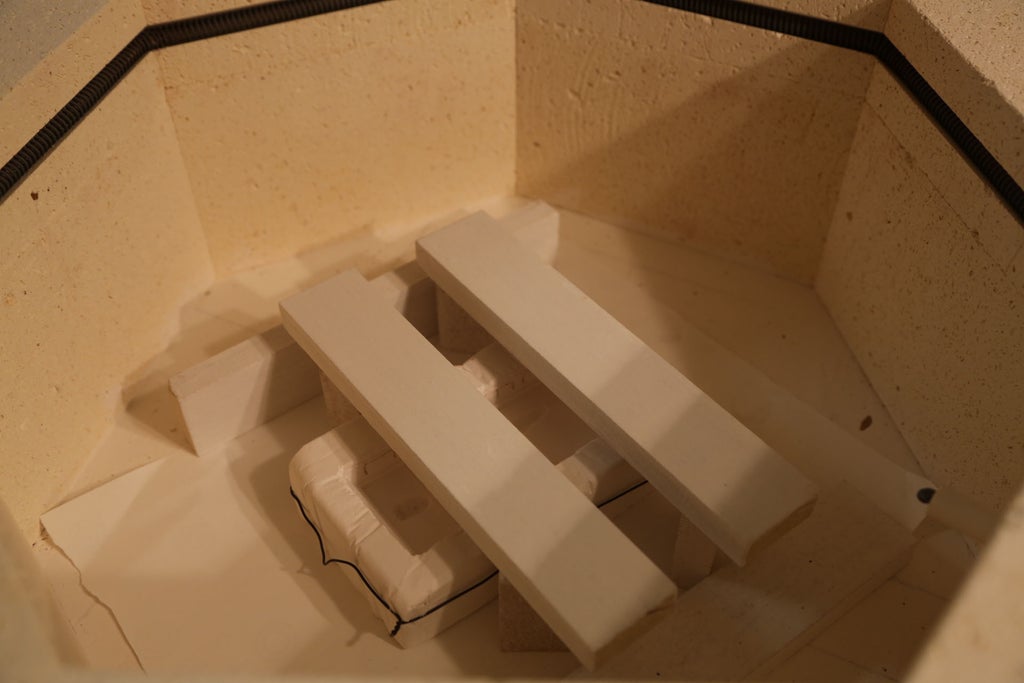
Next you must place a couple dam walls around the plaster mold. This is to contain any molten glass that may over flow the mold.
Place the plaster mold that will receive the molten glass in the center of the dam you formed.
Now place two more dam walls as support for the terracotta pot across the length of the dam you just built.
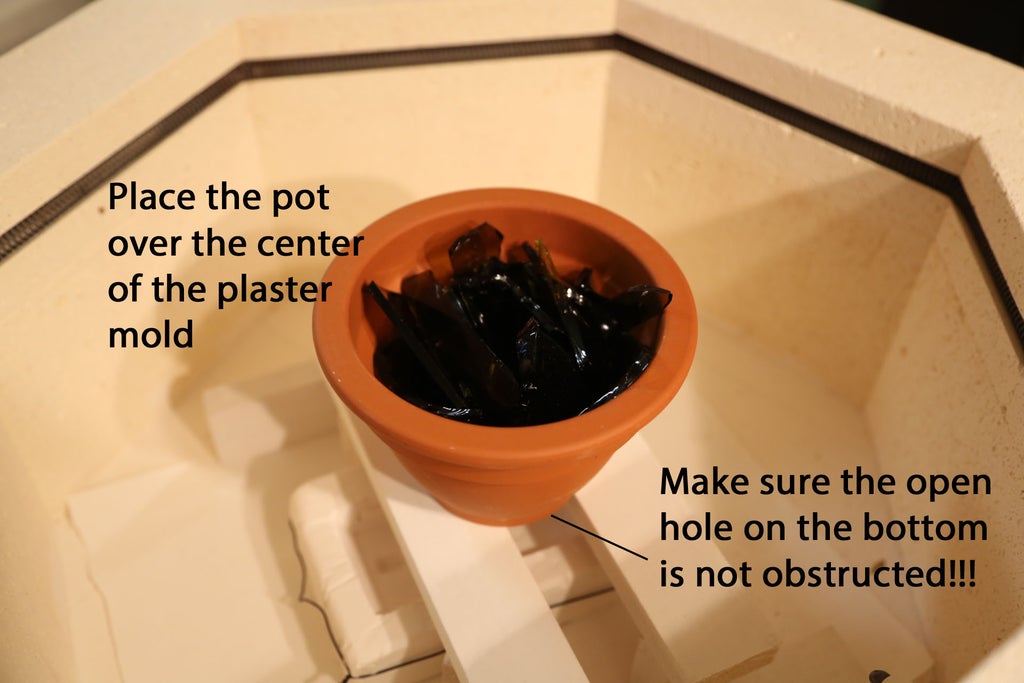
Place the terracotta pot upon the two supporting dams without obstructing the drainage hole in the bottom of the pot. The hole should align with the cavity of your plaster mold. Make any necessary adjustments to stabilize the structures and to align the pot and mold.
The following chart describes the firing schedules for the glass casting and was derived from the System96 website describing the annealing time necessary for S96 glass. Glass from wine bottles may be similar and therefor this chart makes a sufficient approximation of the required firing schedule. Depending on the thickness of your casted model you will need to follow a specific schedule. I chose to follow a firing schedule for the 0.5" thickness. These schedules may be overly conservative but I'm more confident about producing successful results with a slower process.
Some important notes for the chart include:
- The first labeled segment is full-heat (as fast as possible) to 1600
- The second labeled segment is full-heat (as fast as possible) to 960
- The third labeled segment is turning off the kiln and allowing the object to naturally cool to room temperature (assuming you have a firebrick kiln, not fiber.)
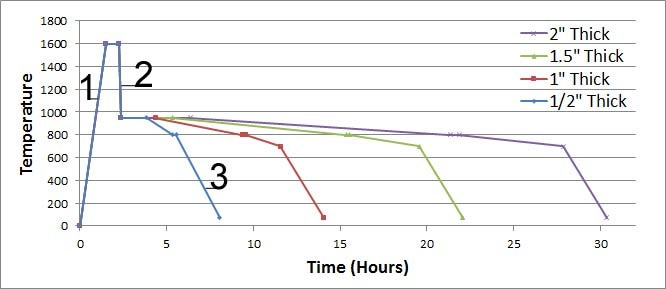
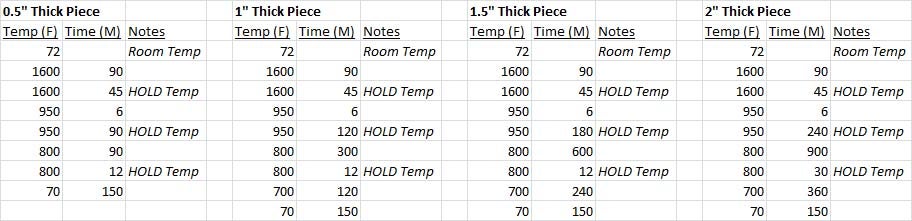
I have also included the following tables to help program a digital kiln controller if you are lucky enough to have one.
At its hottest temperature the glass will be molten and glowing (just like the title says.) You can peak into your kiln to take a look but only if you have good ventilation and have adorned adequate protective gear. This includes safety glass, and temperature resistant gloves specifically designed for working with hot glass. Let's assume that's how I took these pictures.
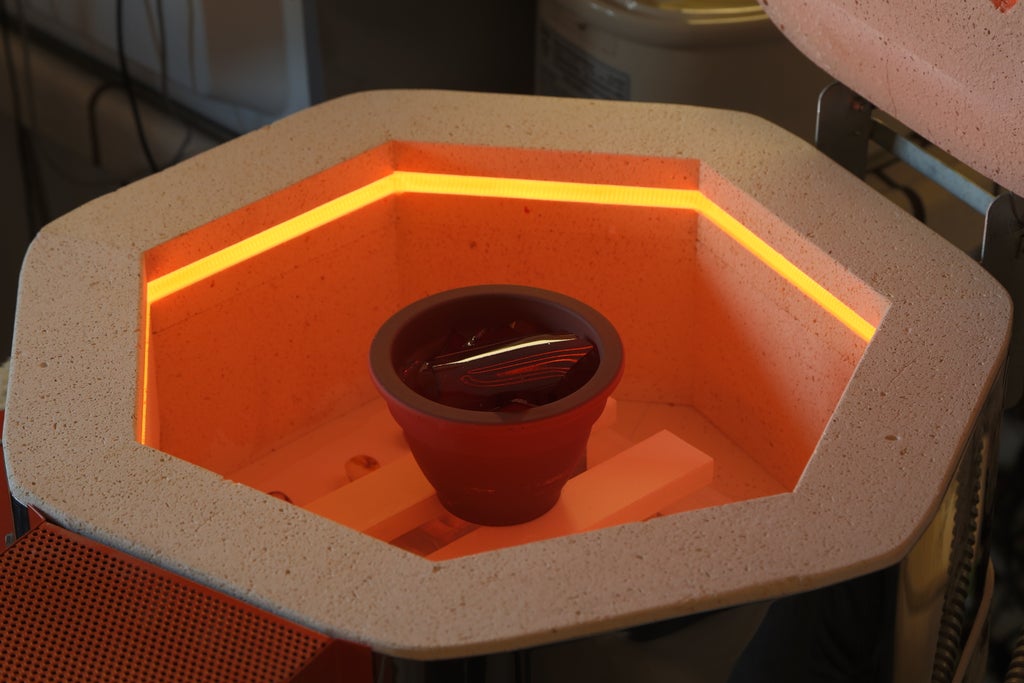
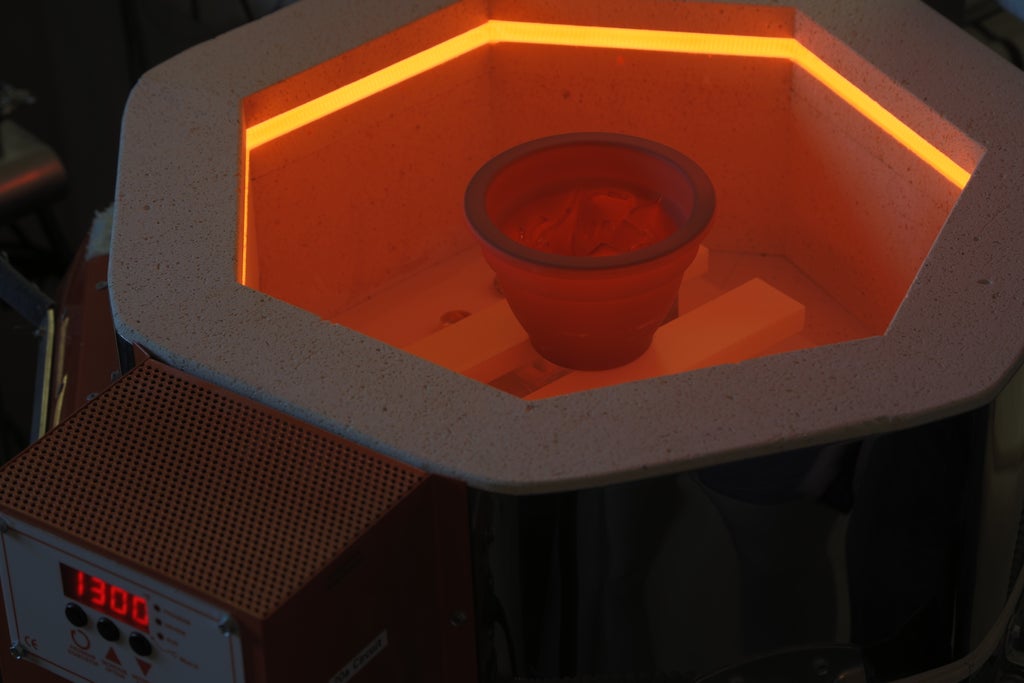

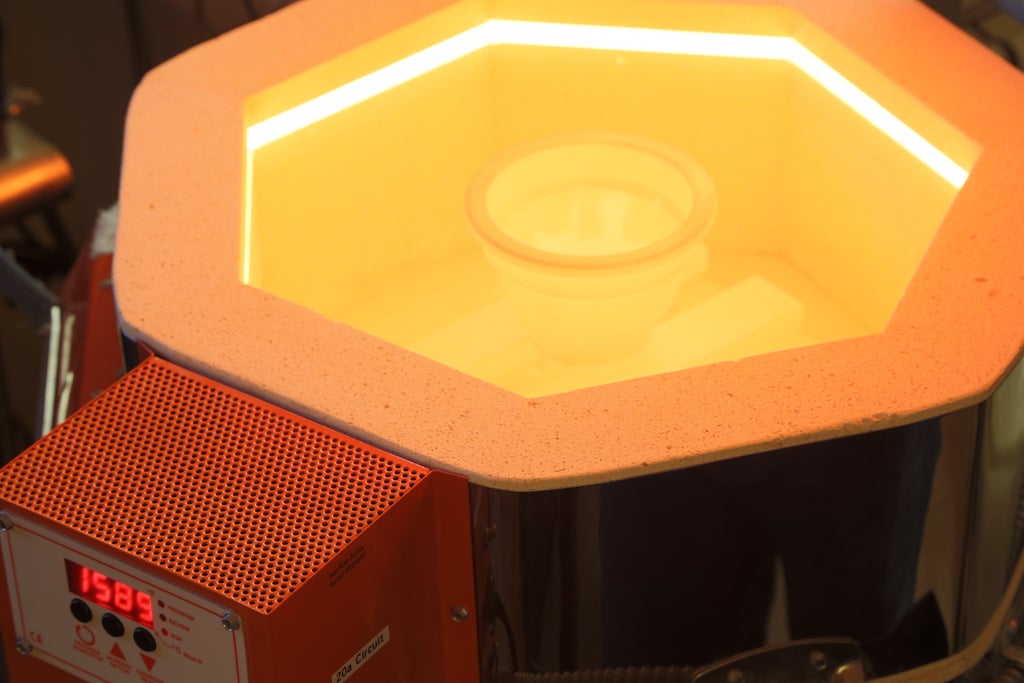
Now that's what I call a hot pot!
If there is not enough glass accumulated in the mold by the end of the 1600 degree hold cycle you will need to increase the time spent at this temperature. There will always be some glass remaining in the bottom of the pot so don't try to empty it all out.
Once you have programed your kiln (assuming you have a digital kiln controller) kick off the heating cycle, kick-up your feet and move on to the next step....
Step 22: Performing the Casting: Slowly Cooling the Casted Object

This is probably the most difficult part of the process. It is not so much a technical challenge (although this step is technical in nature) but more of a test of your patience. It may feel like forever before you bring the temperature down to where you can remove the piece from the kiln. Properly heating and cooling a casted glass object is essential to its stability. If not done properly the internal stresses of the glass will be locked in place as it cools making it very likely to fracture or explode.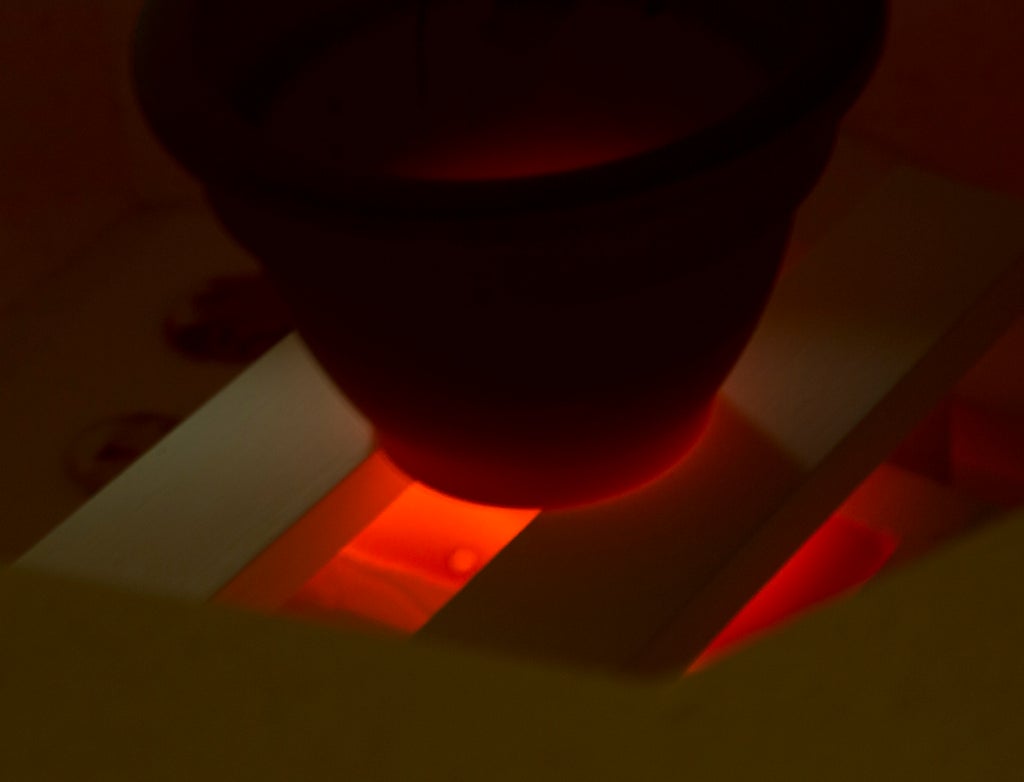
This is the molten glass after it had melted into the plaster casting mold. The photo was taken at around 1000 degrees (approaching the annealing temperature)
The process to properly cool a warm glass object is called annealing. It is a process by which you maintain a constant temperature of the glass object at a point where it is still soft enough to "adjust" the molecular alignment of the silica atoms into a state that minimizes internal stress. Once you drop below the annealing temperature the alignment of molecules becomes rigid and any stresses are locked in to the amorphous solid. Being an amorphous solid, glass does not have a clear state transition between solid and liquid states but rather changes in viscosity across temperatures. It is not a liquid in solid state as it is commonly thought of, and no, stained glass windows from ancient cathedrals are not flowing down from the force of gravity. The thickening of the glass that is observed is a result of the manufacturing process of glass from that era and an understanding that thicker glass on the bottom was more stable than thicker glass on the top.
Hopefully this long winded history/science lesson was able to lull you to sleep in order to pass the time until you can handle your "ridiculously.awesome" casted glass reproduction of your favorite movie prop.... Of course there is still one last step in the fabrication of this object. Flip the page for the final turn in this marathon....
Step 23: Stage 5: Finishing Touches
- Well, Let's See if This Worked...
- Assessing your Geekiness
- Extra Credit
Attachments
Step 24: Finishing Touches: Well, Let's See If This Worked...

Now we get to take a look at the surprise waiting for us inside. When the kiln and glass have COMPLETELY cooled you can open it up to begin the extraction process. This is how my setup looked after the big melt.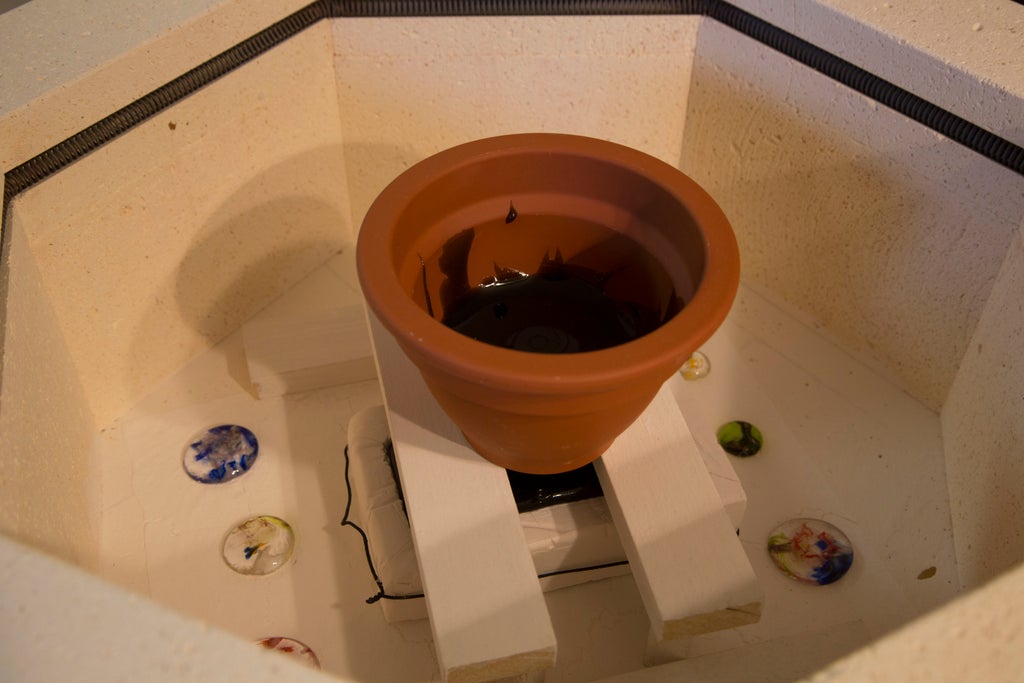
Carefully remove the glass object from your plaster mold. I recommend doing this over a plastic bag to contain the debris. Don't worry about salvaging the mold; rather focus on keeping your casted object in one piece. If the casted object does not easily release you must begin breaking apart the plaster mold into small pieces. I found it very easy to break apart the mold. This is the path that I took to free the carbonite me-Han sculpture from its plaster prison.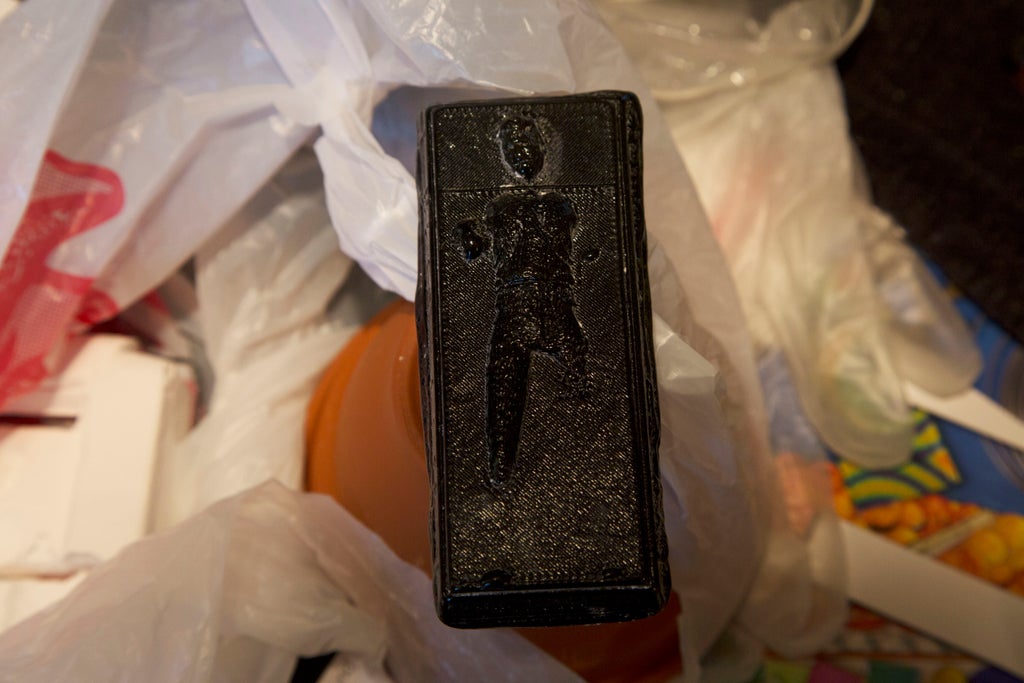
If you had a surplus of glass like me you will have a column of glass attaching your casted object to the terracotta crucible. I used my diamond emery board to saw through this column to detach the piece. You should do this under running water to flush down the tiny glass pieces into the drain. (Remember our old friend pneumonoultramicroscopicsilicovolcanoconiosis? You don't want microscopic pieces of glass floating freely through the air....)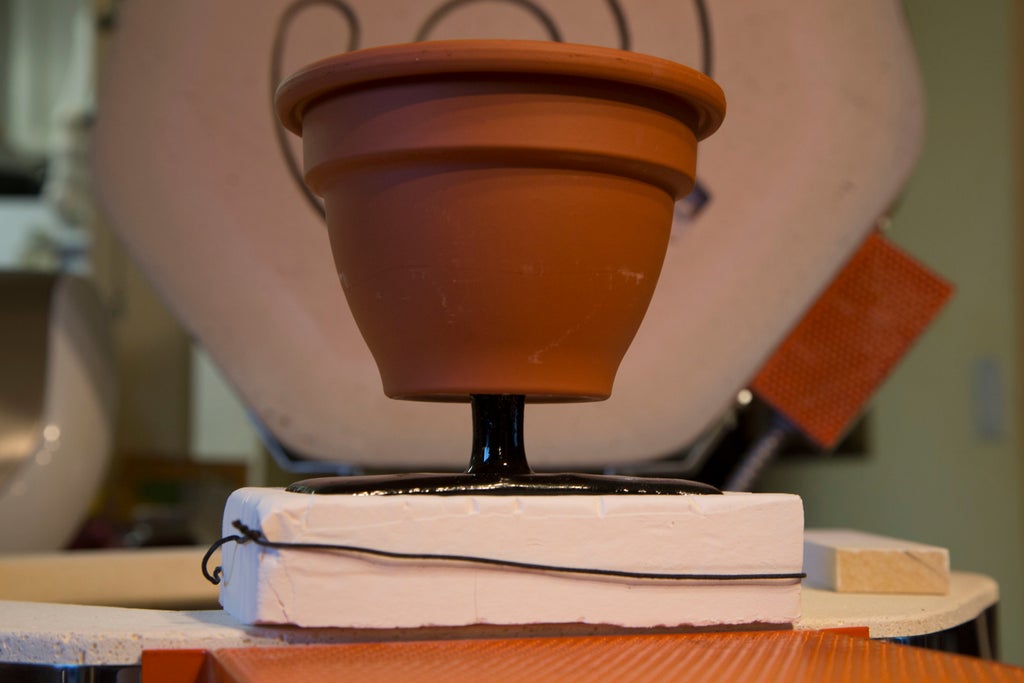
There may be some additional pieces of glass attached to the object if your casting mold was not free of air pockets. If this is the case you can use the diamond emery board (again under running water) to smooth out these parts. If you are looking for a glossy finish on the surface where you removed these pieces you'll have to get access to a cold working studio and polish out the texture, but this is for another instructable.
Finally, using a soft bristle brush, soap and water clean up the remaining plaster around the detailed pieces of your object.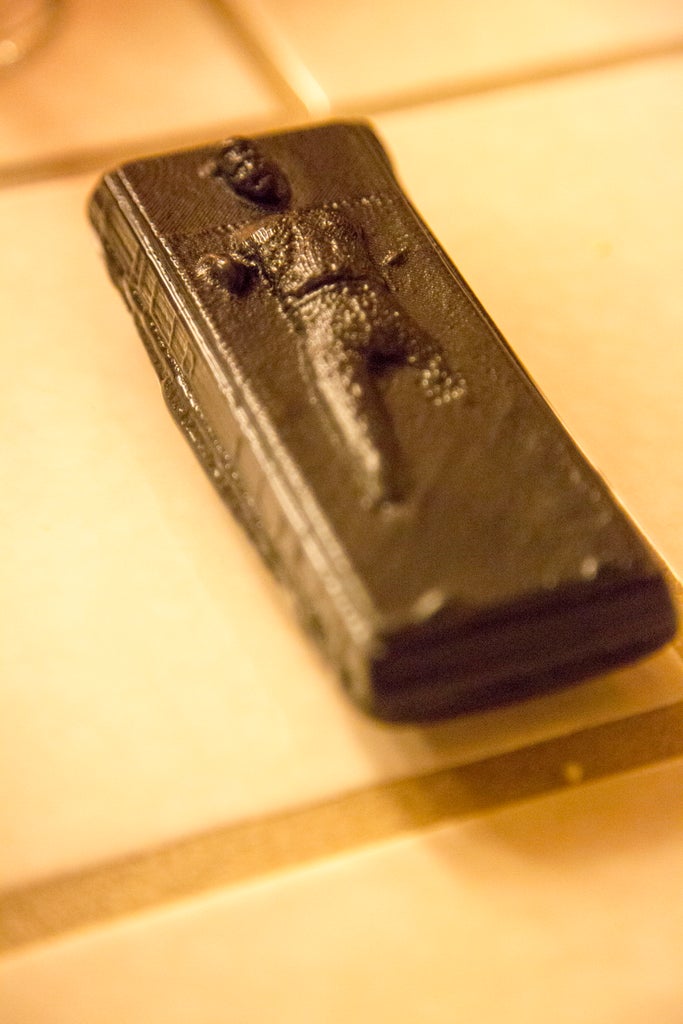
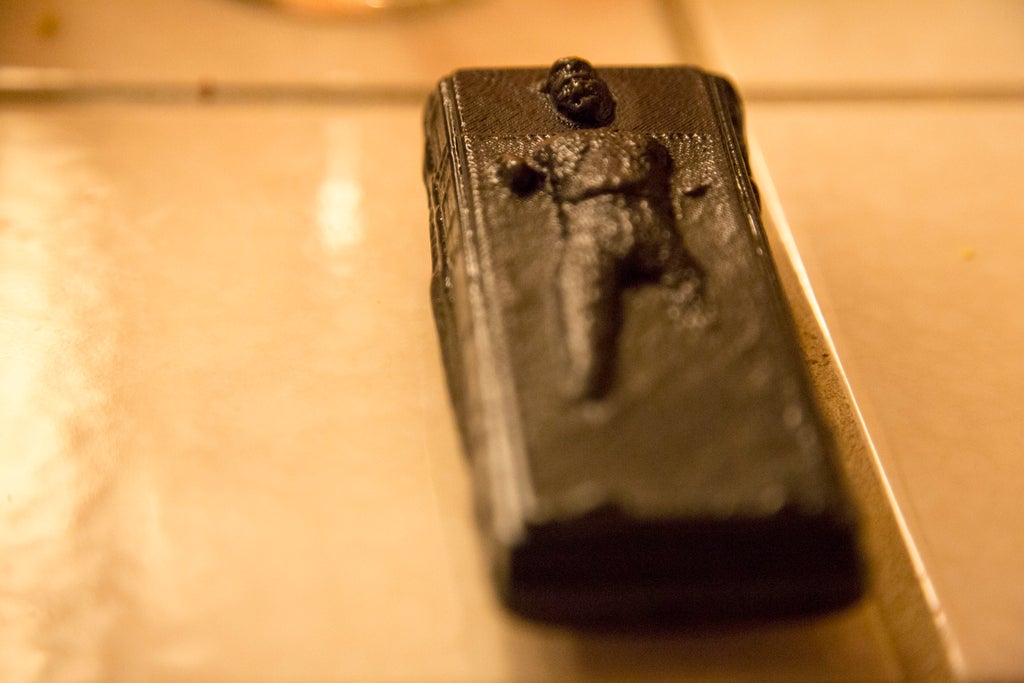
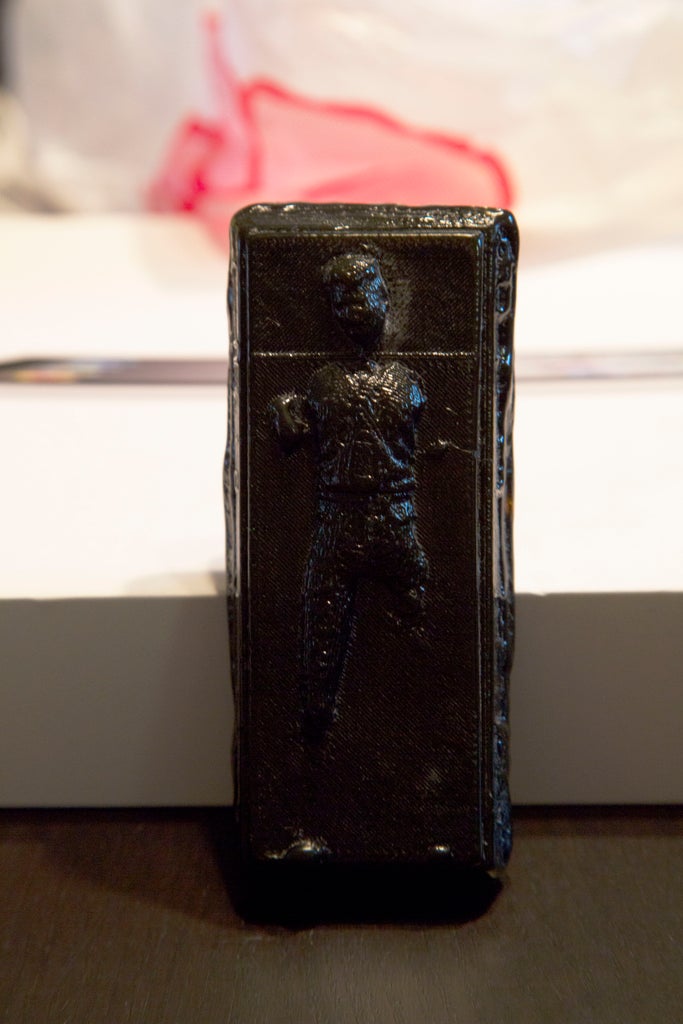
Congratulations! Hopefully you completed this project with a "ridiculously.awesome" casted glass reproduction of your favorite movie prop. If you are extra-super geeky (and took on the GP challenges) it will also look a little bit like you! I'm very happy with the way mine turned out (with one exception) and have plans to reproduce other artifacts in the future. Looking closely you will see that the hands did not come out well. This is most likely due to the visucosity of the glass being too high at 1600 degrees and a slightly higher temperature may help to address this. Also, the pockets of air where the hands were could be more easily released if a small hole were drilled through from the backside. I will experiment further with these techniques moving forward. If you followed this instructable and made your own glass reproduction please post a link to some pictures in the comments section.
Step 25: Finishing Touches: Assessing Your GQ (Geek Quotient)

0-5 Geek Points:
Brittany Spears |  |
There is no pride in achieving this title, only shame. Take your Mickey Mouseketeer self to a remedial school for science and engineering because you have a lot of work to do. |
5-10 Geek Points
Mathew Mcconaughey |  |
Don’t kid yourself. This is only marginally better than Brittany. If you’ve earned this score than at least you are not at the bottom of the barrel—and you probably have more than a few lady friends too. |
10-20 Geek Points Mathew LeBlanc |  | Now we are just starting to acquire some shade of geekness. Although Mathew LeBlanc played it cool on Friends, there was always a suggestion of a suppressed geek deep inside unable to surface. |
20-40 Geek Points Mathew Perry |  | This is the middle of the road my friend. You are neither geek, nor cool. Be happy in the knowledge that the longevity of your career will in all likelihood exceed that of your less geeky peers. |
40-80 Geek Points Rowan Atkinson |  | The Black Adder. The first true geek within the spectrum. There is no shame in alignment with the stature of this pioneering geek. Congratulations sir/madam you have arrived on the proper side of the tracks. |
80-160 Geek Points Steven Hawking |  | I’m in awe if you have landed in proximity to the most famous Simpsons character within the sphere of geekdom. Hats off to you—you have obtained a rare honor. |
160-x (lim x→∞) Geek Points Albert Einstein |  | We are not worthy. |
All of the GPC answer (or additional related information) are summarized below.
GPC: 0.A
Points for passing: 1
You got the points for this challenge simply by reading it. How lame is that?
GPC: 0.B
Points for passing: 10
If you figured out that you were in an infinite loop before completing three iterations you win the points. If understand the previous sentence you truly earned those points.
GPC: 0.C
Points for passing: 3.14159
This photo-chop was based on the old NES classic Solomon's Key. This game was one of the first puzzle games that not only tested your hand-eye coordination but also you memory and ability to solve complex problems.
GPC: 1.A
Points for passing: 5 or 100
If you chose to integrate yourself into the 3D model you earn the 5 points. If you create your own camera rig like shown in the pictures then you, sir/madam, are truly "ridiculously.awesome" and earned 100 GPCs.
GPC: 1.B
Points for passing: 2
Yeah, all you have to have done is gotten to this point and read the challenge to earn 2 points. Good for you!
GPC: 1.C
Points for passing: 2 or 15
My skills at weaving the poetic yarn may suck, but that's the beauty of a Haiku. Even a spiritually dead robot can construct this lyrical prose and claim to have inspired creativity within the crucible of their burning soul. In truth what often results is something that only a loving mother could feign appreciation for. If you knew the term for this form of poetry you earn two points. If you actually created something and posted, cheers fellow droid, you've earned 15 quid (or GPCs as we call them in The States.)
GPC: 1.D
Points for passing: 5 or 15
This challenge provides 5 extra GPs for adding additional geometry to your model (not including any model of yourself that you chose to integrate.) The real points come from knowing what an Ionian pillar is. This pillar was of course "...originally designed by the Ionians of ancient Greece, are considered the most feminine type of pillar. They traditionally see a lot of indoor use or appear on small buildings because of their slender shaft and decorative capital. The capital features two volutes (spiral shapes that resemble scrolls) on either side of the shaft. The Coliseum and the Temple of Fortuna Virilis--two famous Roman landmarks--both feature Ionic pillars." (thanks Mr. Internet--wikipedia.org)
GPC: 1.E
Points for passing: 10 or -15
This challenge gives you some points for just hanging in there if you decided to include some captured geometry of yourself in the final glass casting. If, however, you started and then changed your mind you LOSE 15 points. That’ll teach you a lesson to always finish what you start. Humph!
GPC: 2.A
Points for passing: 5
This is a simple challenge to make your mother mold out of glow-in-the-dark filament. It’s another lame challenge, but otherwise stage 2 wouldn’t have any GPCs. Without it, stage 2 would feel like one of those dreams where you are naked in public. You know the ones that usually take place in school….
GPC: 3.A
Points for passing: 25
This is the lost wax challenge—one that I did not take up for my project. It is up to you to research this method and experiment so that you can report back on what worked and what didn’t. From what I understand about lost wax casting it has much fewer successful outcomes than failures. Wine bottles are cheap, but my time is precious, so let me know how it goes….
GPC: 3.B
Points for passing: 15, 30 or 45
This is a challenge to use the longest word ever published in an English dictionary in an everyday conversation. If you take this one on, record it and post it to YouTube to inspire the next Internet meme.
GPC: 3.C
Points for passing: too complicated to summarize
This is a trivia challenge to test your arcane knowledge of many things geeky. The answers are as follows:
1.The name of the hand drawn character is Daxter.
2.His partner goes by the name of "Jak"
3.This is the Nebuchadnezzar, the ship from The Matrix.
4.This scene is from Hot Tub Time Machine. If you haven't seen it you should.
5.This, again, is known as a Nebuchadnezzar
Step 26: Finishing Touches: Extra Credit

This is a fun little bonus GPC I call "Spot the Differences". It is basically my way of showing you, the reader, how much time I spent on each of the illustrations in this instructable while providing a little fun to the reader. So here's the challenge: review each of the illustrations in the previous steps of this instructable and identify the number of elements that have been modified and/or added for each one. Once you have done this return to this page and compare your answers to the actual numbers listed below. You have to scroll down to see the correct answers (in order to hide them from you while you do the work.) So once you are done, come back here, scroll down, and check your answers.
- You will earn two GPs for each modification you correctly identify
- Subtract one GP for each modification you fail to identify
- Subtract one GP for each modification you incorrectly identify
- You will earn one extra GP for each phrase "ridiculously.awesome" you find hidden in the image
Intro:
This one is kind of obvious. I added the text, created a look of depth and added a reflection to the top of the letters. You get two points for figuring this one out--genius.
Total elements: 1 modification (1 "ridiculously.awesome")
Step 1:
Ah, one of my favorites--the chicken-chop. This illustration takes the labeled anatomy of the chicken and substitutes the proper names for the different stages of this instructable. It all culminates in the output of a "ridiculously.awesome" egg in the end.
Total elements: 7 modifications (1 "ridiculously.awesome")
Step 2:
Until now, the truth about Celine Dion's rise to success was buried in the dark bowels of the Internet. Of course, without her domin-earrings her road to success would not have been as rapid.
Total elements: 3 modifications. (1 "ridiculously.awesome" and, yes the background counts.)
Step 3:
This medieval looking device is exactly that. It was used during the inquisition to encourage the user to reveal the truth of their own heretical nature. It looked a bit like Domo to me and thus the nom nom nom inlay. Then of course there is the obligatory "ridiculously.awesome" inlay too.
Total elements: 2 modifications (1 "ridiculously.awesome")
Step 3:
Not much to say here; just one modification and two GPs to earn.
Total elements: 1 modification (1 "ridiculously.awesome")
Step 3:
This is one of the more subtle ones, but the original picture sure is gruesome.
Total elements: 1 modification (1 "ridiculously.awesome")

Step 3:
This one took a little more time to finish up than the previous ones. After combining the three basic images there was a bit more photo-chopping in store. It's the subtle details that make the difference.
Total elements: 3 plus additional modifications (1 "ridiculously.awesome")
Step 5:
This was one of the more complicated chops. It required the application of geometric transforms to all of the tattoos on the model's body. The Instructables logo required two spherical distortions, one for each buttock (but I'll consider them to be one modification.)
Total elements: 4 elements and 5 modifications (2 "ridiculously.awesome"s)
Step 6:
Very funny, ha ha ha. Key frames--get it? Anyhow, besides rotating the frame a bit and adding some shadows beneath it there is also a "ridiculously.awesome" signature at the bottom of the frame.
Total elements: 3 elements and 2 modifications (1 "ridiculously.awesome")

Step 7:
I've always loved the imagery of the Japanese tsunami art. This was my chance to include it in the set of photo-chops. You can see the 123D dinosaur looking up towards the cresting wave in shock and awe as well as the oblivious Instructables robot thinking the sailors are bowing before his might....
Total elements: 4 elements (1 "ridiculously.awesome")
Step 7:
This is my homage to how "ridiculously.awesome" the 123D service is. I made a collage of things that I find comparably awesome such as Super Mario Brothers, Meteors, Photon Torpedos, The Enterprise and the classic NES game "Blaster Master".
Total elements: 5 elements
Step 8:
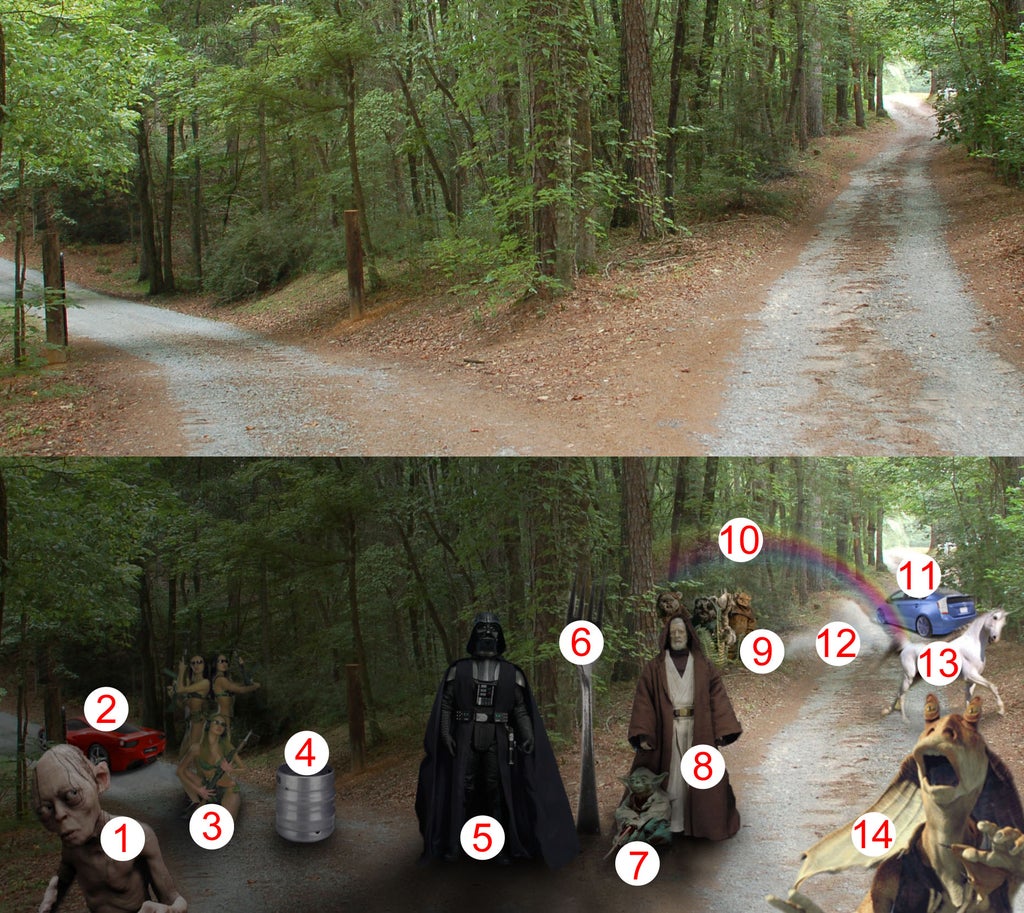
Here we have a representation of the choice between the Light Side (facing the unexpected challenges we encounter and proceeding with the original intent) and the Dark Side (being a lazy, spoiled brat who quits at the first sign of trouble.) The fork in the road image scavenged from the Internet had the following Dark Side and Light Side components added:
- Smeagol (who needs no introduction)
- A cherry red Ferrari
- Girls with guns
- A big keg o' beer
- Mr. Darth V. himself
- A literal fork in the road
- Yo Duh
- Old Ben Can o' Beans
- The "ridiculously.awesome" Ewoks
- A rainbow sprouting from a unicorn's posterior
- A Toyota Pious
- A cloud sprouting from a unicorn's posterior
- A unicorn
- Jar Jar Binks (which if the legend is accurate also sprouted for a unicorn's posterior)
Total elements: 14 elements and 1 modification
Step 9:
This one has 3 main elements to it. Mr. Clean was imported and colorized, the crown was tilted and placed up on his head, and the phrase was changed to "Keep Calm and Clean Up". In case you were wondering where the heck the original design came from I learned of the source recently. The poster was produced during WWII by the British government as a slogan aimed at keeping moral high during the Nazi bombing raids over the country. It was discovered in storage a decade ago and was framed in a small book store. The poster grew in popularity and became the ubiquitous mystery (not any more) that it is today.
Total elements: 3 elements and 2 modifications
Step 10:
Frankensolo the monster was transformed from the man Han Solo into something more frightening than an inebriated jawa. The bride of Frankenstein looks on in horror....
Total elements: 3 elements
Step 12:
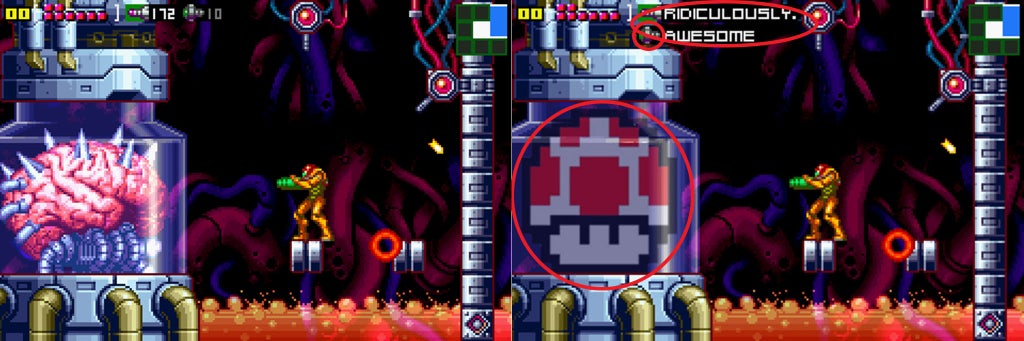
Ah, Super Metroid; another classic game, this time on the SNES. This chop only had a few modifications, but getting the transparency on the mushroom just right took some sleight of hand. The bomb icon was shifted around and of course "ridiculously.awesome" replaced the quantity of bombs and missiles normally present.
Total elements: 3 elements (1 "ridiculously.awesome")
Step 13:
How can you have a "ridiculously.awesome" instructable without a big red button? You can't, and that's why it's here.
Total elements: 1 modification (1 "ridiculously.awesome")
Step 14:
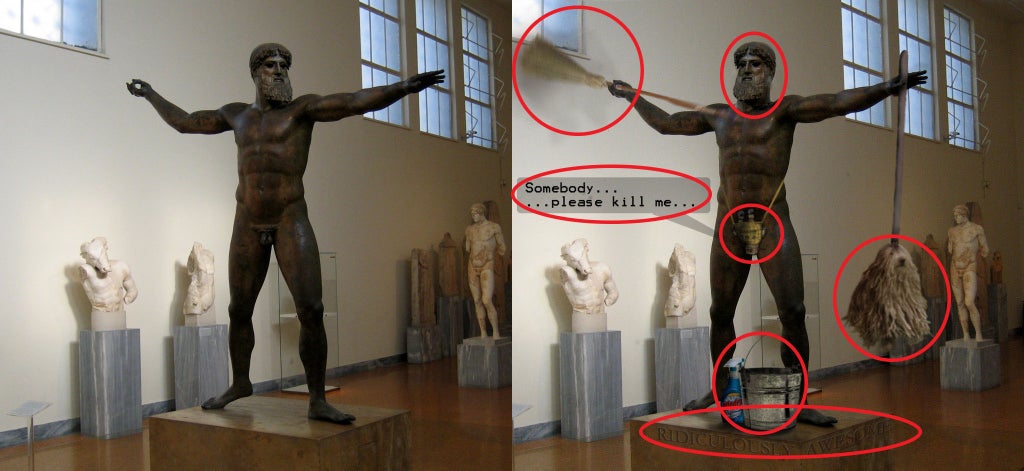
Cleanliness is Godliness, right? Well that's what this chop attempted to convey. Here we have an ancient statue of the Greek god Zeus. He lost his lightning bolt many eons ago and has recently taken up cleaning to fill the void in his omnipresent soul. Some Windex and a bucket were added in addition to a mop (which upon closer inspection is actually a dog) and Zeus is steadily cleaning the cobwebs from the window. I also rotated his head to make him appear more engaged with his activity. The Instructables robot is acting as a cod-piece to cover the exposed nasty bits. Finally a "ridiculously.awesome" relief was added to the base of the statue.
Total elements: 6 elements and 1 modification (1 "ridiculously.awesome")
Step 16:
The theme here was "making a good impression". It includes elements of both this and the artistic style of impressionism.
Total elements: 8 elements (1 "ridiculously.awesome")

Step 17:
This film heralds the apex of geeky entertainment. Since this illustration represents the process of making plaster it seemed appropriate as a base for the photo-chop. Additions include Daxter from the PlayStation series bearing his name and a bottle of Jack, since his buddy wasn't present. There is a chubby champagne connoisseur in the back ground holding a Nebuchadnezzar of bubbly and the ship bearing the same name from The Matrix trilogy. There was also some background added from The Matrix computer screens to make it a little more obvious. Beyond that there was significant blurring to create a sense of depth.
Total elements: 5 elements and 2 modifications
Step 18:
For curing the plaster it seemed appropriate to have this "original" goth classic for the basis. Both Chewy and Leia were added to the background in poses that reflected the cool appearances of the era. Then of course, Robert Smith's mug was replaced by that of an elderly Han Solo. It came out kinda creepy.... There is also, of course the "ridiculously.awesome remix" addition too.
Total elements: 4 elements (1 "ridiculously.awesome")
Step 20:
This is a classic photo representing the step that requires one to break a wine bottle for casting material. Lena Horne (a hottie from way back) is seen christening that bow of the S.S. "RIDICULOUSLY.AWESOME". The Instructables robot can be seen watching in reverence from afar.
Total elements: 2 elements (1 "ridiculously.awesome")
Step 21:
This was probably the most complicated photo-chop to cook up. It is a melange of the final scene from the "Lord of the Rings" trilogy where they narrowly escape the molten lava of Mt. Doom. Here our hero Han has been transported into the scene as well as the Instructables robot. Closer inspection reveals that not only does the Instructables robot have the same hands as C3P0 but that in this alternate, alternate reality he made off with the One Ring. Much closer inspection of the closer inspection reveals that the ring is inscribed with the name "ridiculously.awesome".... Lots of color work was needed to get the elements working together.
Total elements: 6 elements (1 "ridiculously.awesome")
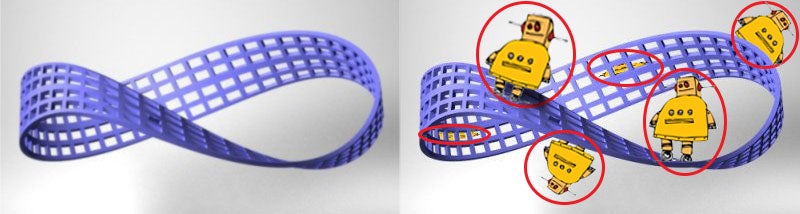
Step 22:
A simple homage to the infinitely long voyage of M.C. Escher's ants along the single face of the mobius strip. This may be how you feel as you are waiting for your sculpture to anneal. Six modified robot's and some simple shading complete the chop.
Total elements: 6 elements
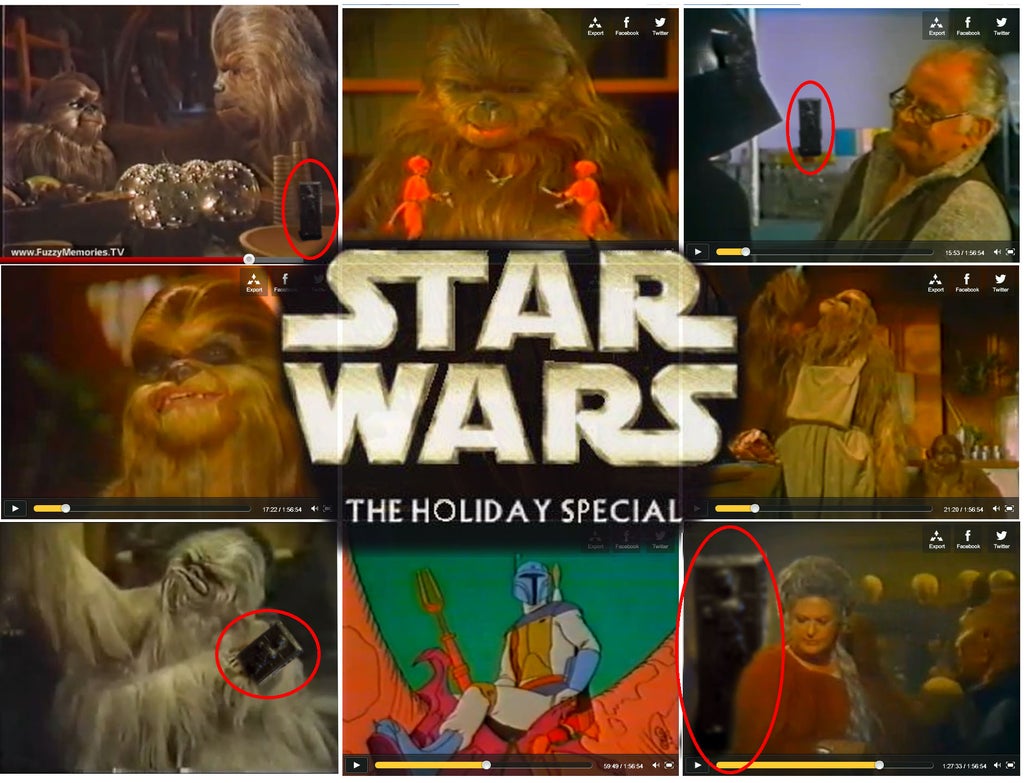
Step 24:
If you have never heard of the Star Wars Holiday Special you should consider yourself blessed. This was the low point for the carreer of George Lucas--and yes I have seen the new Indiana Jones movie. The first time I watched this it blew my mind. I think this made-for-TV-special was singularly responsible for launching the war on drugs. Upon close inspection you will find four instances of my finished glass object. And yes, that is Bea Arthur--perhaps C3P0 was the Golden Girl's love child.
Total elements: 9 elements and 4 modifications
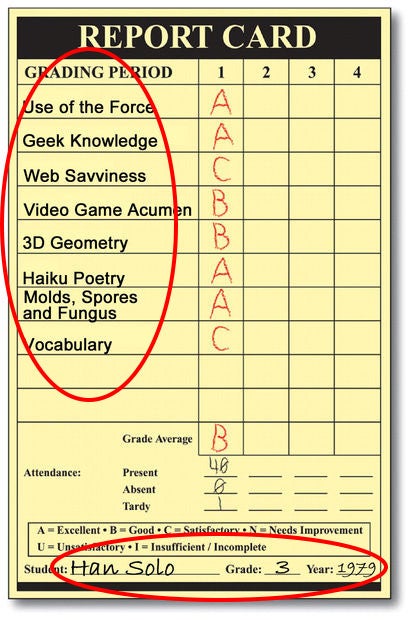
Step 25:
Here is your final report card describing your geek aptitude. It contains all the subjects you were quized on during the Geek Point Challenges.
Total elements: 2 elements
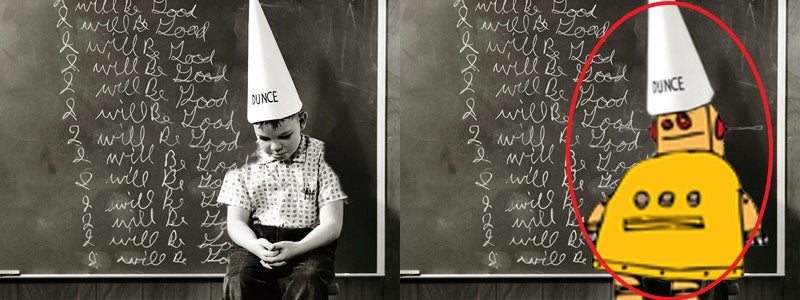
Step 26:
This final photo-chop represents the last chance for the torpid robot to earn a respectable rank from the Geek Point Challenges. Some minor blurring was added to the dunce cap to seamlessly integrate it with the Instructa-bot.
Total elements: 1 element and 1 modification
Step 27: Epilogue

Great job! You're almost done! Scroll down and follow each step.
1) Touch your toes
.
.
.
.
.
.
.
.
.
.
.
.
.
.
.
.
.
.
.
.
2) Clap your hands
.
.
.
.
.
.
.
.
.
.
.
.
.
.
.
.
.
.
.
.
3) Jump up and down
.
.
.
.
.
.
.
.
.
.
.
.
.
.
.
.
.
.
.
.
4) Pat yourself on the back
.
.
.
.
.
.
.
.
.
.
.
.
.
.
.
.
.
.
.
.
5) Click on THIS_LINK

Participated in the
Halloween Props Contest

Participated in the
Hurricane Lasers Contest


