Hello all,
Contrary to what I said before here is an update anyway.
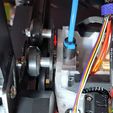
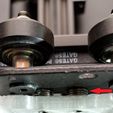
According to some, the CR-Touch is too low, namely under the nozzle.
I removed 2mm on the underside where the CR-Touch attaches.
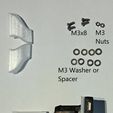
Furthermore, some spacer plates that can be used to generate more distance for the CR-Touch or to use them above it as extra strength.
There will be sone a Minimus for the Ender 3 V2 NEO from Rogue Paul 🖖.
Because of that there will be no continguing of my mod.
The new backplate that Rogue Paul made for the CR-Touch and the Sonic-Pad Sensor is better.
It is about the following:
1. I use the original Minimus Hotend Cooler System developed by Rogue Paul 🖖.
2. When I modified this version for the NEO, Rogue Paul's model was free, if you followed the rules it was no problem to share those modified versions for free as well.
3. Something has changed.
Rogue Paul 🖖 decided at the beginning of May to ask for a small fee again, namely € 2.29.
I can well understand why he did this, it takes a lot of time to develop new designs.
New updates and additions to the Minimus Hotend Cooler System range were and are still being made regularly.
There is even a small chance of a NEO version by Rogue Paul.
Why are there no more updates from me?
I use those new, "paid" files, I also want to comply with the rules that have been set.
If you would like to contribute please do so by downloading the files for € 2.29 on the original page of the Minimus Hotend Cooler System https://cults3d.com/en/3d-model/tool/minimus-hotend-cooler-system.
Or download the Armadillo Flex EZR from https://cults3d.com/en/3d-model/tool/armadillo-flex-wire-conduit for $2.19.
I have put a new video on YouTube in which you can see the airflow on water even better, and at the end you can see a modified backplate. https://youtu.be/yltX7SQ-I8I
Since the beginning of February I have an Ender 3 V2 NEO.
To get to know the preparations and the 3D printing itself better, it is best to find out and make things yourself.
If you can immediately make your own printer look slicker, that's a bonus.
I used Tinkercad to modify, experiment and learn from created stl files.
One of the designs that did appeal to me is that of Rogue Paul 🖖.
Minimus Cooler System
First read what Rogue Paul wrote with his Minimus Hotend Cooler System from which I derived it.
https://cults3d.com/en/3d-model/tool/minimus-hotend-cooler-system#comments
I changed it and now have a modified model on my Ender 3 V2 NEO.
Below is a summary of the parts and what I did.
A warning. You get no warranty on what you print based on my adjustments.
There are too many dependencies.
Type of material you print with, the setting of your printer, you can probably name a few yourself.
I have a lot of prototypes in a box that didn't make it.
The Shroud and the Backplate can run rough then you will have to be creative with a Dremel, file or sandpaper.
Of course working adjustments, by anyone, are welcome.
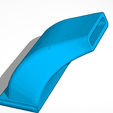
Minimus Cooler System Shroud Dual wide Ender 3 V2 NEO
This is a Tinkerd pard of the "Minimus Cooler System" from Rogue Paul 🖖
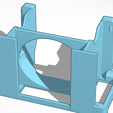
It is the part that holds the fans the "Minimus Shroud".
The base is a Minimus Dual 4010.
The colingblock for the NEO's is different od shape.
I wident the standard shroud of the 4010 Minimus Dual 7mm.
It fits on the Ender 3 V2 NEO and maybe the other NEO printers.
Minimus Cooler System Backplate Ender 3 V2 NEO CR-Touch&G.Sensor
This is a Tinkerd pard of the "Minimus Cooler System" from Rogue Paul 🖖
The colingblock for the NEO's is different od shape. I widen the standard backplate.
It fits on the Ender 3 V2 NEO and maybe the other NEO printers.
I also put a holder for the G-Sensor in front of the CR-touch.
Attention!! Place 3 to 4 spacers behind the backplate.
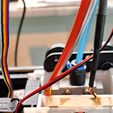
LOOK AT THE PICTURES!!!!
Move Manually to the left to test if you hear the click and don't hit the X-axis housing.
Minimus Cooler System Fan 40x40 cover
This is a Tinkerd pard of the "Minimus Cooler System" from Rogue Paul 🖖
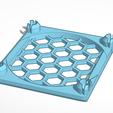
It is the modified Cooler System Fan cover 40x40.
I removed a bit left and right to fit in between the front of the shroud. So its fits on the NOCTUA NF-A4x10 FLX, 40 x 40 x 10 mm, 12 V, 17.9 dB,4500 RPM, 8.2 m3/h
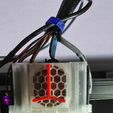
Minimus Cooler System NEO SIGN
Made with Thinkercad.
Printed in PLA Red
Glued on the cover.
Minimus Cooler System Duc Right Ender 3 V2 NEO
This is a Tinkerd pard of the adaptation by LouPea
https://www.printables.com/model/419653-ender-3-neo-v2-neo-max-neo-hotend-duct/files
From the "Minimus Cooler System" from Rogue Paul 🖖
https://cults3d.com/en/3d-model/tool/minimus-hotend-cooler-system
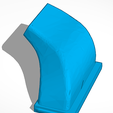
I used the part from LouPea because it fits, I removed a bit from the end.
Minimus Cooler System Duc Left Ender 3 V2 NEO
This is a Tinkerd pard of the adaptation by LouPea
https://www.printables.com/model/419653-ender-3-neo-v2-neo-max-neo-hotend-duct/files
from the "Minimus Cooler System" from Rogue Paul 🖖
https://cults3d.com/en/3d-model/tool/minimus-hotend-cooler-system
I used the right duct from LouPea and made a mirror so it fits.
I printed all the parts with PETG transparent, one exception is the NEO sign is PLA red
https://www.youtube.com/watch?v=KgtFKLF7yQA

