Skip to content

Carbon Filter Hack for any Levoit 300 HEPA Filter Machine

Advertising
Advertising
?
Creation quality: 5.0/5 (1 vote)
Evaluation of members on the printability, utility, level of detail, etc.

  • 2.8k views
  • 3 likes
  • 17 downloads
  • 3 comments

License
3D design format
STL Folder details Close
  • CarbonFilter_Cage.STL.STL
  • CarbonFilter_Funnel.STL
  • CarbonFilter_Top.STL.STL

Learn more about the formats

Publication date 2023-03-19 at 18:13
Design number 1123475

3D printer file info

3D model description

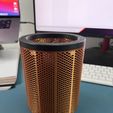
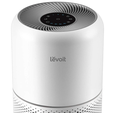
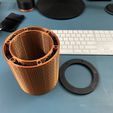
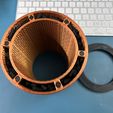
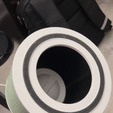
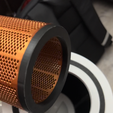
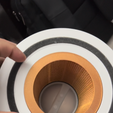
If you have the popular HEPA filter machine from Levoit, the Core 300 as they call it. You can hack your machine with a slight modification. I designed a center core that can take activated carbon pellets as well as a funnel to help guide the carbon pellets into the carbon pellet cage.

The HEPA filters it comes with or the replacement ones do have a carbon media that the air passes through, but given that the 3D Printing area is a confined space, I wanted to be extra certain that I was trapping and filtering out any type of VOC (volatile organic compounds) for my own good.

There are not very many air filtration machines out there that have emphasis on cleaning the air with respect to 3D Printing. VOC's are NOT good for your health and should be taken with a reasonable level of caution. The air filter machines in the marketplace that do have any sort of 3D Printing application or consideration are terribly expensive. Which is why I wanted to modify my Levoit Core 300 HEPA Air Filter Machine to take these carbon pellets to better my filtration capabilities.

Also, I have another one of these in my kitchen/dining area. Awesome way to filter any smells during or post cooking to keep the house smelling fresh!

This modification will simply insert right into the factory air filter with no extra help. Air is forced through the carbon pellets and no extra sound is produced.

Steps:

  1. Print Carbon Filter Cage
  2. Print Carbon Filter Top
  3. Print Carbon Filter Funnel
  4. Add a small dab of Super Glue to each hole for the magnets
  5. Make certain your magnets are in the correct orientation for polarity
  6. Insert Magnets
  7. Allow to dry 2-4 hours
  8. Insert Carbon Pellets with the aid of your funnel
  9. Clip the Lid on
  10. Insert into your air filter machine and Enjoy!

......... I hope this helps and Happy 3D Printing!

3D printing settings

  • PLA
  • 6x3MM Small Refrigerator Magnets
  • Generic Temperature Settings
  • Be very sure you have good retraction settings. With all the small holes, you will need a dialed machine that can do retractions well and accurately
Advertising


Issue with this design? Report a problem.

Would you like to support Cults?

You like Cults and you want to help us continue the adventure independently? Please note that we are a small team of 3 people, therefore it is very simple to support us to maintain the activity and create future developments. Here are 4 solutions accessible to all:

  • ADVERTISING: Disable your banner blocker (AdBlock, …) and click on our banner ads.

  • AFFILIATION: Make your purchases online by clicking on our affiliate links here Amazon.

  • DONATE: If you want, you can make a donation via Ko-Fi πŸ’œ.

  • WORD OF MOUTH: Invite your friends to come, discover the platform and the magnificent 3D files shared by the community!


Sharing and downloading on Cults3D guarantees that designs remain in makers community hands! And not in the hands of the 3D printing or software giants who own the competing platforms and exploit the designs for their own commercial interests.

Cults3D is an independent, self-financed site that is not accountable to any investor or brand. Almost all of the site's revenues are paid back to the platform's makers. The content published on the site serves only the interests of its authors and not those of 3D printer brands who also wish to control the 3D modeling market.

100% secure payment by credit card, PayPal, Apple Pay, Google Pay, etc.
View all payment options.