

Introduction: Revolutionary Toothpaste Roller


You know how much you love to make your toothpaste tube last as long as possible? Well, sometimes that is hard to do when there is just a tiny bit of paste left. Generally , you go about fixing this by trying to roll up your tube of paste as tightly as possible, thus squeezing out the remainder of the toothpaste. This can partially work, but you really aren't getting your money's worth. Also this can lead to sore fingers and even CARPAL TUNNEL!!!!!!!!jk. What if there were some kind of pain- free way to deal with this money- loss situation? Well, here, I give you THE TOOTHPASTE ROLLOMATIC 50000PSDFOGJS[PDIVHN;CKNV;SDKNFVOEU!!!!!!!!!
Questions for the Make- to- Learn Contest:
What did you make?
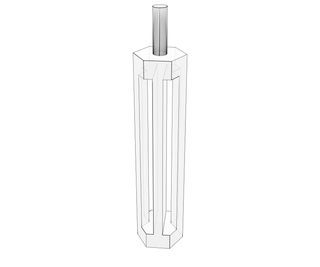
I made a small 3D extruded toothpaste tube roller that will help to squeeze those last drops of paste of of your container.
How did you make it?
To make this I created a model of it in SolidWorks (Such a terrible program. I would much prefer Autodesk Inventor but sadly cannot afford it!)
Where did you make it?
I worked on this project in the 3D Rapid Prototyping lab of my school.
What did you learn?
I learned that some times it is hard to come up with innovative and creative ideas but eventually a imaginative person will pull something out of the magic hat that works.
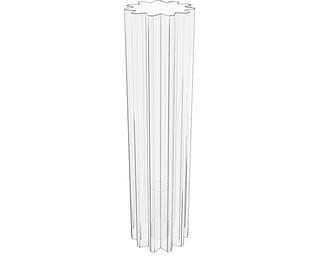
Step 1: Modeling the Part


I used the horrible program of SolidWorks to make this part. It was really hard and unhelpful because it is a terrible program. I first made it and then I printed it out on a old crappy Makerbot. I have included pictures of the dimensions and such but I will also include a file download for this step.
Step 2: Printing the Part

Next I loaded the program onto the ReplicatorG program for the Makerbot. I made sure to center it and put it on the platform. You can do this by going to the move tab and clicking center and put on platform.Next I made sure that the part was on the flat hexagonal end
with no hole or peg. This will allow it to print without problems. The image below is not my part, it is just an example of what ReplicatorG looks like.
Step 3: Assembling the Part
First, take the part with the two slots and look at the peg. Then take the other part (the handle) and examine the hole. Put a little bit of blue into the hole. The put some glue all over the peg. Insert the peg into the hole. Allow time to dry.
Step 4: Using the Roller
First you need to know that by using this product you are becoming part of a massive revolution of money-saving, hard-working, independent people. Now the steps:
1. Insert the wide and flat end of the toothpaste tube into one of the two slots.
2. Once the tube is on the other side, bend it over the center bar and insert it into the other slot.
3. Once that is done, begin rolling tightly. Make sure that you experience no muscle pain or over-exertion (just kidding).
4. Squeeze out your toothpaste and save a load of money. (possibly into the range of the millions)
Step 5: Why I Should Win an Up! Printer

I don't deserve an Up! 3D printer, but the people who helped me get to my level of skill and devotion do. If I were to win an Up! 3D printer, I would donate it to my awesome 3D Rapid Prototyping teacher, Mr. Chirinian. He is still stuck with our schools low budget, and can't get a nice printer. We are left with nothing but a low resolution Makerbot Printer that breaks basically every other day. If I were blessed with an Up! printer, it would not benefit one person, but many who need it to be successful.

Participated in the
Make-to-Learn Youth Contest

Participated in the
UP! Contest


