Skip to content

mouseFPV FPVCycle Incisor Prototype 5 Accessories

Advertising
?
Creation quality: 0.0/5 (0 votes)
Evaluation of members on the printability, utility, level of detail, etc.

  • 444 views
  • 2 downloads

License
3D design format
Folder details Close
  • FPVCycle_Prototype_5_Ultralight_toesies.stl
  • Ghost_Atto_FPVCycle_Prototype.stl
  • Hero_9_10_30Deg_FPVCycle_2.stl
  • Hero_9_10_30Deg_FPVCycle_pt5_no_batt.stl
  • Vista_Antenna_Mount_FPVCycle_Prototype.stl
  • Vista_Lolipop_Cover.stl
  • fake-gopro-batt.stl
  • hero_5_session_30Deg_FPVCycle_pt5.stl
  • hero_5_session_band.stl

Learn more about the formats

Publication date 2023-03-27 at 08:36
?
Published to Thingiverse on: 2021-10-30 at 00:41
Design number 1136378

3D printer file info

3D model description

mouseFPV Quad Accessories

Overview

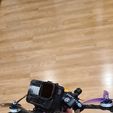
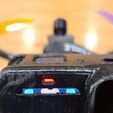
These are the parts I use on my quads. Everything is in the proper printing orientation for minimal supports, strength, and printing speed. DO NOT print the mounts 'bottom down' for the layer lines will become a weakpoint in your base and you can lose the gopro. Highly recommend washers on all mounts, RDQ has nice countersunk ones. I try not to add extra things I dont need to my quads, and try to keep them as light as possible.

PRINT 3 WALLS ON EVERYTHING. These were designed to use 3+ walls and minimal infill to save weight.

Notes in order:

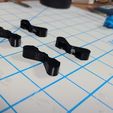
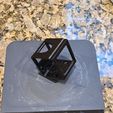
  • FPVCycle_Protorype_5_ultralight_toesies.stl
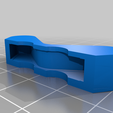
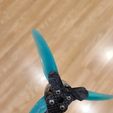
    • These are friction fit arm gaurds. They are as light as possible, and are considered disposable/sacrificial layer. I usually put new ones on every 3-5 fly days. Arms can break and thats fine, but I HATE getting carbon splinters. HATE IT.
    • If your printer is well tuned you shouldnt need supports. If you use them, they are a pain to get out. Small imperfections in the inside dont matter much.
    • 3 walls
    • 16% infill, you should end up with a little infill at the tips when slicing.
  • fake-gopro-batt.stl
    • this is a dummy battery for the hero 9
    • If your printer is well tuned you shouldnt need supports. If you use them, they are a pain to get out. Small imperfections in the inside dont matter much.
    • 3 walls
    • 16% infill, you should end up with a little infill at the tips when slicing.
  • Ghost Atto FPVCycle Prototype
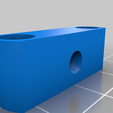
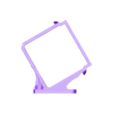
    • This should really be called the "qTee antenna FPVCycle Frame mount". This is just a crappy version/ripoff of Ridwan Hughes idea. Its a folding antenna mount for ghost and the FPVCycle Prototype. He originally came out with the idea for the tiny trainer minimortal-T for this. so I made one for the prototype and ghost. I think he has since made ghost versions, so if you want something nicer, look to his designs. here (https://www.thingiverse.com/thing:4662724). This should also fit the cinesplore and the fouride if I am not mistaken
    • Print settings dont really matter. Make sure your first layer is good.
  • Hero_5_Session_30_deg_FPVCycle.stl
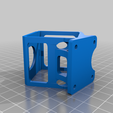
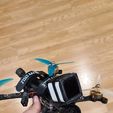
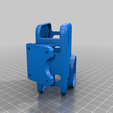
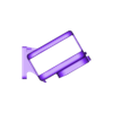
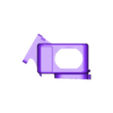
    • 30 degree Hero Session Mount. Camera Butter ND filter friendly (slides in with one on). sides are open. Optionally, you can print the session band to slide over it. I find using 2 of those holds it really well. I also find as time goes on and the mount losens up, you can add some electrical tape to the bottom of the session to tighten it back up. This is made to be very light and very durable. Fits all standard (short base) Fpvcycle quads No, I wont make you a 20 Degree mount, use tinkercad...
    • Only needs supports for the button cutout, and front opening.
    • 3 walls
    • 16% infill (i use gyroid)
  • Hero_5_Session_Band.stl
    • Band to keep your session from blowing out the side.
  • Hero_9_10_30deg_FPVCYcle_2.stl
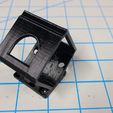
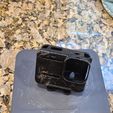
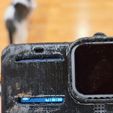
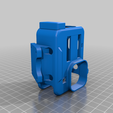
    • 30 degree Hero 9 or 10 Mount. Camera Butter ND filter friendly (slides in with one on). you need to cut a slit where there is a seam along the top over the lens area. small bump above lens is made to provide some protection. You need to push the area around the lens ALL THE WAY ON or it will be in view. there are slits so you can see important info on the front screen. This is made to be very light and but durability isnt anything to write home about. It has what it needs in all the right places but I was between I giant mount and one of those half mounts and wanted full coverage around the gopro. Had a bit of extra height to clear bent props. No, I wont make you a 20 Degree mount, use tinkercad...
    • needs supports (lots of waste here)
    • 3 walls
    • 16% infill (i use gyroid)
  • Hero_9_10_30Deg_FPVCycle_pt5_no_batt.stl
    • 30 degree Hero 9 or 10 Mount. Camera Butter ND filter friendly (slides in with one on). you need to cut a slit where there is a seam along the top over the lens area. small bump above lens is made to provide some protection. You need to push the area around the lens ALL THE WAY ON or it will be in view. there are slits so you can see important info on the front screen. This is made to be very light and but durability isnt anything to write home about. It has what it needs in all the right places but I was between I giant mount and one of those half mounts and wanted full coverage around the gopro. Had a bit of extra height to clear bent props. No, I wont make you a 20 Degree mount, use tinkercad... this covers the battery area and has extra protection over the USB port so you can run no battery and use a BEC
    • needs supports (lots of waste here)
    • 3 walls
    • 16% infill (i use gyroid)
  • Vista_Antenna_Mount_FPVCycle_Prototype.stl
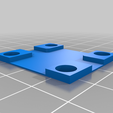
    • Rear Vista anttenna mount for the Prototype. Similar to what comes with the frame.
    • no supports
    • 16% infill
  • Vista_Lolipop_Cover.stl
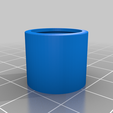
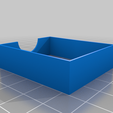
    • This is made to protect your vista antenna from becoming a baby rattle. slide it over from the bottom. You have to unplug the antenna to get this on/off
    • No supports
    • infill does not matter
Advertising


Issue with this design? Report a problem.

Would you like to support Cults?

You like Cults and you want to help us continue the adventure independently? Please note that we are a small team of 3 people, therefore it is very simple to support us to maintain the activity and create future developments. Here are 4 solutions accessible to all:

  • ADVERTISING: Disable your banner blocker (AdBlock, …) and click on our banner ads.

  • AFFILIATION: Make your purchases online by clicking on our affiliate links here Amazon.

  • DONATE: If you want, you can make a donation via Ko-Fi πŸ’œ.

  • WORD OF MOUTH: Invite your friends to come, discover the platform and the magnificent 3D files shared by the community!


Sharing and downloading on Cults3D guarantees that designs remain in makers community hands! And not in the hands of the 3D printing or software giants who own the competing platforms and exploit the designs for their own commercial interests.

Cults3D is an independent, self-financed site that is not accountable to any investor or brand. Almost all of the site's revenues are paid back to the platform's makers. The content published on the site serves only the interests of its authors and not those of 3D printer brands who also wish to control the 3D modeling market.

100% secure payment by credit card, PayPal, Apple Pay, Google Pay, etc.
View all payment options.