Skip to content

DIY Midi Gelbox

Advertising
Advertising
?
Creation quality: 5.0/5 (1 vote)
Evaluation of members on the printability, utility, level of detail, etc.

  • 401 views
  • 5 downloads

License
3D design format
Folder details Close
  • Comb.DXF
  • Comb.SLDPRT
  • Electrode_plate.DXF
  • Electrode_plate.SLDPRT
  • Lid_electrode.DXF
  • Lid_electrode.SLDPRT
  • Sides.DXF
  • Sides.SLDPRT
  • base_plate.DXF
  • base_plate.SLDPRT
  • front_back.DXF
  • front_back.SLDPRT
  • gel_base.DXF
  • gel_base.SLDPRT
  • gel_sides.DXF
  • gel_sides.SLDPRT
  • lid_top.DXF
  • lid_top.SLDPRT

Learn more about the formats

Publication date 2023-03-27 at 08:21
?
Published to Thingiverse on: 2014-10-15 at 05:35
Design number 1136206

3D printer file info

3D model description

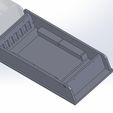
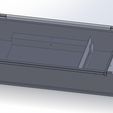
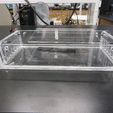
Apparently I'm not the only one who thinks $160 is a bit much for a plastic box. This is a gelbox designed for the Cooper Union iGEM team. It can run up to 30 samples simultaneously and is made from lasercut panels.

BOM:

6mm and 2mm acrylic sheet

20x20mm acrylic square rod

2 Male/Female Banana plugs (or the standardized plug in your lab)

Platinum wire (AWG 30)

Four M3x15 screws and nuts

Acrylic glue

3D printing settings

1) Cut the following plates:

6mm sheet

- Two “Sides”

- One “base_plate”

- Two “electrode_plate”

- Two “front_back”

- One “lid_top”

- One “lid_electrode”

- One “gel_base”

2mm sheet

- Two “Comb”

Two 20x20x190mm acrylic square rods

1) Laser cut specified parts

2) Glue all plates, except the “electrode_plate”, together using acrylic glue. Clamps are recommended to ensure a watertight seal and better alignment.

3) Attach male banana plugs to holes in the “sides” plate

4) Attach the electrode wire to the power plugs and thread through the small hole in the “electrode_plate” so that the small hole is on the opposite side of the power plugs and the wire is behind the grate section

5) Screw both “electrode_plate” pieces to their respective sides using M3 screws

6) Notch two evenly spaced slots into the acrylic square rods, this will be where the combs sit. The notch depth depends on your gel thickness but should be around 9mm

7) Glue the square rods to the “gel_base” using the combs as alignment references

8) Glue lid pieces together and attach female banana plug

Advertising


Issue with this design? Report a problem.

Would you like to support Cults?

You like Cults and you want to help us continue the adventure independently? Please note that we are a small team of 3 people, therefore it is very simple to support us to maintain the activity and create future developments. Here are 4 solutions accessible to all:

  • ADVERTISING: Disable your banner blocker (AdBlock, …) and click on our banner ads.

  • AFFILIATION: Make your purchases online by clicking on our affiliate links here Amazon.

  • DONATE: If you want, you can make a donation via Ko-Fi 💜.

  • WORD OF MOUTH: Invite your friends to come, discover the platform and the magnificent 3D files shared by the community!


Sharing and downloading on Cults3D guarantees that designs remain in makers community hands! And not in the hands of the 3D printing or software giants who own the competing platforms and exploit the designs for their own commercial interests.

Cults3D is an independent, self-financed site that is not accountable to any investor or brand. Almost all of the site's revenues are paid back to the platform's makers. The content published on the site serves only the interests of its authors and not those of 3D printer brands who also wish to control the 3D modeling market.
100% secure payment by credit card, PayPal, Apple Pay, Google Pay, etc.
View all payment options.