Hi Virtual Hoons!
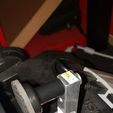
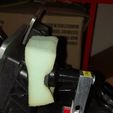
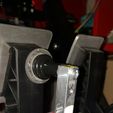
So today/yesterday.... I've whipped up a couple of different mounting options for a Load Cell Brake Mod in your Thrustmaster T3PA pedals. This is the physical mounting kit you'll need to hook one up...
*** Update, Code has been appended to this pack.. Download and extract into your arduino folder in your mydocuments. It has both the HX711 and Joystick libraries also included. It might ask you to replace the original files. I suspect they'll be the same so you don't have to overwrite them if you already have the libraries ***
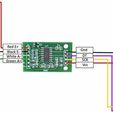
*** Re Wiring Schematic... Check your own wiring to the code. The diagram attached is for a Leonardo board. I have used a pro-micro and for my own purpose have changed the pins for the HX711 to match my wiring. Check your own and modify the HX711 code to match your preferred wiring***
Check out the picture but here's what's in the pack;
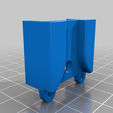
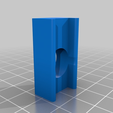
1 x RamjetX T3PA 20Kg Load Cell Mount Back
1 x RamjetX T3PA 20Kg Load Cell Mount Front
and...
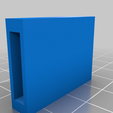
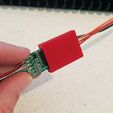
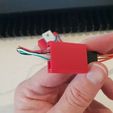
1 x RamjetX T3PA HX711 Load Cell PCB Sleeve
Okay, so let me brake ( ;P ) this down for you all.
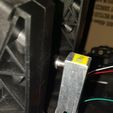
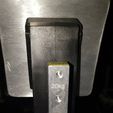
The 3d models allow you to bolt the load cell through the 10mm bolt hole with a 5mm bolt going directly into the load cell. The slot will align the load cell and stop it from rotating because you only have 1 bolt in it. It will also support the bending of the load cell from pulling the 10mm nutsert out.
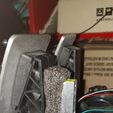
If you mount it on the back side, it will give you a little more room for your foam/rubber to compress and give you more pedal movement and you only need to print the back side mount.
Naturally then, if you mount it on the front side, you can screw it in from the back... it really is up to you. You may also need the back side mount just to support the bolt from pulling out the pressed 10mm nut housing.
You'll see on my back mount pictures I have a black cone thing from the top of the load cell... this is an IKEA door knob with a flat face. I used it because, it was 4mm (matching the top holes on the load cell) and stepped forward enough for me to put a sticky foam pad and softer foam to make up the slack. I'll refine this later in the week, but for now it feels good.
Which load cell did you buy? I hear you ask...
https://www.ebay.com.au/itm/Load-Cell-Weight-Sensor-20KG-Portable-Scale-HX711-Weighing-Sensors-Ad-Module-ATA/263918092334?hash=item3d72be802e:g:-m8AAOSw3gJZKPeJ:rk:1:pf:0
This one... and yes... 20Kg is fine...
https://i.ebayimg.com/images/g/-m8AAOSw3gJZKPeJ/s-l1600.jpg
Couple of pro tips whilst I'm getting the code together to publish also... The HX711 has two modes for sample rate... 10Hz and 80Hz, this is simply moving a 0 Ohm resistor from the 10Hz spot to 80Hz. This will effectively change the speed of it to be quick enough to be useful for a brake.
For the PCB Sleeve, I wired the Pin headers on sideways so it poked out of one end and then wired up the load cell (picture included), slid in the PCB and just hot glued in the end.
It's free to stick to anything you want now.
Also I used a STRONG 32U4 Micro arduino clone (https://www.ebay.com.au/i/112951197414?chn=ps) ... check my other models for a holder for that PCB also.
See my vibration motor mount for this mod too https://www.thingiverse.com/thing:3381158

/https://fbi.cults3d.com/uploaders/15107007/illustration-file/c3e79480-5dd7-4486-9a06-9974302e4803/20190119_164607.jpg)
