Skip to content

Sun & 4 Planets

Advertising
Advertising
?
Creation quality: 5.0/5 (1 vote)
Evaluation of members on the printability, utility, level of detail, etc.

  • 991 views
  • 1 like
  • 23 downloads

License
3D design format
Folder details Close
  • base.stl
  • child.stl
  • main.stl

Learn more about the formats

Publication date 2023-03-30 at 23:00
?
Published to Thingiverse on: 2023-03-30 at 19:10
Design number 1143419

3D printer file info

3D model description

The idea for this gearset came from the following posting I saw online:

https://parametrichouse.com/gears/

Since I use Grasshopper to make all my designs I thought I could use this method to make a small gearset that would be a nice demonstration of the Planthopper software add-on to Grasshopper. So I installed it and started working.

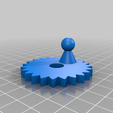
Well, it turned out it was more complicated than I expected. Planthopper was made to produce precisely machined metal gears. It does not account for the dimensional inaccuracies inherent with all 3D printers and their printed results. So I had to make several adjustments to get a good result. Plus I had to add a handle to one of the gears to make the whole assembly easily workable. The STL files included here are the final result.

Here's how to get everything working OK:

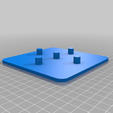
  1. Print the base. This is a simple print that holds the gears in the proper orientation.

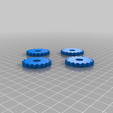
  2. Print child.stl. This will produce just the 4 child/planet gears. They will print if the orientation they will have on the base, but you can move them around in your slicer any way you want. Just make sure there is some space between them.

  3. Print main.stl. You can print this one separately, or along with child.stl, but make sure it is spaced away from all the child gears if you do.

  4. With everything printed, assemble the gears on their appropriate posts. First, fit the child gears on their posts. It will be a tight fit, but they will fit with enough clearance to spin properly. Spin each gear by hand to work out and sticking points. This should only take a minute or so.

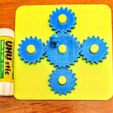
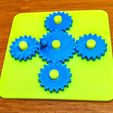
  5. With the 4 child gears in place, fit the main gear on it's post. You'll have to manually line up the teeth on each child gear. Then spin the main gear by gripping its teeth (not the handle) until every thing works fairly smoothly. Once the gears work smoothly enough to use the handle it will still take a while to get all the gears turning as smoothly as you like.

Once all the sticking points are worked out all the gears will turn freely and you can crank the handle as fast as you like.

Tags

Advertising


Issue with this design? Report a problem.

Would you like to support Cults?

You like Cults and you want to help us continue the adventure independently? Please note that we are a small team of 3 people, therefore it is very simple to support us to maintain the activity and create future developments. Here are 4 solutions accessible to all:

  • ADVERTISING: Disable your banner blocker (AdBlock, …) and click on our banner ads.

  • AFFILIATION: Make your purchases online by clicking on our affiliate links here Amazon.

  • DONATE: If you want, you can make a donation via Ko-Fi 💜.

  • WORD OF MOUTH: Invite your friends to come, discover the platform and the magnificent 3D files shared by the community!


Sharing and downloading on Cults3D guarantees that designs remain in makers community hands! And not in the hands of the 3D printing or software giants who own the competing platforms and exploit the designs for their own commercial interests.

Cults3D is an independent, self-financed site that is not accountable to any investor or brand. Almost all of the site's revenues are paid back to the platform's makers. The content published on the site serves only the interests of its authors and not those of 3D printer brands who also wish to control the 3D modeling market.

100% secure payment by credit card, PayPal, Apple Pay, Google Pay, etc.
View all payment options.